


Configure Info Exchange Widgets
Perform the following steps to configure the Info Exchange widgets for your Project Home page.
Global Administrators have the additional option to create Project Home page templates for all users. For more information, please refer to Create a Global Template for the Project Home page.
To configure widgets on Info Exchange
1. If you are not already there, navigate to the Project Home page.
2. Select Customize in the upper right corner of the Project Home page.
3. In the Customize My Project Home panel, shown below, you can see the current widgets with their controls, along with the list of available widgets.
4. In the Available Widgets list, select the position control on the desired widget to add it to the Project Home page.
● Select  to add the widget to the left panel.
● Select  to add the widget to the center panel.
● Select  to add the widget to the right panel.
● Select  to move the widget above another widget in the panel.
● Select  to move the widget below another widget in the panel.
● Select  to remove the widget from the Project
Home page.
to remove the widget from the Project
Home page.
5. Set the height for each widget using the Height control. The values are Fit,1-5, where Fit will fill the entire screen, 1 is the smallest and 5 is the largest within the grid.
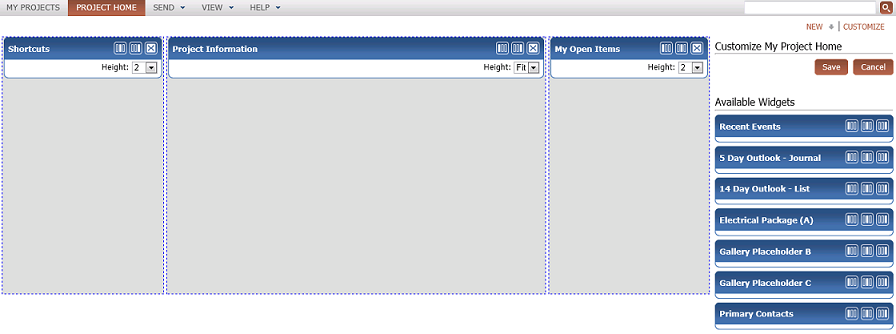
6. Select Save when you finish your changes. A new template named My Custom View is created.
Each time you make changes, the changes are saved to the My Custom View. Only Global Administrators can edit the Simple View or Advanced View templates.
If the widget you want is not available, contact your Global Administrator.
Table of Contents
Index
Search (English only)
Back