


Info Exchange Quick Reference Guide
This topic provides a reference for the Project Center Info Exchange activity center.
Click here to download a PDF of the reference guide.
Purpose
An easy alternative to the FTP server, with additional logging, tracking, notifications, and document expiration management built in.
Audience
Anyone in your organization that needs to send, receive and track file transfers of any type or size.
Tasks covered
● Add external users to the project team
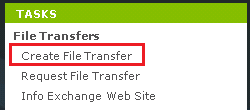
To send file transfers
1. Go to
the Info Exchange activity center.
From the Tasks panel, select Create
File Transfer.
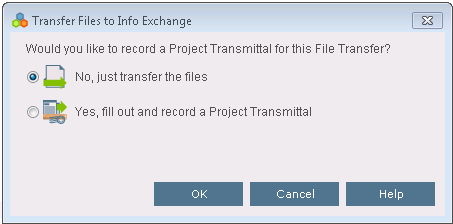
2. In the
Transfer
Files to Info Exchange dialog box, select whether or not you want
to create a transmittal for the file transfer and click OK.
3. In the
Transfer
Files to a Newforma Info Exchange Server dialog box, shown below,
enter recipients in the To: field.
![]()
Info Exchange transfers can be sent to any email address. Recipients do not need to be part of the Project Team, although it is recommended.
4. Add a Subject for the transfer.
5. Select the Files to Transfer tab and Add Files or Add Folder of files to send.
6. Select Transfer.
7. On the
next screen, select the appropriate visibility, expiration and notification
options. Select Edit to change
expiration and notification settings.
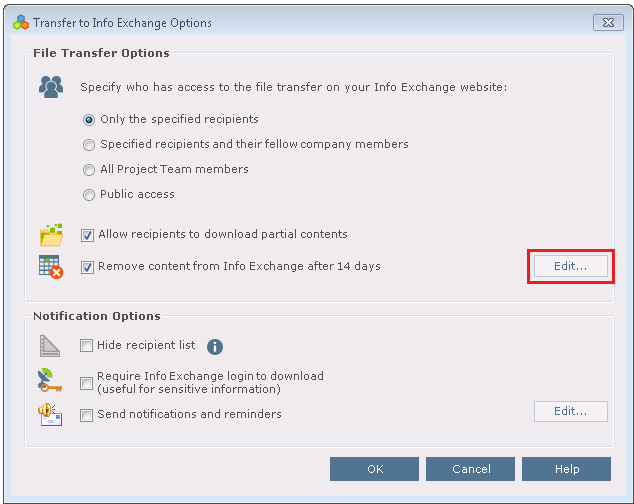
8. Click OK to transfer the files.
To manage file transfers
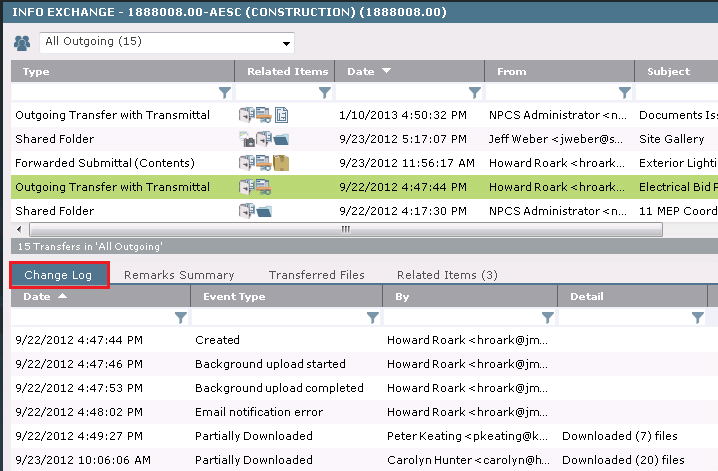
You can monitor the activity of a file transfer from the Info Exchange activity center.
1. To see
who has downloaded files, select the desired transfer and then select
the Change Log tab.
To add external users to the project team
Add external users to the project team so they can send you files via the Info Exchange website and benefit from the same tracking and reliability.
External users must be a member of the project team with web access to this project in order to send files via Info Exchange.
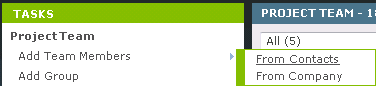
1. Go to
the Project Team
activity center and select Add Team
Members > From Contacts from the Tasks
panel.
2. Select the check box for the team member in the Choose New Team Members from Global Contact List dialog box and click OK.
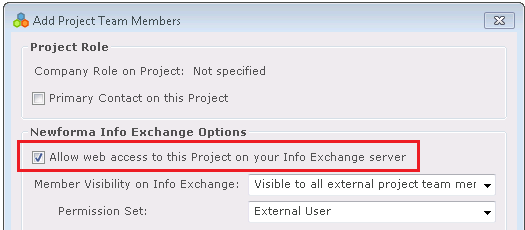
3. In the
Add Project
Team Members dialog box, select the Allow
Web Access to this Project on Your Info Exchange Server checkbox
and click OK.
The first time an external user is given web access to any of your projects, the user automatically receives an email with login credentials.
External users can only see items sent directly to/by them on Info Exchange.
To receive file transfers
When someone sends you files via your Info Exchange website, you will receive an email notification. You can follow the link in the email to receive or acknowledge the transfer.
1. In the Info Exchange activity center, highlight the Pending Incoming Transfer. Select Acknowledge Receipt from the Tasks panel to acknowledge receipt of the transfer.
When the Project Center Server is configured to automatically download file transfers from Info Exchange, you will see the Acknowledge Receipt option. The files are already downloaded and available on the Transferred Files tab. If the server is not configured to automatically download file transfers, the Receive Pending File Transfer task appears. Select it to download the file transfer.
2. View
and open the files from the Transferred
Files tab.
![]()
For additional information on how external users work with Info Exchange, please refer to the Newforma Info Exchange Quick Start Guide for External Users.
Key features
● Manage the transmittal process and share information easily, no matter what the file size.
● Log and track all published information; send notifications and manage file expiration.
● Support external team members with easy, web-based access to transmittals, submittals, RFIs, and more.
Table of Contents
Index
Search (English only)
Back