Create a New Document Set
Use document sets to organize related project files into categories. Perform the following steps to create a document set.
To create a new document set
|
1. |
If you are not already there, open the Project Document Sets activity center by clicking Document Sets from the Project Home activity center or from the Activities list. |
|
2. |
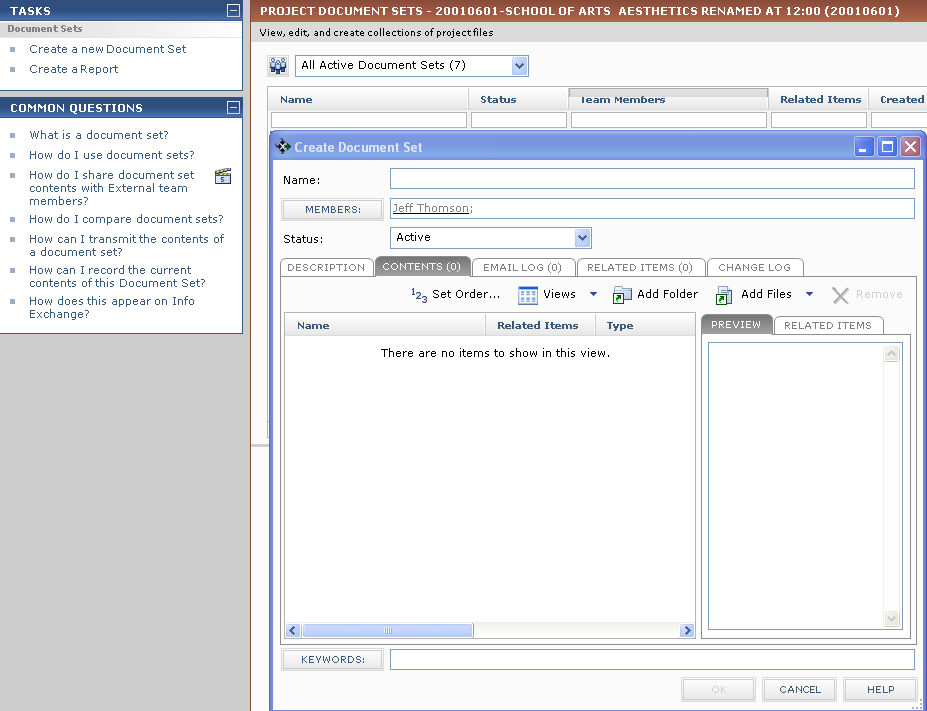
Click Create a New Document Set from the Tasks panel to open the Create Document Set dialog box, as shown here:
|
|
3. |
Enter a name for the document set in the Name field. |
|
4. |
Click Members to open the Choose a Project Team Member dialog box to add project team members to the document set. |
|
5. |
Select the Status of the document set (Active or Inactive). |
|
6. |
Enter any relevant comments in the Description tab, and apply any keywords by clicking Keywords to open the Choose Keywords dialog box. |
|
7. |
To add files, click the Contents tab, then click Add Files to select the files. |
|
|
If you want to add all of the files in a folder, click Add Folder to select a folder. 1 Only the files in the selected folder are added to the document set. If the folder has subfolders, files in the subfolders are not added to the document set. Each subfolder has to be added to the document set separately. |
|
8. |
Click OK to create the document set and return to the Project Document Sets activity center when you are finished adding files. |