


Welcome to Newforma Capture for iOS
Contents
This Help system contains the following sections:
● Overview
● To create a project item from a new photo
● To create a project item from an image in your device's Camera Roll
● To create a project item without a photo
● To view and edit your project items
● To email a single project item
● To remove a single project item
● To upload all project items to Info Exchange and Project Center at once
The images in this Help system are based on an iPad. Images from an iPhone may look slightly different.
Overview
With the Newforma Capture app for your iOS device, you're always ready to create new project items on the job site supplemented by photos. Using the Newforma Capture app, you can:
● Quickly create and log action items, field notes, and punch lists and upload them to their corresponding projects in Newforma Project Center and Newforma Info Exchange, or Newforma ConstructEx.
● Ensure your project team has access to project items immediately.
When you create a new project item and upload it, it is automatically added to the project you selected and its corresponding activity center (the Action Items, Field Notes, or Punch Lists activity center) in both Newforma Info Exchange and Newforma Project Center (or Newforma ConstructEx), and is immediately available in both. Project Center and Info Exchange users can then view and edit the items (based on their permissions).
After you upload items from the Capture app, the items are automatically removed from the app and are then only available in Project Center and Info Exchange, or Newforma ConstructEx.
If you only want to edit existing project items, use Newforma Tasks.
Project access
If a project is not in the list of projects, notify your contact at the company that is hosting the project on their Info Exchange website. Ask them to alert their Newforma Project Center administrator. This may occur for the following reasons:
● If a single project is missing for a specific company, you may not have Info Exchange access to the specific project.
● If all projects are missing for a specific company, it is likely the customer has not installed a Newforma Project Center Twelfth Edition license that enables Newforma ID. If the company is not available as a connection, contact the Newforma administrator for the company hosting the projects on Newforma Info Exchange to install an Twelfth Edition license.
Free accounts can only use one project at a time. Upgrade or remove the project to add another project.
Tap Upgrade to acquire unlimited project usage in all mobile apps.
If you work with other companies and projects on different Info Exchange sites, you will be prompted to provide your credentials for your other Info Exchange accounts at the time you add the project.
To start using Capture
1. Before launching Capture,
you can configure how it starts. In Settings,
select whether Capture always
starts in camera mode (on), or by selecting a project and choosing how
to log an item (off, which is the default) as shown here:

2. Launch the Capture app and login using your Newforma ID.
3. From the main screen, tap  (which is next to Items to Upload in the upper left)
to begin capturing a new project item. You have three options for capturing
and logging an item:
(which is next to Items to Upload in the upper left)
to begin capturing a new project item. You have three options for capturing
and logging an item:
● Create a Project item with a new photo
● Create a project item with a photo from your device's Camera Roll
● Create a project item without a photo
To create a project item from a new photo
1. From the New Item panel,
tap  to
launch the camera on your device.
to
launch the camera on your device.
2. Take the photo. The photo is attached to the item, as shown here:
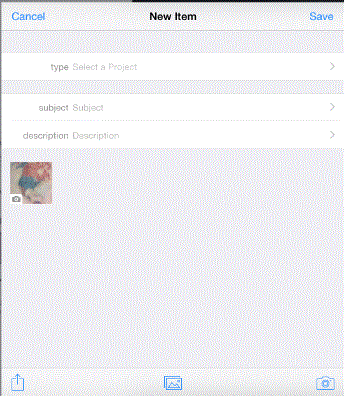
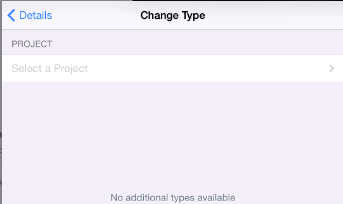
3. Tap Select a Project to open the Change Type panel to select the project and the type of item to create, as shown here:
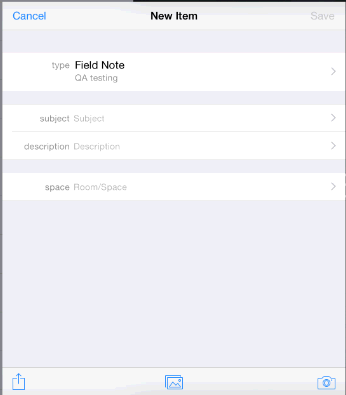
If you previously entered an item, the new item type defaults to the previously entered item's project and type. In this case you would tap the area listing the item type (such as Field Note) instead of Select a Project to change the project and type, as shown here:
4. Tap the project to which you want to add the new item. The Change Type panel now shows the name of the selected project and the available project item types for that project, as shown here:
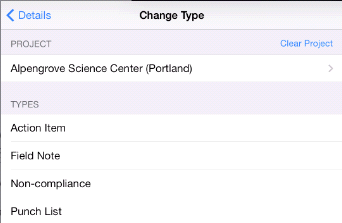
Non-compliance is a type of punch list and if selected, would be added to the Punch Lists activity center.
5. Tap the type of item you want to create. For this example we'll create an action item, as shown in this example:
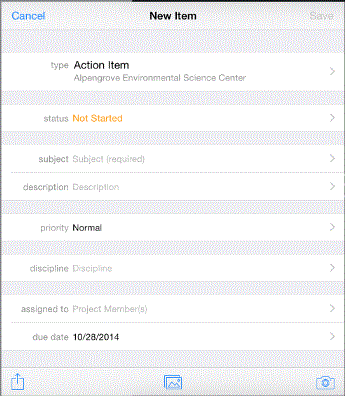
6. Tap the fields to which you want to add information.
7. Tap Save to add the new item to the Items to Upload list in the main Capture panel, as shown here:
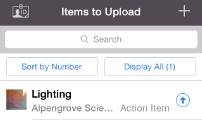
8. To upload the new item immediately to
Project Center and Info Exchange, tap  next to the
item.
next to the
item.
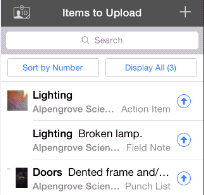
After you upload an item, it is removed from the Capture app and can no longer be accessed from it. You can wait until you are finished adding items and then click Upload All to upload them all at once.
To create a project item from an image in your device's Camera Roll
1. Start with the To start using Capture section above.
2. From the New Item panel,
tap  to
open the Photos panel, as shown
here, which displays your photos.
to
open the Photos panel, as shown
here, which displays your photos.
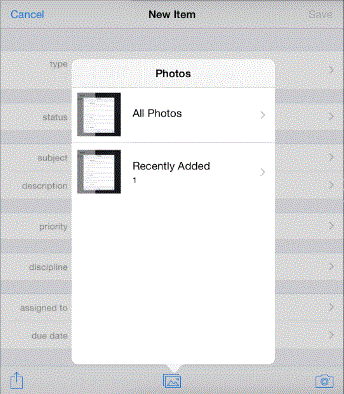
3. Tap an image to attach it to the new item.
4. Perform the steps in the previous section above starting with step 3.
To create a project item without a photo
1. Start with the To start using Capture section above.
2. Perform the steps in the To create an item from a new photo section above starting with step 3 (skip the photo steps).
To view and edit your project items
1. To view an item, tap the one you want to view from the list under Items to Upload to open its Edit Item panel to view and edit its details, as shown here:
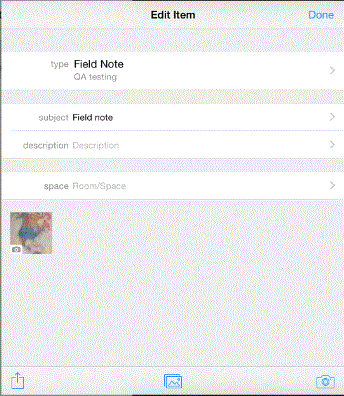
2. Tap any of the fields you wish to edit and make your changes.
3. Tap any of the buttons at the bottom of the panel, as shown here, to email the item or add additional photos to it.

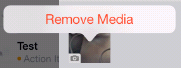
4. To remove a photo, long press its icon and tap Remove Media, as shown here:
To email a single project item
From the Items to Upload panel,
tap the desired project item, then tap  to open a new
email message. Enter any details
pertaining to the item and tap Send
to send the message to another contact. The email message will contain
the details of the item and any photos.
to open a new
email message. Enter any details
pertaining to the item and tap Send
to send the message to another contact. The email message will contain
the details of the item and any photos.
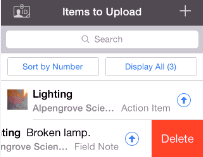
To remove a single project item
Slide the item to the left to enable the Delete option, then tap it, as shown in this example:
To upload all project items to Info Exchange and Project Center at once
From the bottom of the Items to Upload panel, tap Upload All. The items will be removed from the Capture app once they are uploaded.
Common questions
Refer to Common Questions.
Newforma Customer Support
If you cannot find the information you need in this Help system, use the following links for more information:
● Click https://customercommunity.newforma.com/s/ to access the Newforma Customer Community.
● Click here to access Newforma video tutorials.
● For technical questions or problems, please contact Newforma Customer Support, or visit the Contact Support section of the Customer Community.
Revised 5/14/20
Table of Contents
Index
-Search-
Back