


Add a Field Note
Follow these steps to create a field note in Info Exchange.
To create a field note on Info Exchange you must be a member of a permission set that allows creation of a field note.
To create a field note in Info Exchange
1. If you are not already there, open the Field Notes log from the View > Field Management menu.
2. Select Add Field Note to open the Add
Field Note dialog box, shown here:
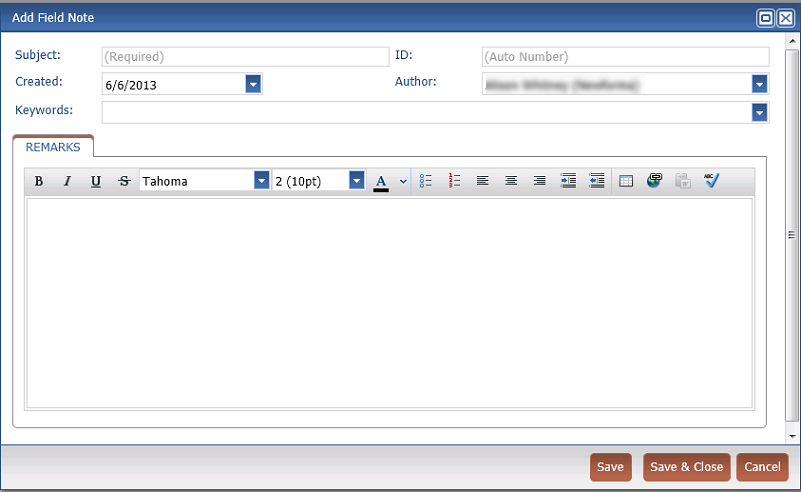
3. Enter the subject of the field note.
4. The ID field is automatically populated though you can manually enter a value if preferred.
5. Select the date the field note was created. The current date is selected by default.
6. Select Author to open the Select Project Team Members as Recipients dialog box. Select the field note author. The current user is selected by default.
7. Select Keywords to add keywords for the field note.
8. Enter the purpose of the field note and any other comments in the Remarks tab.
9. Select Save and Close to save the field note.
To save your work and continue editing the field note, select Save.
Once the field note is created, a Project Center user can continue processing it. For more information on completing a field note, see the topic titled: Modify a Field Note.
Related Topics
Table of Contents
Index
Search (English only)
Back