

Add New Project Team Members
Perform the following steps to add a team member to a project in Info Exchange.
Only Project Center users can add new team members from the Project Team log.
To add team members
1. If you
are not already there, go to the Project
Team log and click Add Team Members
to open the Add
Team Members dialog box, shown here:
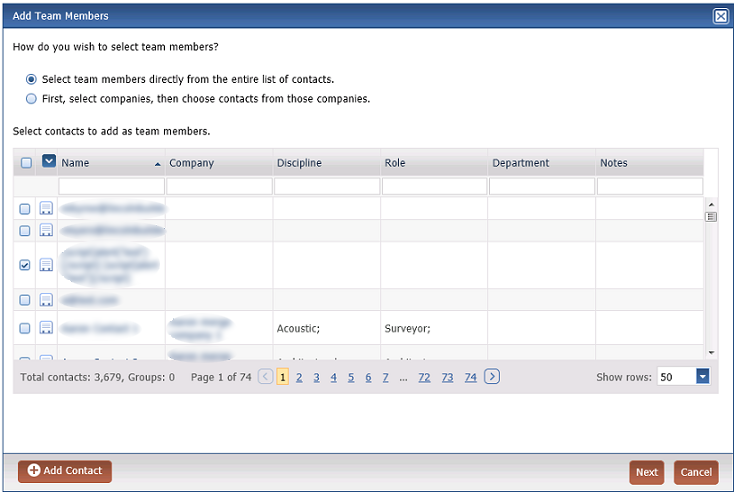
2. Select the method you want to use to locate and select new team members:
● Select team members directly from the entire list of contacts. Use this option to locate an existing contact by filtering on the name of the contact.
● First, select companies, then choose contacts from those companies. Use this option to locate an existing contact by filtering on the company name.
● Add Contact - Click to open the Add Contact dialog box to create a new contact.
3. Mark
the checkbox for the desired contacts and click Next
or OK to assign more options
in the Add Team Members dialog box,
shown here:
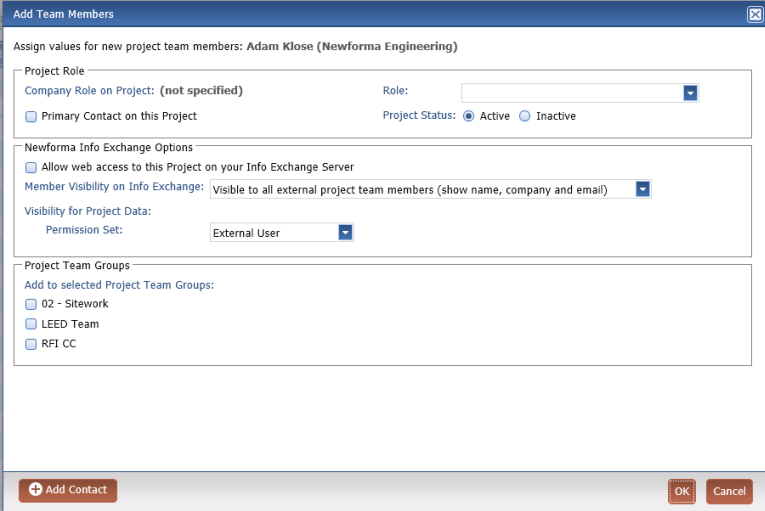
4. Select the role on the project for the contact:
● Role - Select the project role for the contact from the drop-down list.
● Primary Contact on This Project - Mark this checkbox to set the contact as the primary contact for the project.
Each project can have multiple primary contacts.
● Project Status - Select whether the team member is Active or Inactive on the current project.
5. Select the Newforma Info Exchange options:
● Allow Web Access to this Project on Your Info Exchange Server - Mark this checkbox to grant the contact access to the project on Info Exchange. When marked, the contact can see this project in the list of projects on Info Exchange.
● Member Visibility on Info Exchange - Set the level of access to determine how external users can see this contact when they create new project items.
6. Select the permission set for the contact.
7. Mark the checkbox for any project team group (if they exist) to which the contact should belong.
8. Enter relevant data in the Project-Specific Custom Fields section as needed.
This section only appears when the project includes custom fields.
9. Click OK to add the contact.