


Add a Field Note
Follow these steps to create a field note in Info Exchange.
To create a field note on Info Exchange you must be a member of a permission set that allows creation of a field note.
To create a field note in Info Exchange
1 If you are not already there, open the Field Notes log from the View > Field Management menu.
2 Select Add Field Note to open the Add Field Note dialog box, shown here:
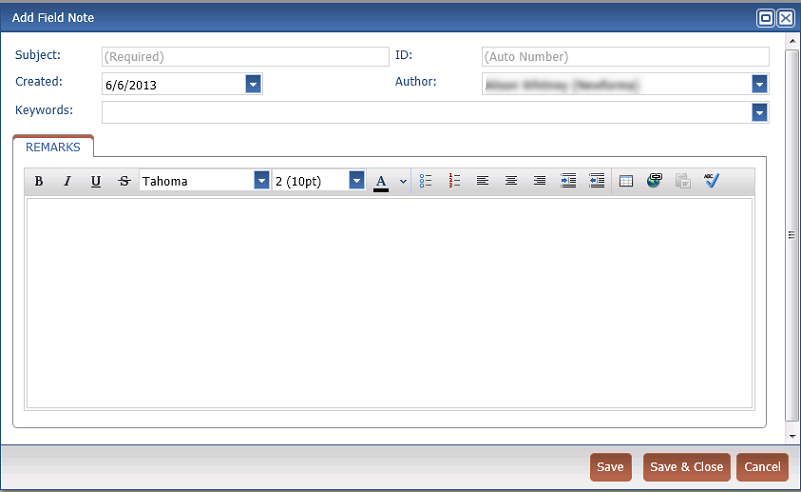
3 Enter the subject of the field note.
4 The ID field is automatically populated though you can manually enter a value if preferred.
5 Select the date the field note was created. The current date is selected by default.
6 Select Author to open the Select Project Team Members as Recipients dialog box. Select the field note author. The current user is selected by default.
7 Select Keywords to add keywords for the field note.
8 Enter the purpose of the field note and any other comments in the Remarks tab.
9 Select Save and Close to save the field note.
To save your work and continue editing the field note, select Save.
Once the field note is created, a Project Center user can continue processing it. For more information on completing a field note, see the topic titled: Modify a Field Note.
Related Topics
Table of Contents
Index
Search (English only)
Back