


Modify the Supplied Microsoft Word Stamps or Create a New Word Template
Project Center uses Microsoft Word as the editor for creating and modifying templates used as the basis for stamps in Info Exchange.
This topic provides guidelines on modifying the supplied Microsoft Word stamp templates to customize them to fit your company's needs.
Getting Started
Newforma provides the Microsoft Word stamp templates, which you can use as a starting point. Before you get started, download these files to your computer. Refer here to download the sample stamps.
You can use either Word 2007 or 2010 to modify stamp templates.
Edit fonts, margins, and other text properties
The first thing to do is customize the appearance of the template's text and its layout. You should edit these properties first. To do so, simply use Word's font and paragraph editors as you would for any document to edit the text and layout as desired. You can move the sections of the template around and rearrange them as necessary.
If you want to update the headers or footers, double-click in the corresponding sections.
You must be familiar with XML formatting to perform the steps in the remaining sections.
Modify the field data that is output to the form
This section explains how to change the data that is output to the form.
For a complete list and description of the available Newforma field tags that you can add to the template, refer to Understanding Newforma Field Tags.
To modify the field data that is output to the form
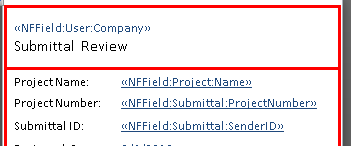
1 Right-click on any of the merge fields and select Edit Field, as shown here. In this example, we will use a submittal review form. Change the Submittal ID field to the sender's ID (SenderID) by right-clicking on the <<NFField:Submittal:ID>> merge field and selecting Edit Field to open the Field dialog box, as shown in step 2 below:
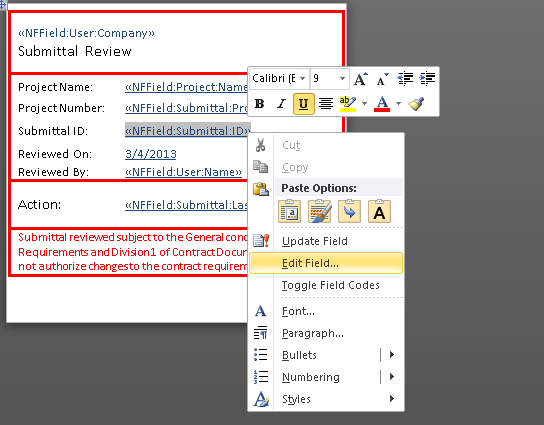
2 Select MergeField from the Field Names list, as shown below. In the Field Name field, change ID to SenderID. Select OK.

3 The Submittal:ID field automatically changes to <<NFField:Submittal:SenderID>>, as shown here:
4 Modify any other merge fields as necessary and save the template with the original name in the original location.
Add a new field
This section explains how to add new fields to the template.
To add a new field
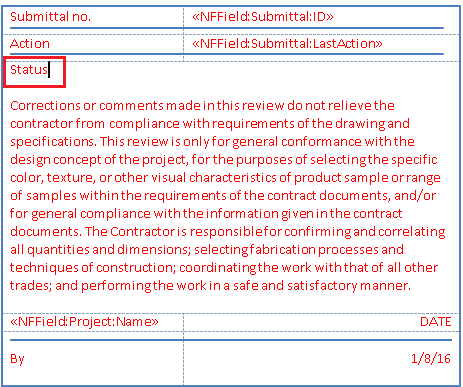
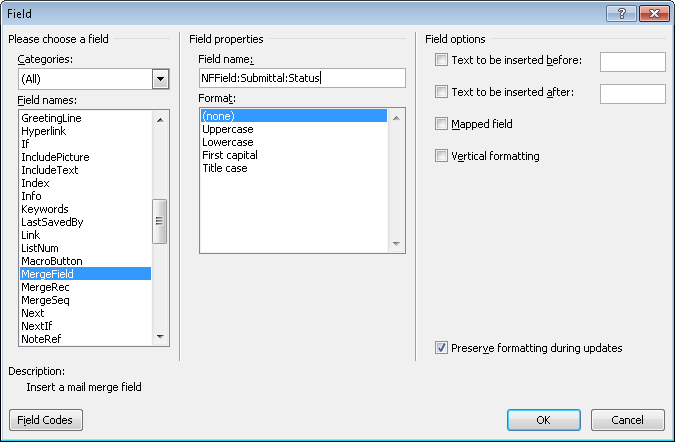
1 For this example, we will add a new field called Status to the Newforma submittal stamp sample template (Newforma_Submittal_Stamp_Sample.docx). To do so, place the cursor in the location where you want to insert the new field and enter the text (Status), as shown here:
2 Place the cursor next to the new text field, then select the Insert menu and select Quick Parts > Field as shown here.
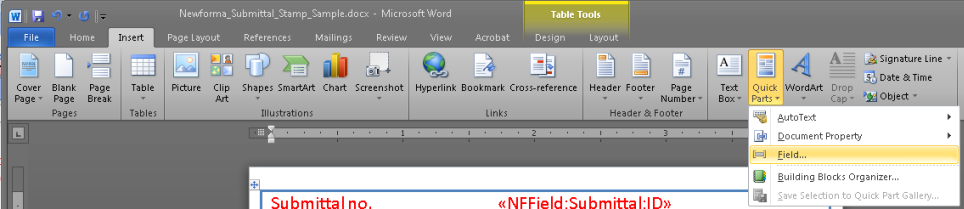
3 In the Field dialog box select MergeField from the Field Names list, as shown below. Enter the appropriate Newforma field value in the Field Name field in the Field Properties section of the dialog box. For this example, we will enter NFField:Submittal:Status in the Field Name field. Select OK.
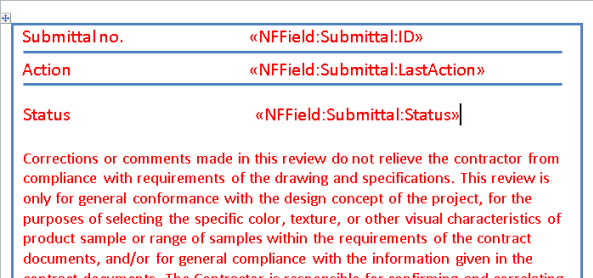
The Status field now appears as follows:
4 Add/modify any other merge fields with necessary and save the template as the original name in the original location.
To add other types of fields
This section explains how to add other field types to your stamp template.
The following example shows examples of different field types: combobox, checkbox, and a text field.
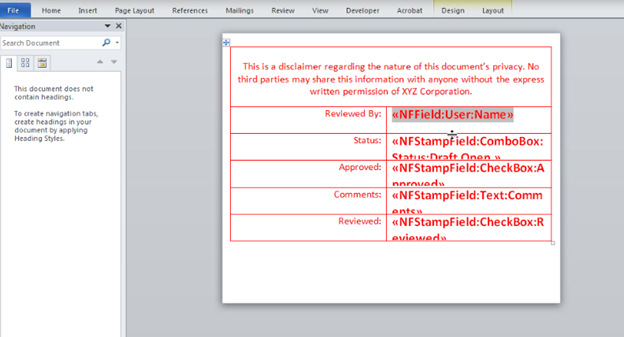
To add a combobox
1 Add any text for the new combobox field, then place your cursor on the location where you wish to place the field.
2 Follow the steps above for adding a new field to a template.
3 In the Field dialog box, type the following in the Field Name field: NFStampField:ComboBox:Status:Draft,Open. In this example, Status is the label for the combobox field on the stamp. The combobox field allows the user to select Draft or Open for values.
Use commas to separate the fields you wish to populate the combobox.
To add a checkbox
1 Add any text for the new checkbox field, then place your cursor on the location where you wish to place the field.
2 Follow the steps above for adding a new field to a template.
3 In the Field dialog box, type the following in the Field Name field: NFStampField:Checkbox:Approved
If the submittal has been approved, the checkbox is checked in the stamp. If it has not been approved the checkbox will appear unchecked.
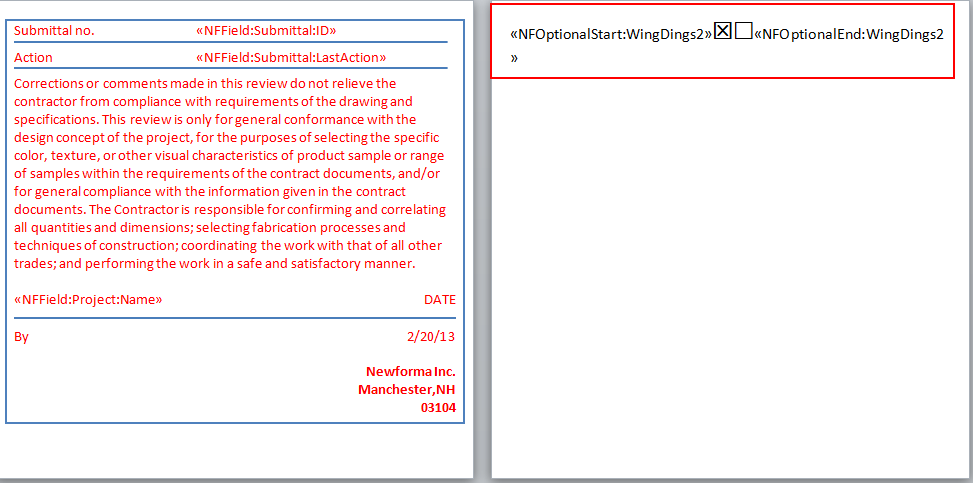
4 Add the following optional section to ensure that servers that do not have the WingDings2 font installed will be able to generate stamps with checkboxes.
To add a text field
1 Add any text for the new text field, then place your cursor on the location where you wish to place the field.
2 Follow the steps above for adding a new field to a template.
3 In the Field dialog box, type the following in the Field Name field: NFStampField:Text:Comments.
Available Fields
These XLS files provide the name and definitions of the fields used in RFIs, Submittals, and Transmittals, which you may wish to add to your stamps.
Transmittal_field_data_for_Stamp
Create a new Word template
If you want to create a stamp from scratch instead of modifying the ones that are supplied with Project Center, perform the following steps.
To create a new stamp template from scratch
1 Open Microsoft Word and create a new document.
2 Design the template using the fonts, paragraph styles, layout, and tables you want to use as the basis for your company's reports and forms.
3 When the layout of the template is finished, save it and continue with the sections above starting with Add a new field.
Table of Contents
Index
Search (English only)
Back