


Document Control Activity Center (Record Documents)
This activity center lists, previews, and displays information about all record documents and record document packages in the current project. The Select View panel allows you view either record documents or record document packages in the activity center. The top section lists all record documents or packages in the current project, and the bottom section displays tabs containing details about the selected record document or package, including the item's issue history, description, email messages linked to the record document or package, related items, supporting documents, and a history of changes. For record documents, a preview is also available; for packages, a list of the record documents included in the package is displayed.
|
Record Document● Add Record Document Click to open the Add a Record Document dialog box to create a new record document. Only available to Document Controllers. ● Add Revisions from Files Click to open the Add Revisions from Files dialog box to add multiple drawing revisions to multiple record documents at one time. Only available to Document Controllers. ● Create Record Document Package Click to open the Create Record Document Package dialog box and create a new record document package. Only available to Document Controllers. ● Edit in Spreadsheet Click to open the Save Spreadsheet dialog box to export the record documents to a Microsoft Excel spreadsheet that you can then edit and re-import. The spreadsheet opens automatically and prompts you to re-import when you are done editing it. Only available to Document Controllers. If you don't have Microsoft Excel installed, the spreadsheet will not open. ● Utilities > Import Spreadsheet Click to open the Select Spreadsheet dialog box to select a Microsoft Excel spreadsheet containing record document data that you want to import. Only available to Document Controllers. ● Utilities > Export Spreadsheet Click to open the Save Spreadsheet dialog box to select the Microsoft Excel spreadsheet to export the project's record documents to. ● Utilities > Edit Extended Properties Click to open the Edit Document Control Extended Properties dialog box to edit synchronization settings and create and edit document control extended properties. Only available to Document Controllers. ● Create Report > Create Report Click to open the Create Report dialog box to select the type of record document report to create. You can customize which columns appear in reports simply by selecting which columns to show and hide in the activity center. Simply right-click on column headers to add or remove columns. A checkmark indicates the column will appear in the activity center and the report. ● Create a Report > Create Document Register Report Click to open the Create Report dialog box to select a Project Center project and folder in which to create and save the document register data as a spreadsheet file. The report then opens in Excel. Selected Record DocumentThe following list shows all available tasks for all record document categories, in alphabetical order. The tasks that appear depend on which category you select from. ● Add Revision Click to open the Add Revision dialog box to add a new drawing revision to the selected record document. Only available to Document Controllers. ● Add to Package Click to open the Select Record Document Packages dialog box to add the record document to an existing package. Only available to Document Controllers. ● Create a Similar Record Document Click to open the Add a Record Document dialog box to create a new record document with the same information as the selected record document. It will be a draft. Only available to Document Controllers. ● Delete Click to delete the selected record document. Only available to Document Controllers. ● Delete Latest Revision of Selected Record Document Click to delete the latest revision of the selected record document. This is useful if you made a minor mistake when adding a revision and need to remove it so the correct revision can be added. Only available to Document Controllers. This task is only available when the selected record document has multiple revisions and the latest revision is in the Draft state. ● Email > Send as Attachment Click to open an email message in Microsoft Outlook containing the selected file as an attachment. ● Email > Send as Link Make sure the recipient can access the files before using this task. Click to open an email message in Microsoft Outlook containing a link to the selected file that the recipient can click on to open the file. ● Email > Send with Options Click to open the Send Files to Email Recipients dialog box to select the sending options before sending the files in an email message. Additional Send options could be available if other transfer methods were added to this project when it was created, or at any other time using the Edit Project Settings dialog box. ● Explorer Tasks Refer to the File Tasks panel topic. ● Find > External References This task is available only when the selected file has external references. Click to open the External Reference Details dialog box to display external reference (XREF) details about the selected file. This command applies to drawing files only. ● Fix Broken Link This task appears if Project Center cannot access the file. Click to open the Change Path of Project File dialog box to locate the file and repair the broken link. ● Info Exchange > Transfer Only Click to open the Transfer Files to a Newforma Info Exchange Server dialog box to send the files via Info Exchange. ● Issue Selected Record Document > Latest Revision Click to open the Issue Record Documents dialog box to create, send, and log a transmittal for the selected record document. Only available to Document Controllers. ● Issue Selected Record Document > Select Revision Click to open the Select Revision dialog box to choose the record document revision number, and then the Issue Record Documents dialog box to issue the selected revisions. Only available to Document Controllers. ● Modify Click to open the Modify Record Document dialog box to edit the selected record document. Only available to Document Controllers. ● Open with... Click to open the file in its native application. For example, a .DOC file will open in Microsoft Word. ● Open with Newforma Viewer Click to open the selected record document's source file in the Newforma Viewer. ● Publish Click to open the Publish Files dialog box to print or create a .PDF of the selected record documents. ● Review Related Action Items This task is available only when you select an item that has related action items. Click to open the Related Action Items activity center to view action items related to the selected item. ● Review Related Markup Sessions This task is available only when you select an item that has related markup sessions. Click to open the Related Markup Sessions activity center to view information about and preview the related markup sessions. ● View Form Click to open the Record Document form to view and print the selected record document's details. Selected Revision● Modify Revision Click to open the Modify Revision dialog box to edit the details of the revision. Only available to Document Controllers. ● Open with... Click to open the file in its native application. For example, a .DOC file will open in Microsoft Word. ● Open with Newforma Viewer Click to open the selected revision's source file in the Newforma Viewer. ● Add to > Project Center Item Click to add the selected revision to a Project Center item. ● Add to > Another Project Item Click to open the Select Project Item dialog box to add the selected revision to a Project Center item that is not in the drop-down list. ● Log as Click to open the Log As dialog box to create a new project item using the selected revision as a supporting document, or create a reviewer response to an existing item. ● Track in Markup Session Log This task is available only when you select a .PDF or .DWF file that does not have a related markup session. Click to open the Save Markup Session dialog box to create a markup session from a .PDF or .DWF file and track it in the Project Markup Sessions activity center. This enables you to track a markup session that was created from a .PDF or .DWF file in an application other then the Newforma Viewer. ● Find > All Versions of This file Click to search for files with the same or similar filename in the current project. The Search Results window opens, which lists all files that have a name similar to the selected file. The search parameter *filename*.* is used as the basis of the search. ● Compare to > Another File Click to open the Select a File dialog box to compare the selected file to another file. ● Compare to > Another Version of This File Click to open the Select File dialog box to compare the selected file to a file with a similar name or version. ● Compare This task appears only if you select two revisions from of the same record document in the top section of this activity center. Click to compare the record document's revisions. The Newforma Viewer opens showing the comparison. If the revisions were issued (they have a Revision Status of Issued), then the files in the record copies of the selected transmittals will be compared. If one of the revisions is not issued, then the revised files themselves are compared. ● Info Exchange > Transfer Only Click to open the Transfer Files to a Newforma Info Exchange Server dialog box to send the files via Info Exchange. ● Info Exchange > Transfer and Log a Transmittal Click to open the Transfer Files and Create an Outgoing Transmittal dialog box to create a transmittal and send the files via Info Exchange. ● Email > Send as Attachment Click to open an email message in Microsoft Outlook containing the selected file as an attachment. ● Email > Send as Link Make sure the recipient can access the files before using this task. Click to open an email message in Microsoft Outlook containing a link to the selected file that the recipient can click on to open the file. ● Email > Send and Log Transmittal Click to open the Send Files and Create an Outgoing Transmittal dialog box to create a transmittal and send the files in an email message. ● Email > Send with Options Click to open the Send Files to Email Recipients dialog box to select the sending options before sending the files in an email message. Additional Send options could be available if other transfer methods were added to this project when it was created, or at any other time using the Edit Project Settings dialog box. ● Publish Click to open the Publish Files dialog box to print or create a .PDF of the selected revisions. ● Explorer Tasks Refer to the File Tasks panel topic. ● Fix Broken Link This task appears if Project Center cannot access the file. Click to open the Change Path of Project File dialog box to locate the file and repair the broken link. ● Delete Revision Click to delete the selected revision. This is useful if you made a minor mistake when adding a revision and need to remove it so the correct revision can be added. Only available to Document Controllers. This task does not appear when the selected revision is in an Issued state. Package● Create Record Document Package Click to open the Create Record Document Package dialog box and create a new record document package. Only available to Document Controllers. ● Edit in Spreadsheet Click to open the Save Spreadsheet dialog box to export the record documents to a Microsoft Excel spreadsheet that you can then edit and re-import. The spreadsheet opens automatically and prompts you to re-import when you are done editing it. Only available to Document Controllers. If you don't have Microsoft Excel installed, the spreadsheet will not open. ● Utilities > Import Spreadsheet Click to open the Select Spreadsheet dialog box to select a Microsoft Excel spreadsheet containing record document data that you want to import. Only available to Document Controllers. ● Utilities > Export Spreadsheet Click to open the Save Spreadsheet dialog box to select the Microsoft Excel spreadsheet to export the project's record documents to. ● Create Report Click to open the Create Report dialog box to select the type of record document report to create. You can customize which columns appear in reports simply by selecting which columns to show and hide in the activity center. Simply right-click on column headers to add or remove columns. A checkmark indicates the column will appear in the activity center and the report. Selected Package● Modify Click to open the Modify Record Document Package dialog box to edit the details of the package. Only available to Document Controllers. ● Add Similar Package Click to open the Create Record Document Package dialog box with the same information as the selected record document. The Status will be Draft. Only available to Document Controllers. ● Issue Selected Package > Latest Record Document Revision Click to open the Issue Record Documents dialog box to create, send, and log a transmittal for the selected package. Only available to Document Controllers. You can select multiple packages and issue them simultaneously. ● Issue Selected Package > Selected Record Document Revision Click to open the Select Revision dialog box to choose the record document revision number, and then the Issue Record Documents dialog box to issue the package with the selected revisions. Only available to Document Controllers. ● Info Exchange > Transfer Only Click to open the Transfer Files to a Newforma Info Exchange Server dialog box to send the files via Info Exchange. ● Email > Send as Attachment Click to open an email message in Microsoft Outlook containing the selected file as an attachment. ● Email > Send as Link Make sure the recipient can access the files before using this task. Click to open an email message in Microsoft Outlook containing a link to the selected file that the recipient can click on to open the file. ● Email > Send with Options Click to open the Send Files to Email Recipients dialog box to select the sending options before sending the files in an email message. Additional Send options could be available if other transfer methods were added to this project when it was created, or at any other time using the Edit Project Settings dialog box. ● Delete Click to delete the selected record document package. Only available to Document Controllers.
The file tasks apply to files in the Supporting Documents tab. See File Tasks panel for more information.
See Email Tasks panel for more information.
See Related Item Tasks panel for more information. |
Document ControlSelect View PanelThis panel filters the contents of the Document Control activity center to show either record documents or packages. To hide the Select View panel, right click in the log portion of the activity center and select Toggle Package View. To show the panel, right click in the log and select Toggle Package View again. All PackagesClick to display a list of all record document packages for the current project. Package listA list of all record document packages for the current project appears in the Select View panel below the All Record Documents option. Click on a package to view its contents in the log. All Record DocumentsClick to display a list of all record documents for the current project.
Category drop-down listThe category drop-down list contains filters to display the record documents or record document packages in particular categories. For example, if you want to view all active record documents, select All Active Record Documents from the list. Only active record documents will appear in the log. You can also choose to display record documents for all project users or only your record documents. Each category is explained below.
Record DocumentsAll Record DocumentsClick to list all record documents. You can then select a record document to view a preview of it as well as any individual record documents that exist for it. All Active Record Documents Click to list all active record documents. All Active Issued Record Documents Click to list all active record documents that have been issued. All Active Not Issued Record Documents Click to list all active record documents that have not been issued. All Inactive Record Documents Click to list all inactive record documents. All Inactive Issued Record Documents Click to list all inactive record documents that have been issued. All Inactive Not Issued Record Documents Click to list all inactive record documents that have not been issued. PackagesAll PackagesClick to list all record document packages. You can then select a package to view its details. Draft PackagesClick to list all record document packages with a draft status. Packages with a draft status have not been issued. Issued PackagesClick to list all record document packages that have been issued. Filter All ColumnsYou can filter by any text that appears in any of the Items columns in this section. For example, if you know the title (or part of the title) of the record document that you are searching for (or the status, date modified, etc.), enter at least part of the text in this field. The Items list updates automatically as you type. For example, if the record document you are searching for has the number 30 somewhere in one of the columns, enter 30 in this field. The list will be narrowed down to only record documents that have the number 30 somewhere in one of the columns.
Click the Settings icon, shown above, and select Toggle Column Filters to toggle between showing and hiding the column filter fields. |


 Click to toggle between showing record documents for all users or only record documents you are involved with.
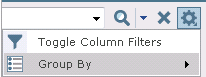


|
Add |
Click to open the Add Email Messages dialog box to select an email message to add to the current record document or package. |
|
Remove |
Click to remove the selected email message from the record document or package. |
Related Items tab
This tab lists all related Project Center items for the selected record document, package, or record document revision.
When a record document or package is selected, all related items for all revisions are listed. When a specific revision is selected, only the related items for that revision are listed.
Create Related > Action Item
Click to open the Identify Action Item dialog box to create a new action item and link it to the current record document, revision or package.
Create Related > Transfer > Via Email
Click to open the Send Files to Email Recipients dialog box to send project files via email. Nothing is logged in this tab.
Create Related > Transfer > Via Info Exchange
Click to open the Transfer Files to a Newforma Info Exchange Server dialog box to transfer project files via your Newforma Info Exchange Server and link the transfer to the current record document, revision or package..
Create Related > Transmittal > Via Email
Click to open the Send Files and Create an Outgoing Transmittal dialog box to send project files via email, file an outgoing transmittal for a file transfer, and link the transfer to the current record document, revision or package.
Create Related > Transmittal > Via Info Exchange
Click to open the Transfer Files and Create an Outgoing Transmittal dialog box to transfer project files via your Newforma Info Exchange Server, create a new outgoing transmittal for the file transfer, and link the transfer to the current record document, revision or package..
Create Related > Contract Management > Contract Management Item
Click to open the Create Contract Management Item dialog box for the type of contract management item you selected to create a new CM item and link it to the current record document, revision or package.
Create Related > Web Link
Click to open the Create Web Link dialog box to enter a web link and automatically relate it to the selected Project Center item. After it is created, the Relation Type column will indicate Web Link, and users can double-click on it to open the website.
Relate to >
Click to select an existing project item and establish a relationship between it and the currently selected record document, revision or package. This gives you the ability to link two items that are related together (for example, an action item that is related to a record document). Select Another Project Item to open the Select Project Item dialog box to locate an item that is not in the list. When you create a relationship between two items, each item's icon is added to the other item's Related Items column and tab.
Share with External
Click and select Yes to allow the selected web link to be shared with external project team members through Info Exchange.
Remove
Click to unlink and remove the selected project item from the Related Items tab.
Removing a related item from the Related Items tab does not remove it from the database.
The Relation Type column has two icons to indicate the relationship type:
● The  icon indicates that the relationship was created by a user and can be deleted (such as an action item related to a record document).
● The  icon indicates that the relationship was created by Project Center and cannot be deleted (such as a transmittal or record copy related to a record document).
Supporting Documents tab
Use this tab to attach files to the selected record document, revision or package and to view attached files. For example, if you have a record document and a particular drawing is related to it, you can use this tab to attach the drawing file to the record document. Also, files sent using the Add to > Record Document task are added to this tab.
The number in parentheses indicates the number of files that are attached to the record document.
You can copy and paste and drag and drop files from Windows Explorer into this tab.
|
Change Version |
If you are using an EDMS, click to select a specific version of the file to link to the record document. |
|
Set Order |
Click to open the Set Document Order dialog box to set the order of the documents. |
|
Add Files > Another Project File |
Click open the Add Supporting Documents dialog box to locate and attach a file to the record document. |
|
Share with External > Yes |
Click to allow the selected files to be shared with external project team members through Info Exchange. |
|
Remove |
Click to remove the selected supporting file from the record document. |
Preview tab
A preview of the selected file appears here.
Related Items tab
This tab lists all related Project Center items for the selected file.
Change Log tab
This tab lists the dates and project team members who created, modified, and closed the record document, revision or package. The change log also lists changes to record documents that occurred as a result of using the Newforma Project Information Link to synchronize and add revisions.
Record Documents tab
This tab is only available when you select a package from the log.
A listing of the record documents included in the selected package.
|
Add |
Click to open the Select Record Document dialog box to select the record documents to add to the current package. |
|
Remove |
Click to remove the record document(s) from the package. |
Number
The record document's number. If the drawing file was imported, it is the drawing's name.
Title
The title of the record document.
Discipline
Disciplines applied to the record document.
Team Members
The project team members involved with the record document.
Status
The record document's status.
To access this activity center
Click Document Control from the Activities list or from the Project Home activity center.
Table of Contents
Index
Search (English only)
Back