


Apply Project Template Settings to Existing Projects
To save time when editing project settings, you can export data from an existing project or import data into an existing project from a project template. After importing the data from the template, all you have to do is edit the fields that are unique or blank in the existing project.
You must be a Project Center administrator to perform these procedures.
You must know the location of the project template you want to use before performing this procedure.
Sample template
Refer to the following Microsoft Excel spreadsheet for examples on how to format the project template: C:\Program Files\Newforma\2022Edition\Project Center\Templates\Project Template.xlsx.
Procedures
This topic contains two different methods of applying template settings to existing projects. Use whichever procedure you are more comfortable with:
● Import the settings from a project template into existing Project Center projects
To export the settings from an existing project to an Excel spreadsheet and import it into other Project Center projects
1. If you are not already there, open the Project Center Administration activity center (shown below) by clicking Project Center Administration from the Tasks panel of the My Project Center activity center, or from the Activities list.
2. Click the Projects tab and select the project from which you want to export settings.
3. Click Edit Settings from the Tasks panel to open the Edit Project Settings dialog box, as shown here, and edit the fields throughout as necessary. For this example, we'll edit the project timeline settings. Click OK to save your changes when you're finished.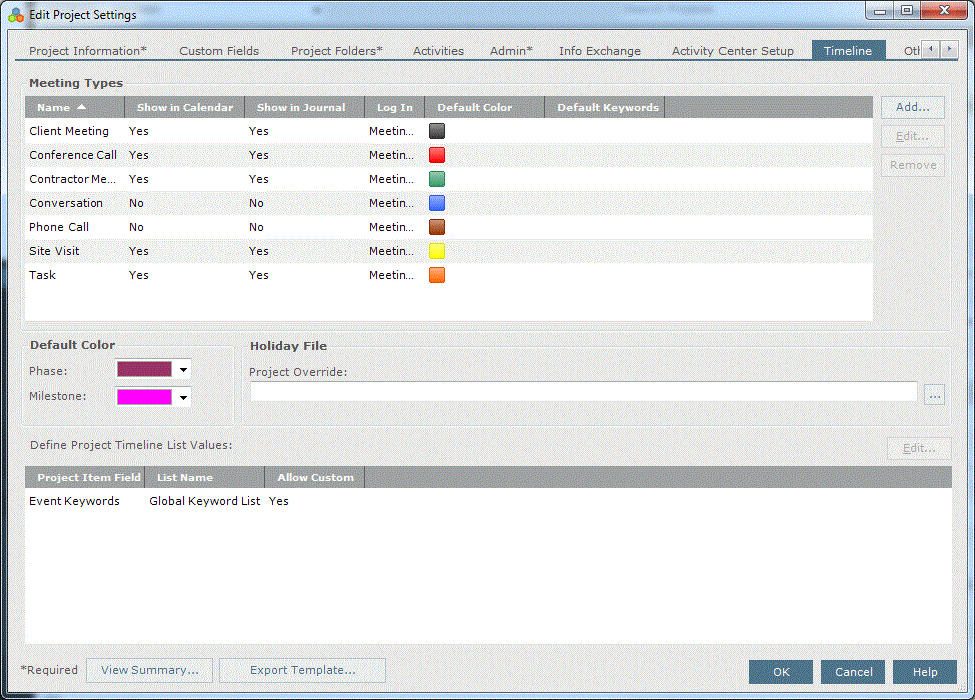
4. With the project still selected, click Project Utilities > Export to Spreadsheet Template from the Tasks panel to open the Save Template dialog box, as shown here: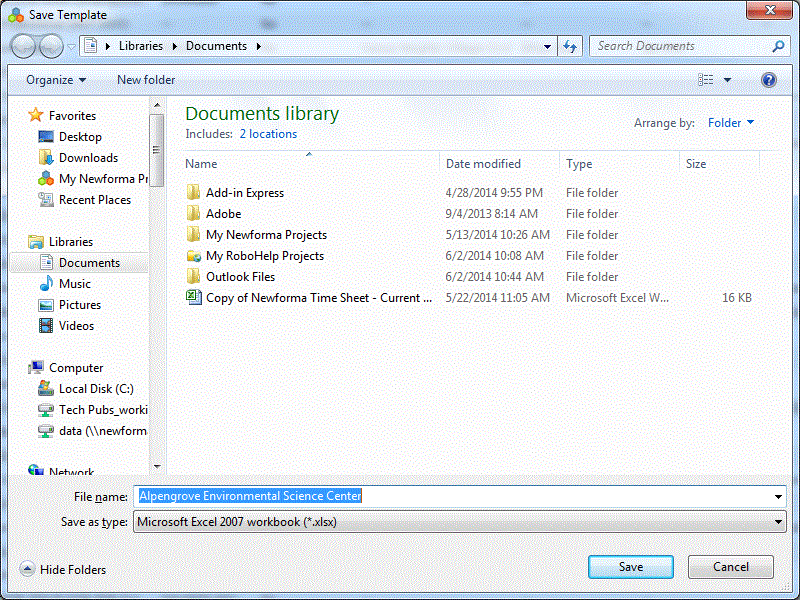
5. Make a note of the location the file was saved to.
6. Open the template and clear the fields, keeping only the table information you want to apply to other projects, as shown in this example (for the timeline):
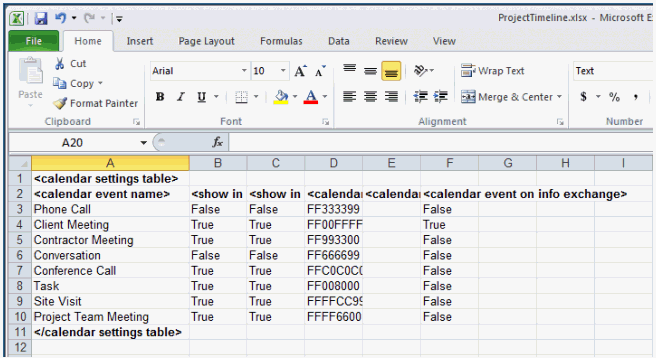
7. Save your changes.
8. In the Projects tab, select the project or projects to which you want to apply the template settings.
9. Click Project Utilites > Apply Spreadsheet Template from the Tasks panel to open the Import from Spreadsheet Template dialog box, as shown here: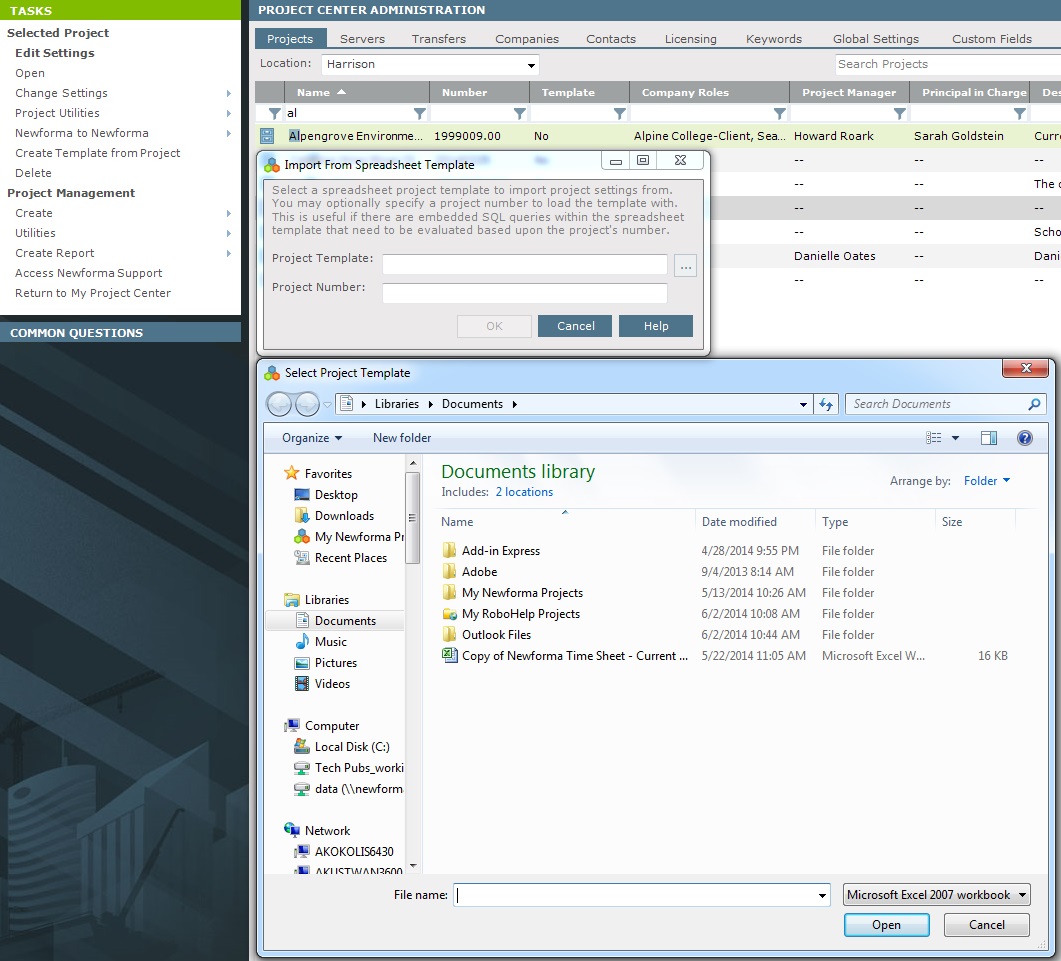
10. Click the  button to open the Select Project Template dialog box as shown above. Locate and select the project template, then click Open.
11. Click OK. The Project Settings Change Confirmation dialog box lists the changes that will be made to the project. Verify the information, then click OK.
If the template cannot be imported, an error message will appear. Open the Import Log to list the errors. You must fix the problems, then re-import the template
12. The data from the template is imported into the new project. The following changes are made:
● If a field in the project template is empty, the value is cleared in the project;
● If a field in the template has a value, it is changed in the project;
● If the field does not exist in the project template, no changes are made to the project.
All project settings changes are recorded in the indicated log file, including all successful changes and any errors. Click Send Log Files to email the log file.
To import the settings from a project template into existing Project Center projects
1. Customize your Excel template.
2. If you are not already there, open the Project Center Administration activity center (shown below) by clicking Project Center Administration from the Tasks panel of the My Project Center activity center, or from the Activities list.
3. Click the Projects tab and select the project or projects to which you want to apply the project template settings.
4. Click Apply Project Settings from the Tasks panel to open the Import from Spreadsheet Template dialog box, as shown here:
5. Click the button to open the Select Project Template dialog box as shown above. Locate and select the project template, then click Open.
6. Click OK to import its data. The Project Settings Change Confirmation dialog box lists the changes that will be made to the project. Verify the information, then click OK.
If the template cannot be imported, an error message will appear. Open the Import Log to list the errors. You must fix the problems, then re-import the template.
7. The data from the template is imported into the new project. The following changes are made:
● If a field in the project template is empty, the value is cleared in the project;
● If a field in the template has a value, it is changed in the project;
● If the field does not exist in the project template, no changes are made to the project.
All project settings changes are recorded in the indicated log file, including all successful changes and any errors. Click Send Log Files to email the log file.
8. Click Edit Settings from the Tasks panel to open the Edit Project Settings dialog box and edit the fields as necessary.
Table of Contents
Index
Search (English only)
Back