


Forward a Submittal for Review
When tracking submittals in Project Center, you can forward items you received to other contacts to review. Perform the following steps to forward a submittal for review.
To forward a submittal for review
1. If you are not already there, open the Project Submittals activity center by clicking Submittals from the Project Home activity center or from the Activities list.
2. Select the submittal you are forwarding from either the Under Review, Draft, or Response Overdue categories.
3. Click Forward for Review from the Tasks panel to open the Forward for Review dialog box, as shown below. Project Center automatically fills in the information from the original submittal.
If the original item has any files associated with it, the Select Files to Forward for Review dialog box will open first. Select the files you want to forward with the item. Any supporting documents included in any related project items are included in the list.
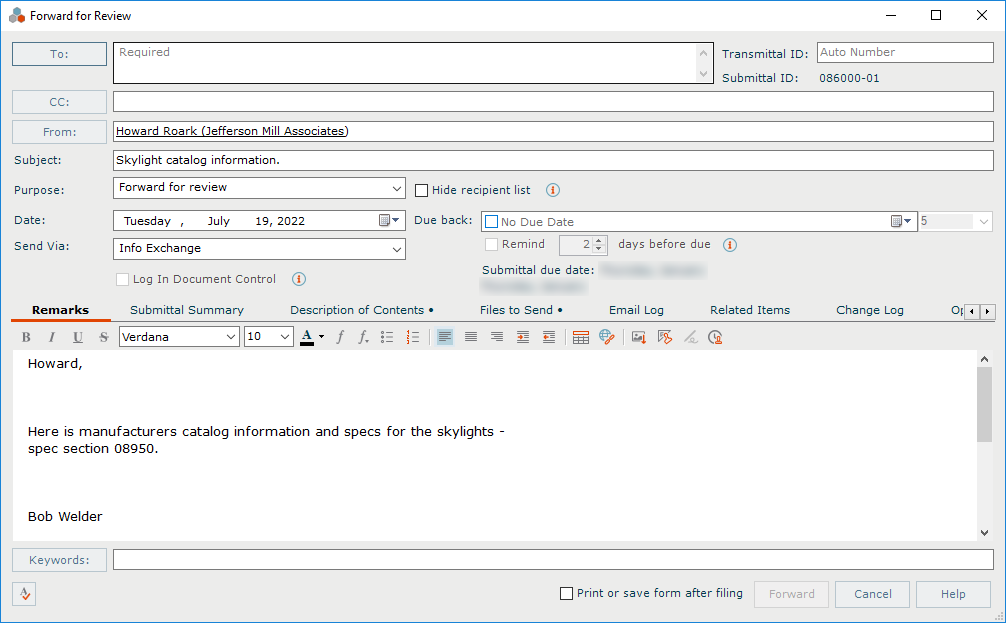
4. Click To to open the Choose a Project Team Member dialog box to select the team members to forward the submittal to. You can also type email addresses directly in this field.
5. Click the Purpose drop-down list and select the reason you are forwarding the submittal.
6. Click the Send Via drop-down list and select the method in which you are forwarding this submittal.
If you choose a drag and drop method, you will be required to add files to the submittal.
7. Enter any additional messages in the Remarks tab.
8. To include any additional files with the submittal, add them by clicking the Files to Send tab, then click Add Files.... Navigate through the folders until you locate the file, then click Open. Repeat as necessary until you have added all the necessary files.
9. Modify any other information as necessary.
10. The Save Record Copy in field (in the
Files to Send tab) contains a
default location in which a record
copy of the submittal's files will be saved. You can change the location
by clicking the  icon.
icon.
11. Click Forward at the bottom of the dialog box. The events that occur next depend on how the submittal is being forwarded.
Via Info Exchange
● Use the Options tab to edit the settings for the file transfer, including who can access it, and reminder and notification settings. The settings are sticky from transfer to transfer.
● The Forwarded Submittal is logged in the All Outgoing log of the Info Exchange activity center.
● The Forwarded - for Review action is added to the submittal's Change Log tab.
● The transmittal is filed in the All Sent log of the Project Transmittals activity center.
Via email
● Use the Options tab to select how you want to attach the files.
● An email message opens in Microsoft Outlook containing information about the transfer and the files in a .ZIP file. Edit the message, then send it.
● The Forwarded action is added to the submttal's Change Log tab, and the transmittal is filed in the All Sent log of the Project Transmittals activity center.
Via hard copy
● The transmittal is filed in the All Sent log of the Project Transmittals activity center. The Forwarded action is added to the submittal's Change Log tab.
Table of Contents
Index
Search (English only)
Back