


Publish Project Information dialog box (Project Publisher)
Use the Project Publisher to select the items of a Project Center project to publish (i.e. project closeout or handover) to your clients at the end of the project. It enables you to select the information you’d like to publish, set the appearance of the information, and then publish the results as .PDF or .HTML files to an optical disk or network folder.
Step 1: Select Project Items
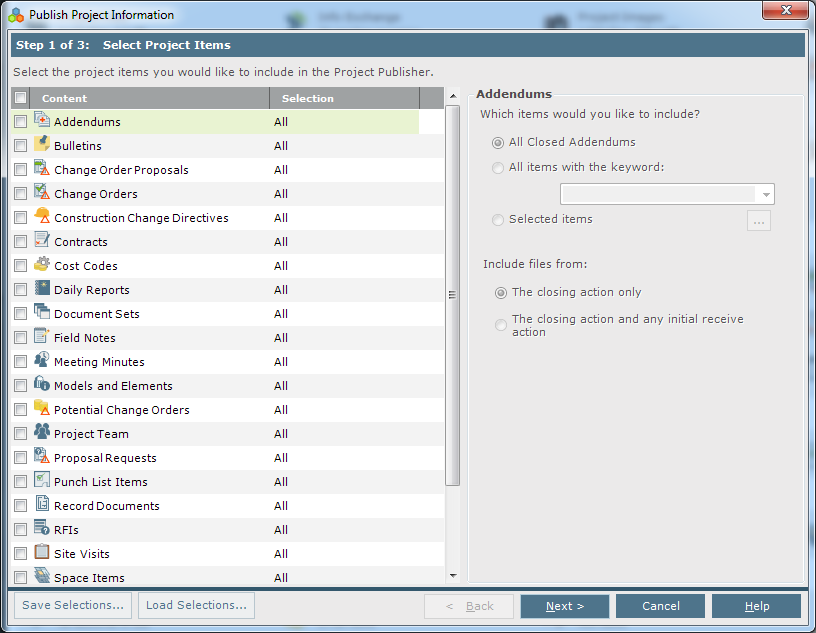
Content
Mark the checkboxes of the Project Center items you want to publish, as shown above.
Selection
This column indicates the option selected from the right side of the dialog box. In the example above, since All Closed Addendums is selected under Addendums (on the right side), the Selection column indicates All. If you selected All Items with the Keyword, the column would say Keyword. If you chose Selected Items, the column would say Selection.
The information in right side of the dialog box changes depending on the item you choose from the left side. Choose the options you want to publish by marking the necessary item checkboxes.
Save Selections
Click to save your selections if you plan to publish the project multiple times or for multiple uses. Select the location in which to save the file, and enter a name for the file.
Load Selections
Click to locate and load the file containing the saved selections to use them again.
Next
Click to go to step 2.
Step 2: Arrange Project Items
This step contains the table of contents. Drag and drop the items to the preferred location in the list, which is how they will appear in the published format.
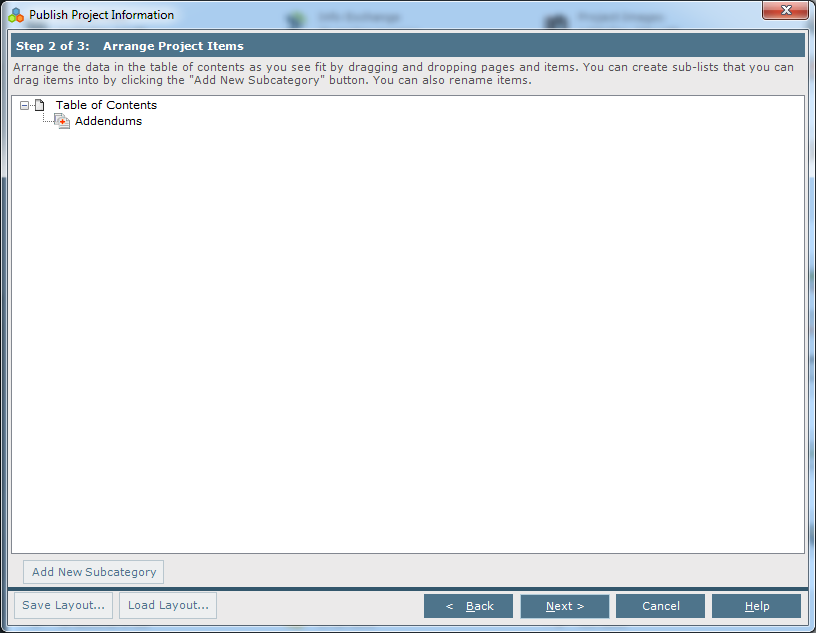
Add New Subcategory
Click to add subcategories. A new item called New Category will be added to the list, which you can rename by clicking on it twice, slowly. You can then drag and drop items from the list into it.
Save Layout
Click to save your layout if you plan to publish the project multiple times or for multiple uses. Select the location in which to save the file, and enter a name for the file.
Load Layout
Click to locate and load the file containing the saved selections to use them again.
Next
Click to go to step 3.
Step 3: Select Publishing Options
Select the publishing location and output type.
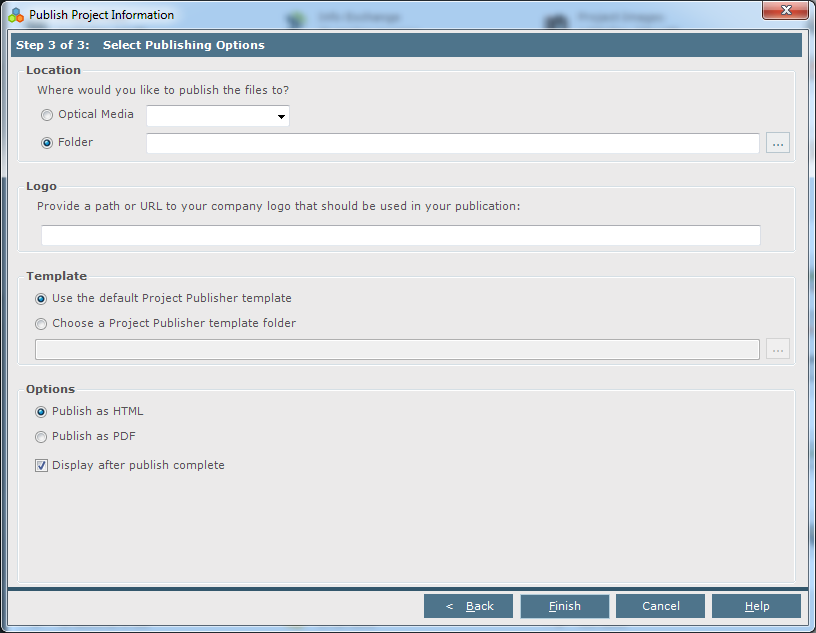
Location
Where Would You Like to Publish the Files to?
● Select Optical Media to publish to an optical device such as a CD.
● Select Folder to publish to a system folder. Click the  button to locate the folder.
Logo
By default, the output will use the logo defined in your template styles. If you want to use a project-specific logo, enter a path or URL to the logo in the field.
Template
● Select Use the Project Publisher Template to use the default project template to publish the output.
● Select Choose a Project Publisher Template Folder to locate and select a different folder containing the project publisher templates you want to use for publishing. Click the button to locate the folder.
All of the templates listed in the Project Publisher Overview must be present in the templates folder, whether you use the default folder or your own modified versions of these templates in another system folder. No templates can be missing.
Options
● Select Publish as HTML to publish to an HTML file.
● Select Publish as PDF to publish to a PDF file.
Display After Publish Complete
Mark this checkbox to view the document after publishing is complete..
Finish
Click to publish the project. A dialog box will appear showing the progress. It will run through each item individually.
The publishing process could take significant time, depending on the amount of data being published.
To access this dialog box
Click Project Publisher from the Activities list or from the Project Home activity center.
Table of Contents
Index
Search (English only)
Back