


Test Form Letter dialog box
Use this dialog box to test a form letter to verify that its output appears the way you want. You can select the actual template and contacts you want to generate the form letter for without actually generating or sending the letter.
Step 1: Choose Contacts, Field Values, and Output Options
In step 1, choose the contacts to include in the form letter, and set the output and email settings, as shown here:
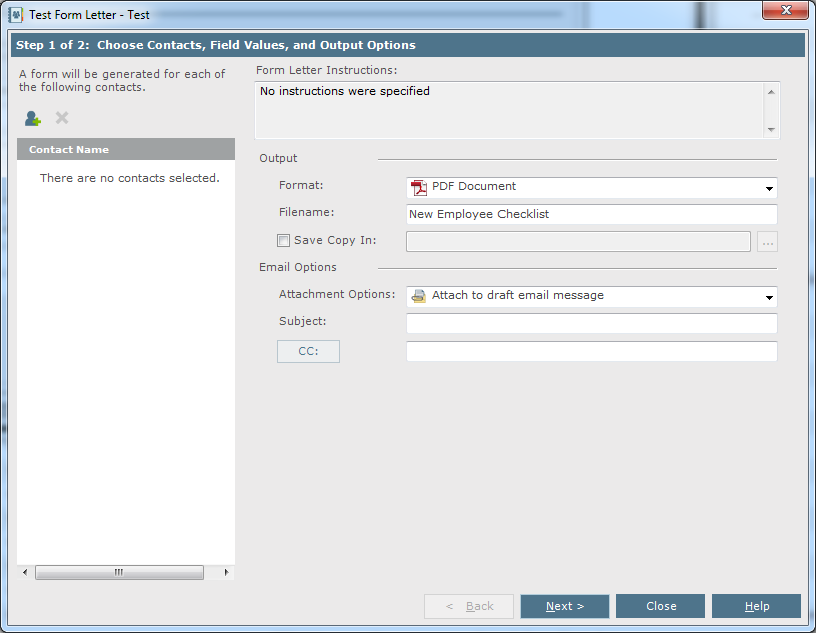
Contact Name
Click the  icon to open the Choose Contacts dialog box to select contacts to add to the form letter.
Form Letter Instructions
The instructions from the Add Form Letter dialog box (if any were added) appear here.
Fields
The fields added in the Add Form Letter dialog box appear here, so they will be different for every form. You can add data to each field depending on its type.
Output
Set the form letter's output parameters.
Format
Select the type of output to create - a Microsoft Word document, a PDF document, or an email message.
If you select Email Message, the following two fields will not appear.
Filename
Enter a name for the file that will be created based on the output type selected.
Save Copy in
If you want to save a copy of the file in the format you selected above, mark the checkbox and click the  button to locate and select the folder in which to save it.
Email Options
Set the email options.
Attachment Options
Select whether to attach the form letter as an attachment to a draft email message or to send the email message, or not to send it as an attachment.
Email Method
This field will appear only if you selected Email Message in the Format field above.
● Select Create Draft Email Message to create the form letter in a draft email message which will open so you can edit it before sending it.
● Select Send Email Message to create the form letter in an email message and send the email message without opening it.
Subject
Enter a subject for the email message.
CC
Click to open the Choose Project Team Members dialog box to select other contacts to send the email message to.
Next
Click to go to step 2.
Step 2: Preview Actions
In step 2, preview the actions and fields that you selected in step 1. In the following example, the available actions are Create PDF Document and Attach to Draft Email Message. However, the actions will be different depending on the actions selected in step 1 above.
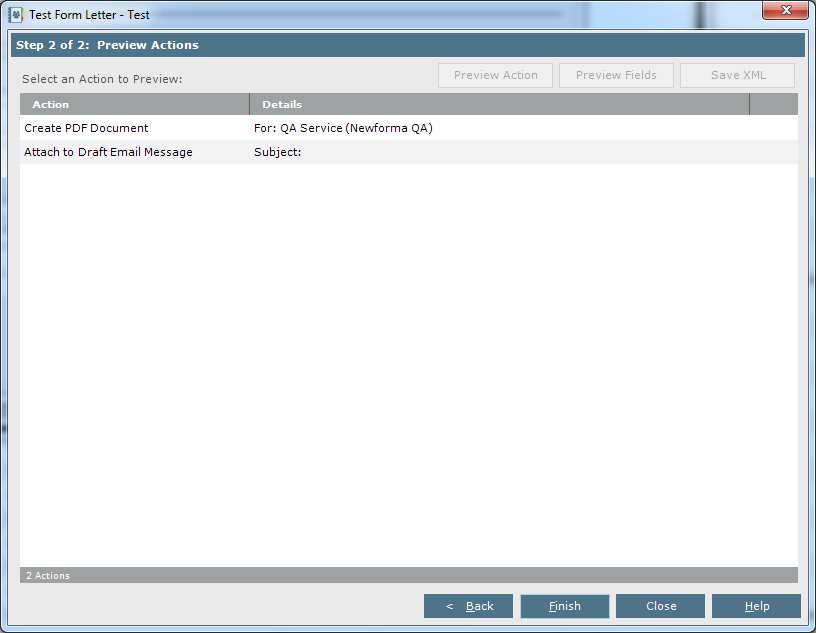
Action
The name of the actions selected in step 1.
Details
The details entered for the actions selected in step 1 appear here.
Preview Action
Click to preview the selected action, as shown in the example below. The document that opens depends on the action selected. For example, If you select Create PDF Document, a PDF file will open containing the form letter with the fields filled in for the contacts selected, any project information selected, and any additional fields entered.
Preview Fields
Click to open a Microsoft Word document containing all possible field tags that can be used in the form letter. The action you select from the list is irrelevant. The document is based on the standard Newforma field tags and any additional fields that were defined in the Add Form Letter dialog box.
Save XML
Click to open the Save XML File dialog box to save a copy of the XML that is generated when you generate the form letter. The file will be saved as an XML file. The XML file could be useful when editing the template as it contains all values that can be included in the form letter template.
Finish
Click to close this dialog box. Nothing will be created or sent.
To access this dialog box
Click Test Form from the Add Form Letter dialog box or the Modify Form Letter dialog box.
Table of Contents
Index
Search (English only)
Back