


Add Building Elements from Revit to the Building Models and Elements Activity Center
Perform the following steps to add building elements from Autodesk Revit to the Building Models and Elements Activity Center.
To add building elements from Revit to the Building Models and Elements Activity Center
1. Start Autodesk Revit and Newforma Project Information Link. Refer to Use Newforma Project Information Link if you need help getting started.
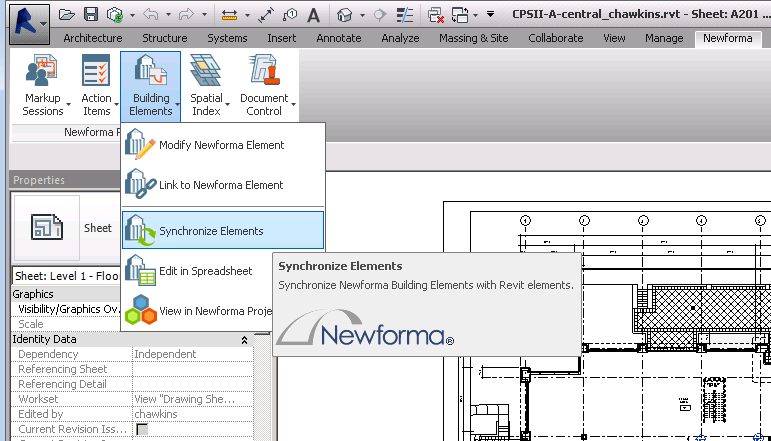
2. From the Newforma tab, click Building Elements, Synchronize Elements, as shown below, to open the Synchronize Building Elements dialog box and add Revit building elements.
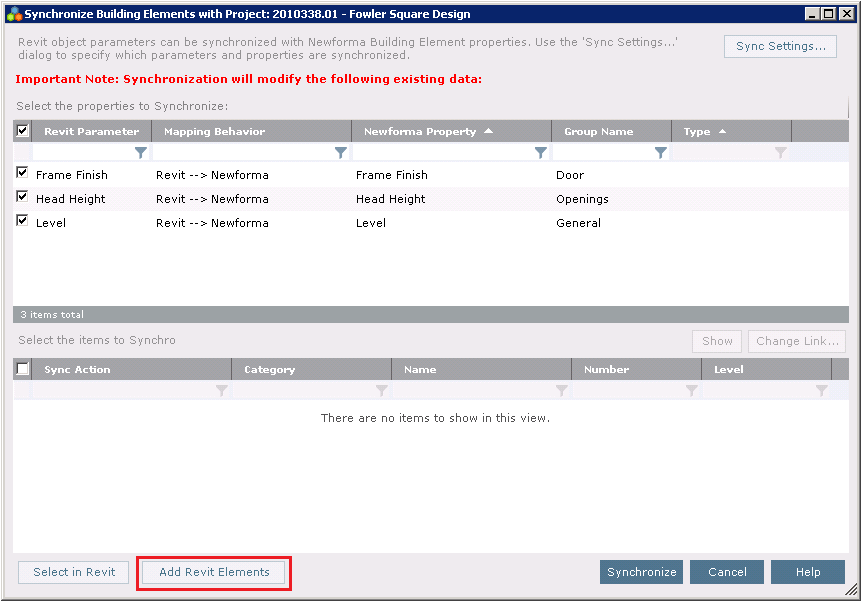
3. Click Add Revit Elements at the bottom of the Synchronize Building Elements dialog box, shown here, to select the elements you want to sync in the drawing.
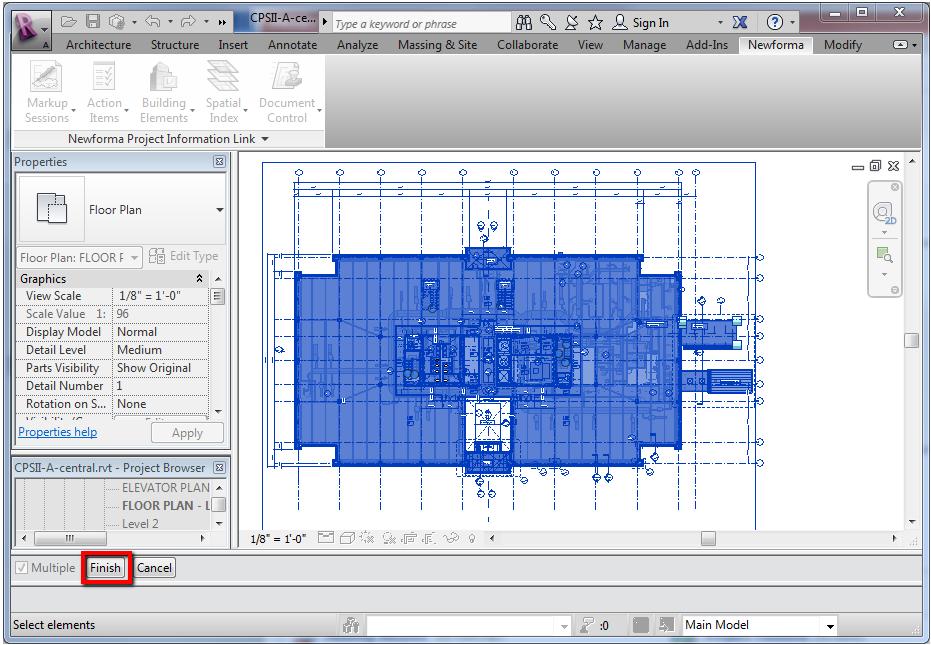
4. Select one or more elements in the drawing (you can select the whole drawing as you will have an opportunity to filter the elements in the next step), then click Finish, as shown here:
5. In the Synchronize Building Elements dialog box, use the column filters to isolate the elements, then mark the checkboxes of the items you want to synchronize.
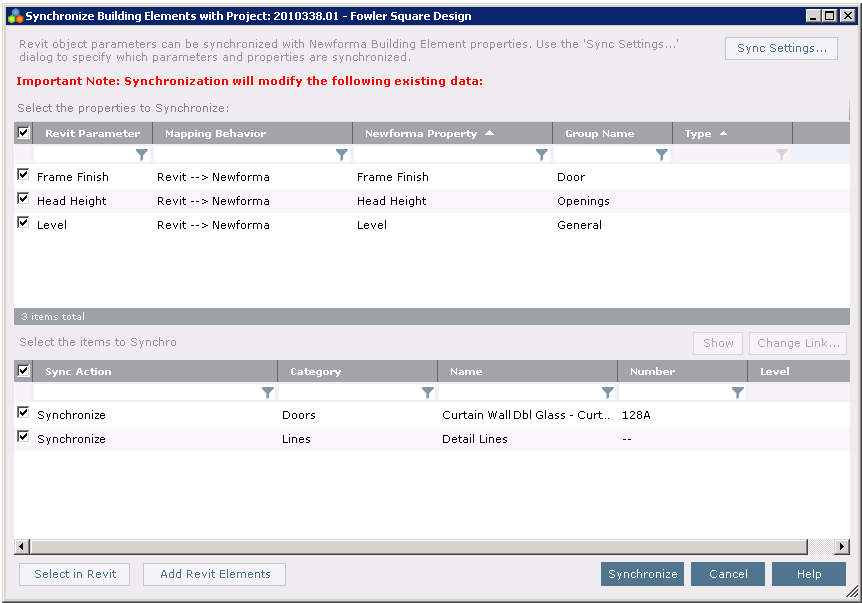
6. Filtering by Category is an effective way to define the selection set you want to synchronize.
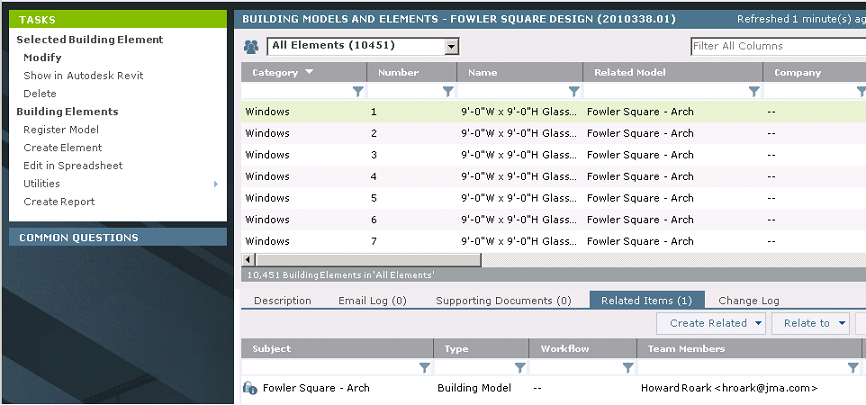
7. Click Synchronize to add the building elements to the Project Center project. Once the elements are synchronized, project team members can view and manage the building elements in the Building Models and Elements Activity Center:
You can also edit the building element data in Microsoft Excel:
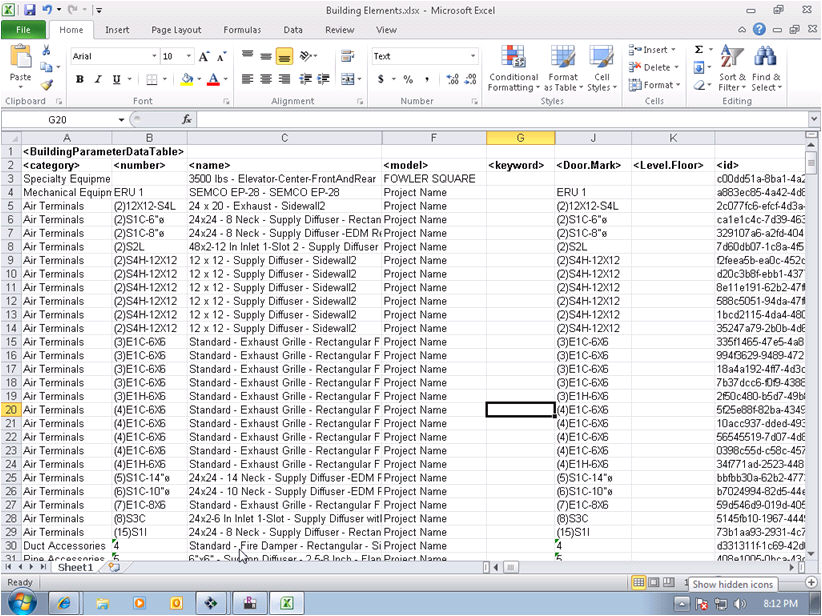
Table of Contents
Index
Search (English only)
Back