


Add Meetings to the Project Timeline Activity Center and the Meeting Minutes Activity Center
Perform the following steps to add a meeting (or a recurring meeting) to the project timeline and meeting minutes.
Meetings added to the Project Timeline activity center are automatically added to the Meeting Minutes activity center, and vice-versa.
To add a meeting to the project timeline and meeting minutes from Project Center
1. Do one of the following:
● If you are not already there, open the Project Timeline activity center (shown below) by clicking Project Timeline from the Project Home activity center or from the Activities list. Or,
● If you are not already there, open the Meeting Minutes activity center by clicking Meeting Minutes from the Project Home activity center or from the Activities list.
2. If you are working in the Project Timeline activity center: In either the Calendar or Journal view, click the date on which the meeting occurred.
3. Click
Add > Meeting
type from the Tasks panel to
open the Create
Meeting dialog box, as shown here. Today's date (or the date you selected)
is entered in the Start Date and
End Date fields. You can edit
these fields.
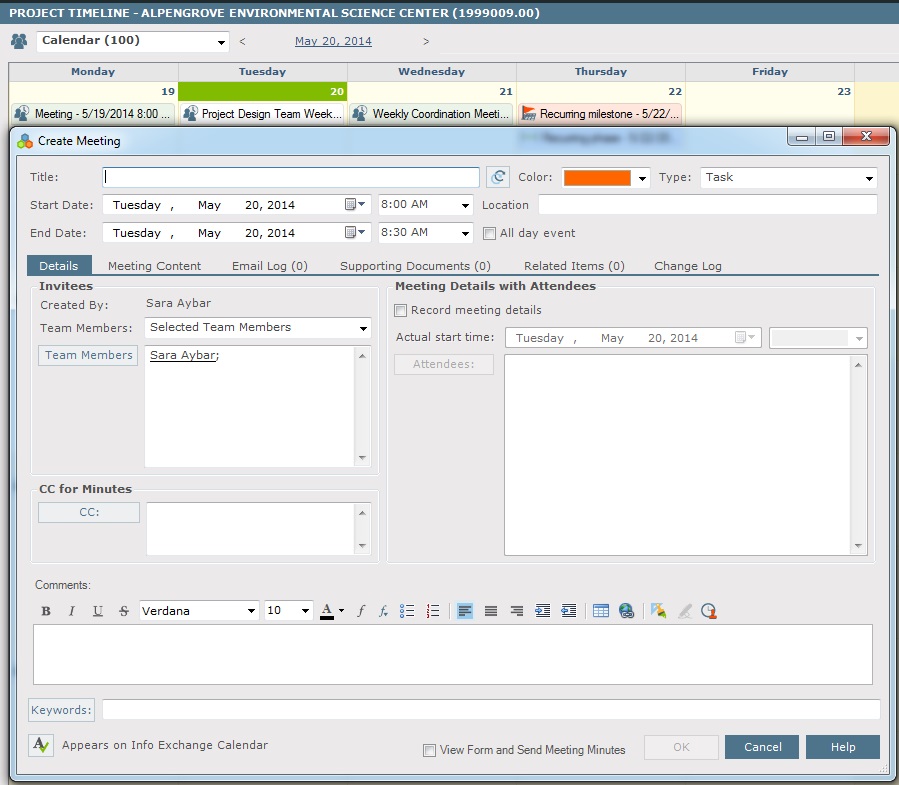
4. Enter the title of the meeting in the Title field.
5. If
it is a recurring meeting, click the  icon to open the Calendar
Item Recurrence dialog box to set the meeting's parameters.
icon to open the Calendar
Item Recurrence dialog box to set the meeting's parameters.
6. Select the Color to represent the meeting.
7. The Type field defaults to the type of meeting you selected in step 3. You can change it.
8. Enter the location (if applicable) in the Location field.
9. In the Details tab, select the project team members who were involved in this meeting. You can select the Entire Project Team, the Internal Project Team, or individual team members by clicking Selected Team Members from the Team Members field.
10. Enter any comments in the Comments field.
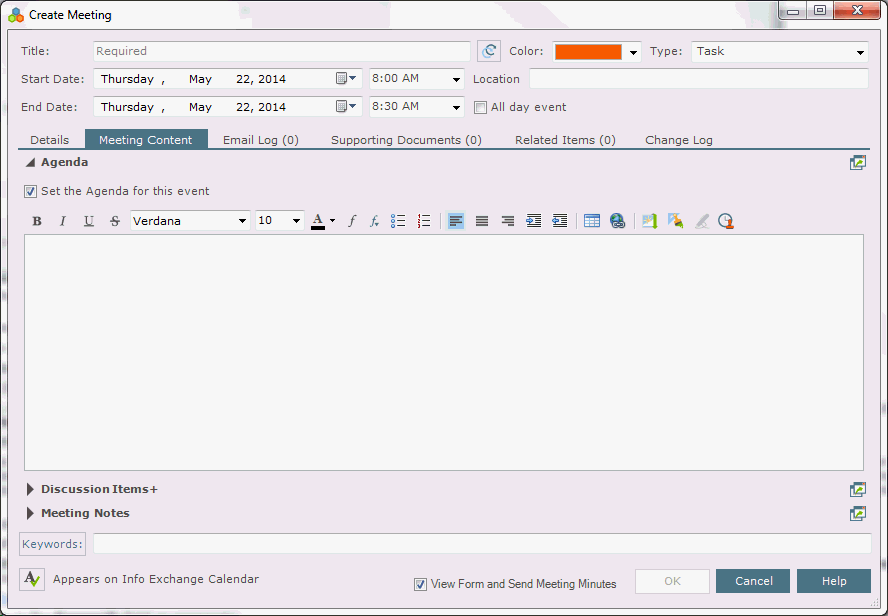
11. Enter
the meeting's agenda in the Agenda
panel of the Meeting Content tab,
as shown below. Mark the Set the Agenda
for This Event checkbox to enable this panel and open the Carry
Forward Agenda Items dialog box to choose whether to carry forward
the agenda and discussion items from another meeting to the current one.
If you choose Yes, select
the meeting containing the agenda and discussion items you want to copy
from the list and then make any changes as necessary. The items will be
added to this panel and the Discussion
Items panel. If you choose
No, you can enter items
manually.
12. Enter discussion, action, and project items to discuss at the meeting in the Discussion Items panel.
13. Enter the details of the meeting in the Meeting Notes panel.
14. To include any additional files that may be related to the meeting, add them by clicking the Supporting Documents tab, then clicking Add Files > Another Project File. Navigate through the folders until you locate the file, then click Open. Repeat as necessary until you have added all the necessary files.
15. Add any related Project Center items in the Related Items tab.
16. Enter any keywords in the Keywords field as necessary.
17. Mark the View Form and Send Meeting Minutes checkbox to send an email message containing a summary of the meeting to the meeting participants and open the Timeline Item form.
18. Click OK to add the meeting to the project timeline and meeting minutes. It is added to the day you selected.
To add a meeting from the Legacy Project Center Add-in for Microsoft Outlook
See Add Meetings from the Legacy Project Center Add-in for Microsoft Outlook.
To add new meeting types
See Add New Meeting Types to a Project.
Table of Contents
Index
Search (English only)
Back