


Add a Project Status
Perform the following steps to add a status that you can apply to projects. The new status will appear in the Status drop-down list of the Create a New Project dialog box and the Edit Project Settings dialog box.
You must be a Project Center administrator to perform this procedure.
To create a new status
1. If you are not already there, open the Project Center Administration activity center (shown below) by clicking Project Center Administration from the Tasks panel of the My Project Center activity center, or from the Activities list.
2. Click the Keywords tab.
3. From the list, select Global Project Status List as shown here: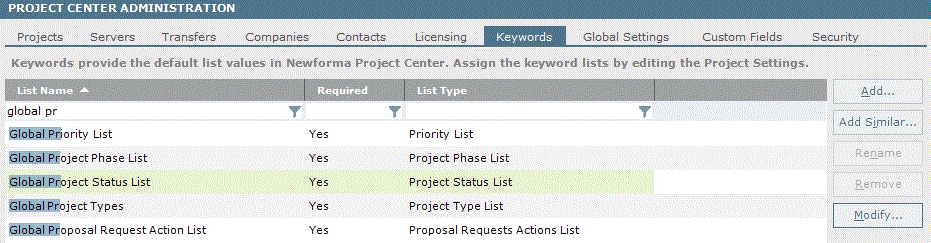
4. Click Modify to open the Project Keyword List dialog box, then click Add to open the Add Project Keyword dialog box.
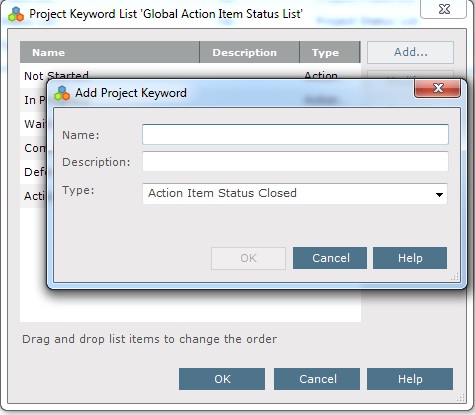
5. Enter the new status in the Name field and a description in the Description field.
6. Select the type for the new status from the Type drop-down list, then click OK. Click OK again.
7. Click Save Changes to save the changes to the Project Center database. The status is now available to be assigned to any project.
Table of Contents
Index
Search (English only)
Back