


Add a New Form Template Style to a Project Center Server
Perform the following steps to add a new form template style, which you can then apply to a specific project to customize its forms and notifications.
You must be a Project Center administrator to perform this procedure.
To add a new form template style containing a custom logo for forms and notifications
1. If you are not already there, open the Project Center Administration activity center (shown below) by clicking Project Center Administration from the Tasks panel of the My Project Center activity center, or from the Activities list.
2. Click the Servers tab.
3. From the Servers drop down list, select Project Center/Info Exchange.
4. Select the Project Center Server that you want to add the new form template style to.
The Type column lists the server types. Make sure the type is Project Center.
5. Click the Notifications/Forms tab (shown below).
6. Click
Add to open the Add
Template Style dialog box, as shown here: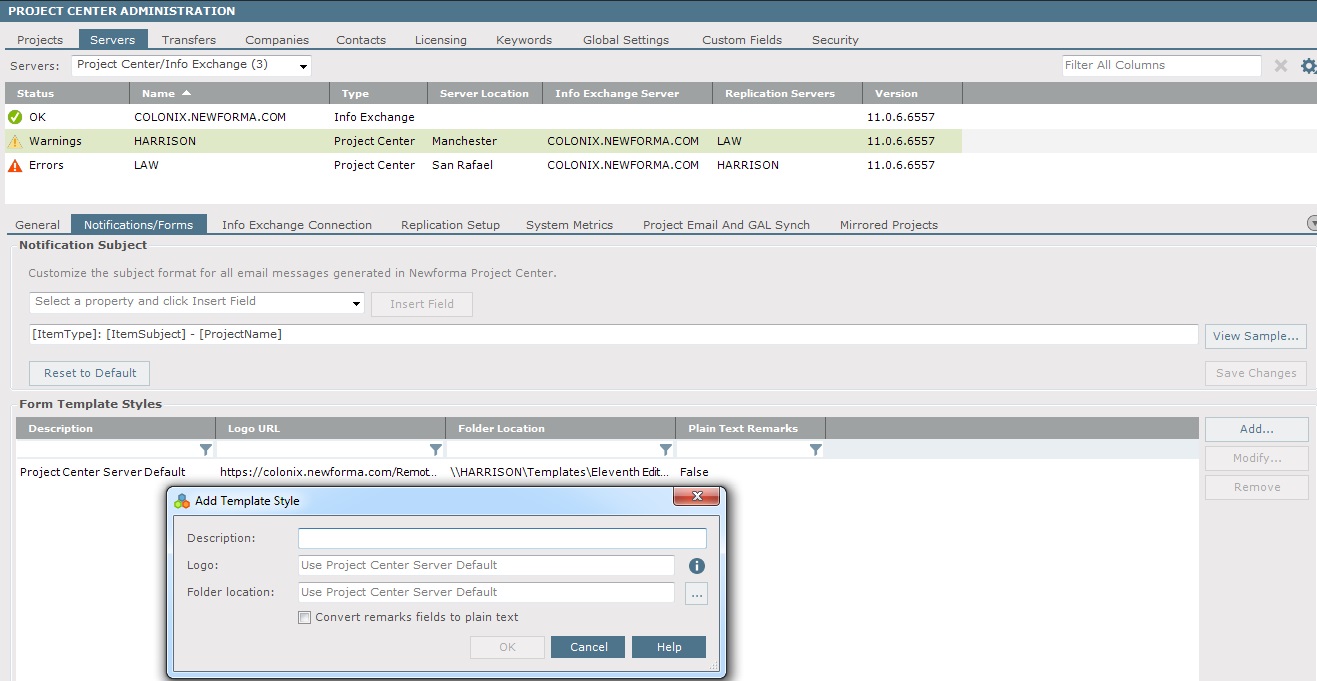
7. Enter the name of the new template style in the Description field.
8. Enter the full path to the logo you want to use in the Logo field.
9. If the template files are in a folder other than the default folder, enter the full path to the folder in the Folder Location field.
10. Click OK. The new form template is added to the Form Template Styles section of the Notifications/Forms tab.
11. Repeat this procedure as necessary for any other Project Center Servers.
12. Apply the new form template style to a project.
If your default template is used when sending a password
reminder, it is because the following templates don’t use the template
styles and always use the default template:
AccountNotificationEmail
GenericPrintableView
PasswordReset
ResendLoginInfo
Table of Contents
Index
Search (English only)
Back