


Compare a Document Set
Perform the following steps to compare a document set to another document set, a project folder, or the files in a record copy.
For information on how Compare handles external references, see How the Compare Feature Handles External References (XREFs).
To compare a document set
1. If you are not already there, open the Project Document Sets activity center by clicking Document Sets from the Project Home activity center or the Activities list.
2. Choose the document set you want to use as the baseline for the comparison.
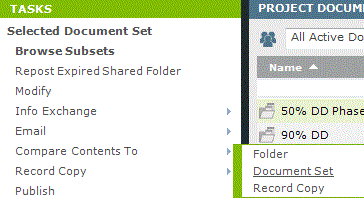
3. From the Tasks panel, click Compare Contents to >, then choose one of the following, as shown below:
-
Click Folder to compare the current document set to a project folder.
-
Click Document Set to compare the current document set to another document set in the same project.
-
Click Record Copy to compare the current document set to the files in a record copy.
4. Choose the document set, folder, or record copy that you want to compare to the baseline document set, then click OK.
5. After you select the desired item, the Compare Results window opens, showing all file changes, additions, and removals, as shown here.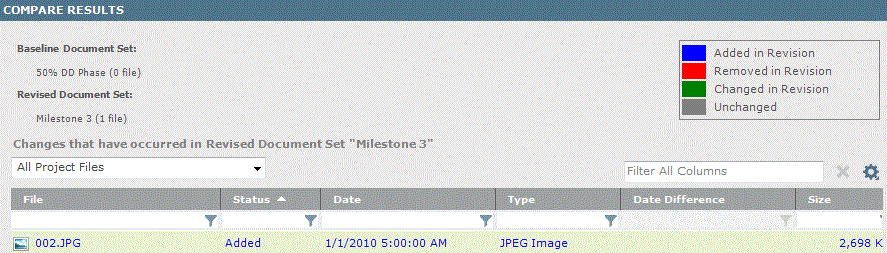
6. Optional:
-
You can switch the baseline and revised document set by clicking Swap Baseline and Revised Selections from the Tasks panel.
-
Click Create a Report to open the Create a Report dialog box to select the type of comparison report to create.
-
Click Exclude/Include Subfolders in Comparison to exclude or include the document set's subfolders in the comparison.

Table of Contents
Index
Search (English only)
Back