


Download a Pending Incoming File Transfer and File a Transmittal
Perform the following steps to download a pending incoming file transfer from Newforma Info Exchange and file a transmittal.
To download and save a pending incoming file transfer and file a transmittal
1. If you are not already there, open the Info Exchange activity center (shown below) by clicking Info Exchange from the Project Home activity center or from the Activities list.

2. Select All Incoming from the drop-down selector.
3. Select the Pending Incoming Transfer file transfer you want to download.
4. Click Receive Pending File Transfer from the Tasks panel to open the Receive Pending Transfer dialog box, as shown here:
If the Automatically Download Incoming Transfers option is selected in the Info Exchange tab of the Edit Project settings dialog box, the Acknowledge Receipt task appears instead of the Receive Pending File Transfer task. Click it to acknowledge the transfer.
If the file transfer was sent from an internal project team member via the web, a message appears asking if you want to record the transfer as an outgoing file transfer. Click No to be able to file an incoming transmittal for the transfer.
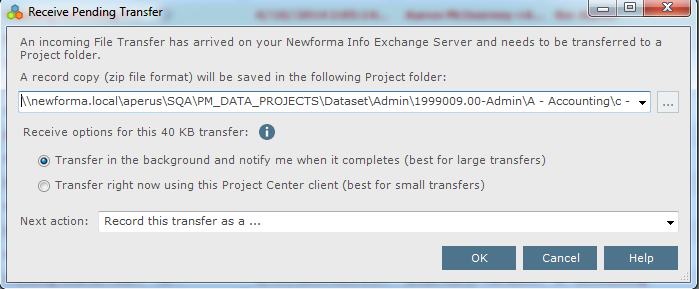
5. In the A Record Copy (ZIP File Format) Will be Saved in the Following Project Folder field, click  if you want to change the location where the record copy of the file transfer will be saved. (The default location is defined in the Edit Project Settings dialog box.)
6. Select the Record this Transfer as a option from the Next Action drop-down list and click OK to download the transfer and open the File as dialog box: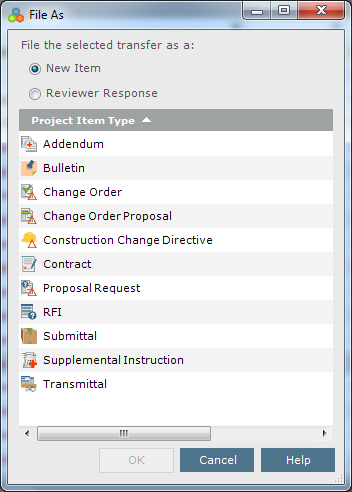
7. Select to file the transfer as a New Item, and then select Transmittal from the Project Item Type list. Click OK. The Log an Incoming Transmittal dialog box opens: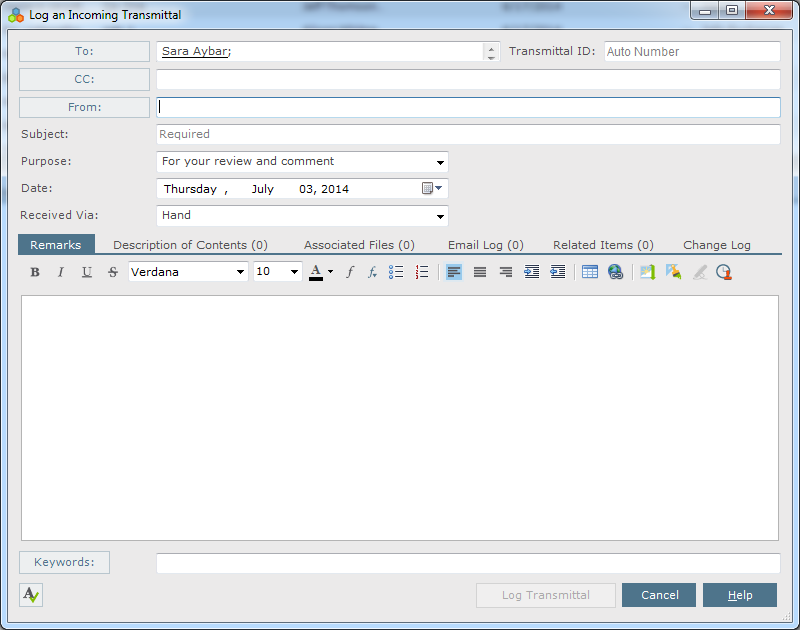
8. Fill in the required information, then click Log Transmittal to create and file a transmittal for the file transfer. If any internal project team members are subscribed to the contact who posted the files to Info Exchange, the Incoming Transmittal Notification dialog box opens so you can select the members to notify about this file transfer. Select the internal project team members that you want to send a notification to regarding this file transfer, then click OK. If you do not want to send a notification to anyone, click Skip Notification.
9. Once the file transfer is downloaded, it is listed as a Received with Transmittal transfer in the All Incoming log of the Info Exchange activity center. The transmittal is filed in the All Received log of the Project Transmittals activity center, and the record copy is saved to the designated folder.
You can also file a Received Transfer as a contract management item by clicking File As from the Tasks panel.
Expiration dates on file transfers uploaded to Info Exchange are not set until the record copy is created in a project folder, which occurs either when the recipient manually receives the transfers in Project Center or when the Project Center Server automatically downloads the file transfers (if the automatic download option is enabled).

Table of Contents
Index
Search (English only)
Back