


Edit a Document Set
Perform the following steps to add folders and files to a document set, as well as remove folders and files.
To edit a document set
1. If you are not already there, open the Project Document Sets activity center (shown below) by clicking Document Sets from the Project Home activity center or from the Activities list.
2. Select the document set you want to edit.
3. From the Tasks panel, click Modify to open the Modify Document Set dialog box, as shown here: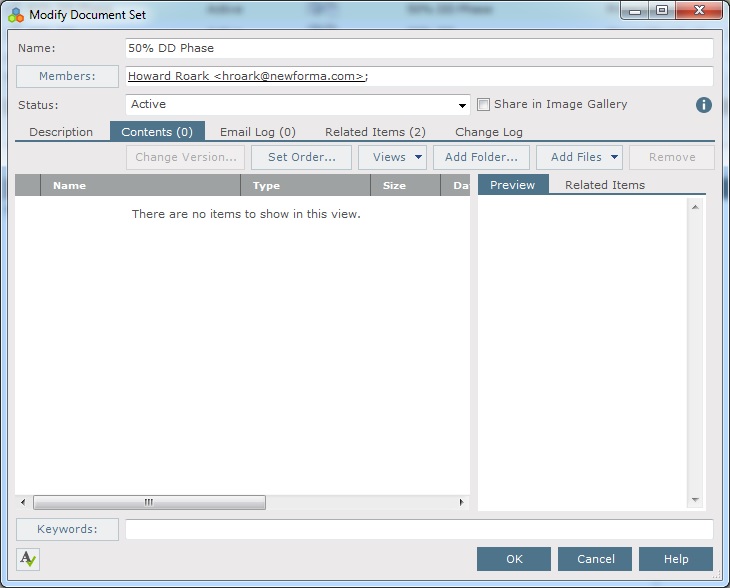
4. To add files to the document set, click the Contents tabs, then click Add Files > Another Project File to open the Add Supporting Documents dialog box.
-
If you want to add the contents of a folder, click Add Folder from the Contents tab to select a folder.
Important: Only the files in the selected folder are added to the document set. If the folder has subfolders, the files in the subfolders are not added to the document set. Each subfolder has to be added separately.
-
To remove folders and files, select the folder or file you want to remove from the document set and click Remove.
Removing files from a document set does not delete the actual source files from Windows. They are only removed from the document set.
5. Click the Description tab to edit the description, the Email Log tab to edit the email messages, and the Related Items tab to edit the related items.
6. Click OK to return to the Project Document Sets activity center when you are finished.
Table of Contents
Index
Search (English only)
Back