


Export DWF Files from Revit
Project Center cannot directly compare Revit building models. However, as shown in the Batch Compare Drawings topic, you can compare drawing sets that are exported to .DWF (but not .DWFX) from Revit 9.1 or higher using Project Center. Use Revit 9.1 or higher in order for the Revit object IDs to be properly exported to .DWF. When comparing, this allows Project Center to filter out objects that have not changed between revisions. It also allows Project Center to distinguish objects that have moved from objects that have been removed or added.
To export .DWF files from Revit
1. When publishing drawing sets from Revit, select Export DWF/DWFx:
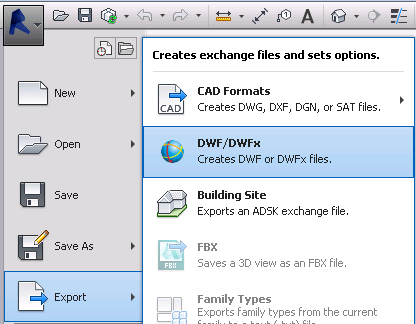
Be aware that the default file type, DWFx, is not supported by the Newforma Viewer. Make sure you select a file of type DWF.
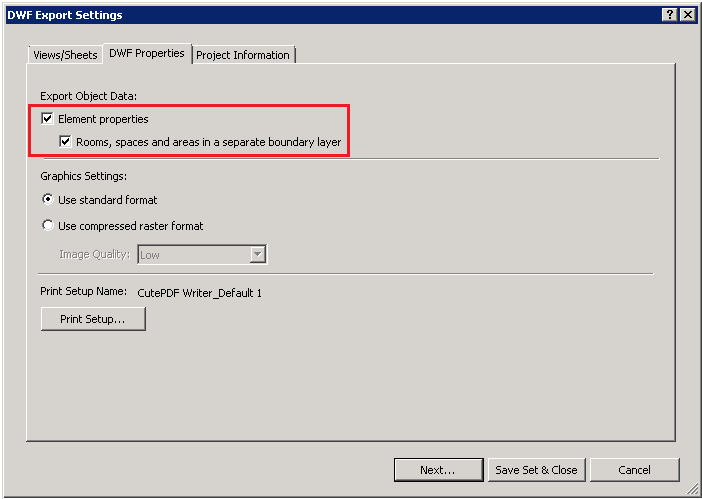
2. In the DWF Export Settings dialog box, shown below, mark the Element Properties and Rooms, Spaces and Areas in a Separate Boundary Layer checkboxes, then click Next. This allows the Revit object data in the resulting .DWF drawings to be searched in Project Center and queried in the Newforma Viewer.
3. In the Export DWF - Save to Target Folder dialog box, select Automatic - Short from the Naming drop-down list and select the Combine Selected Views and Sheets into Single DWF File checkbox.
If the checkbox is cleared, the views will be written as pages of a single .DWF and will be more difficult to compare individually. Additionally, make sure the .DWF file names that are exported are unchanged between revisions. For batch compare to work, the .DWF file names to be compared must match. You can ensure this by selecting the Short option for file naming. Also, avoid renaming your sheets between revisions.
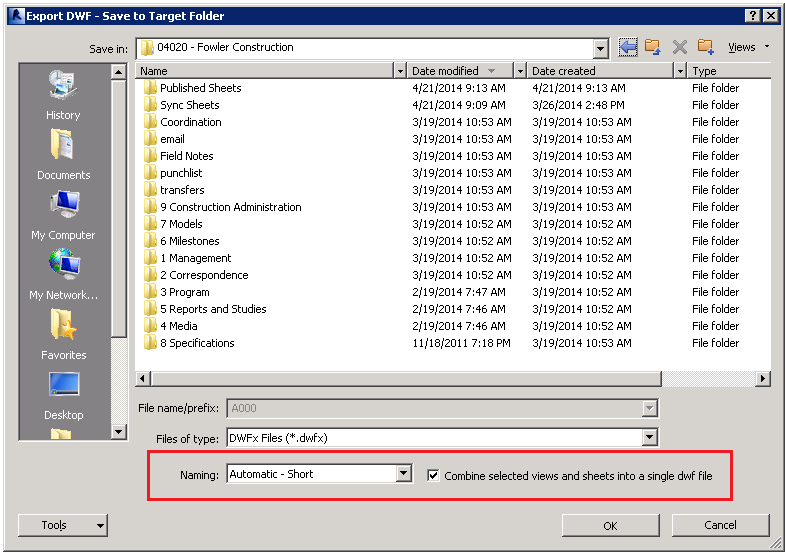
Table of Contents
Index
Search (English only)
Back