


Import Action Items from Navisworks Clash Reports
Navisworks Clash Detective identifies a list of clashes between building models. Users can export an .xml file of these clashes and use it to create action items for each clash in Project Center. Imported items include an image of the clash and its coordinates. Importing additional .xml files updates the action items. This process is different from syncing clashes using the Navisworks add-in, which allows for bi-directional syncing.
You do not need Navisworks Clash Detective installed to import the .xml files into Project Center.
We recommend adding all users who may comment on clashes as Project Center Contacts. This ensures that their comments will be imported to the action item. For additional information, please see Add Contacts to the Project Center Contacts Database.
This topic includes the following tasks:
● Import a Navisworks Clash Report
● Import an updated Clash Report
To import a Navisworks Clash Report
You must have an exported clash report .xml file from Navisworks Clash Detective to perform the import. The .xml file requires a file name to be imported. In Navisworks, work needs to be saved as a Navisworks file format (for example, NWD) before exporting the .xml file.
1. Place the exported clash report .xml file in a project folder.
2. From the Action Items activity center tasks, select Utilities > Import Navisworks Clash Report.
3. In the Select Spreadsheet dialog box, navigate to the project folder and select the .xml file. Click Open. Click OK on the Import Summary.
If not all commenters on the clashes are Project Center contacts, the Import Summary states that some comments were not added because the author is not a valid Newforma contact. Add all possible commenters as Project Center to eliminate this issue.
4. The clashes are imported as action items. The clash information appears on the Description tab. The clash image also appears on the Supporting Documents tab:
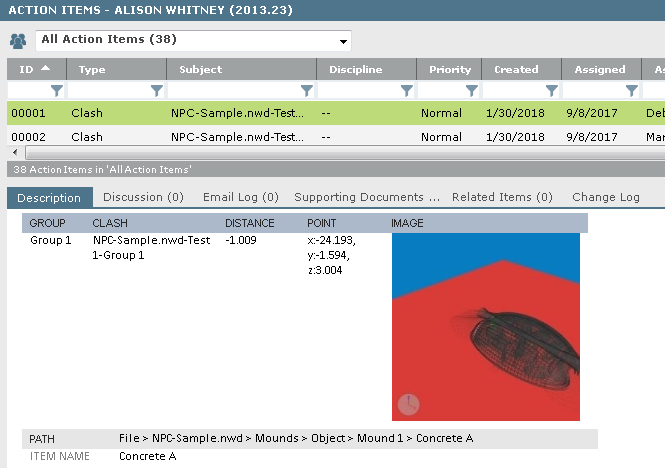
All action items created by the import are automatically assigned the Clash type. You can filter on the type as needed to view clashes.
Import an updated Clash Report
1. Place the updated clash report .xml file in a project folder.
2. From the Action Items activity center tasks, select Utilities > Import Navisworks Clash Report.
3. In the Select Spreadsheet dialog box, navigate to the project folder and select the .xml file. Click Open. Click OK on the Import Summary.
4. The Close Selected Action Items dialog box lists any existing action items for which clashes do not appear in the updated .xml file. Use the checkbox to select any action items you want to set to Closed in Project Center. Click OK to complete the import.
5. New clashes are imported and added as action items. Existing action items are updated with the latest information from the imported clash report.
Table of Contents
Index
Search (English only)
Back