


Import Record Document Packages from a Spreadsheet
This topic offers guidelines on creating a spreadsheet template in Microsoft Excel for importing existing record document packages into Project Center.
You can access the sample record document package spreadsheet template supplied with Project Center in its default location: C:\Program Files\Newforma\Twelfth Edition\Project Center\Templates\Record Document Packages Import Template.xlsx.
You must be a Project Center administrator to perform this procedure.
Record document packages fields
The import spreadsheet has the following fields:
● Name – Unique names are required.
● Discipline – Not required.
● Status - Not required.
● Distribution - Not required. If used, must be in a valid email address format or project team member name.
● Keywords - Not required. A list of keywords for the package, delimited by semi-colons (;). It must match the keyword list for the project if the user is not allowed to edit the keyword list.
● ID – GUID of the record document package. Leave blank. For internal use only.
To create an import file for record document packages and import it
1. Make a backup copy of your existing spreadsheet with the data.
2. Edit the spreadsheet and fill in the required data:
● Remove any extra rows.
● Determine how your fields map to Project Center fields (you can rearrange columns to match Project Center columns).
● To import record document packages correctly, you must format your Excel spreadsheet to the exact format as the template supplied above.
3. Copy your data columns to the Record Document Packages Import Template.xlsx file, replacing the sample columns with your own information.
4. Edit the field values based on the information given in the Record document packages fields section above. Add values to fields where required.
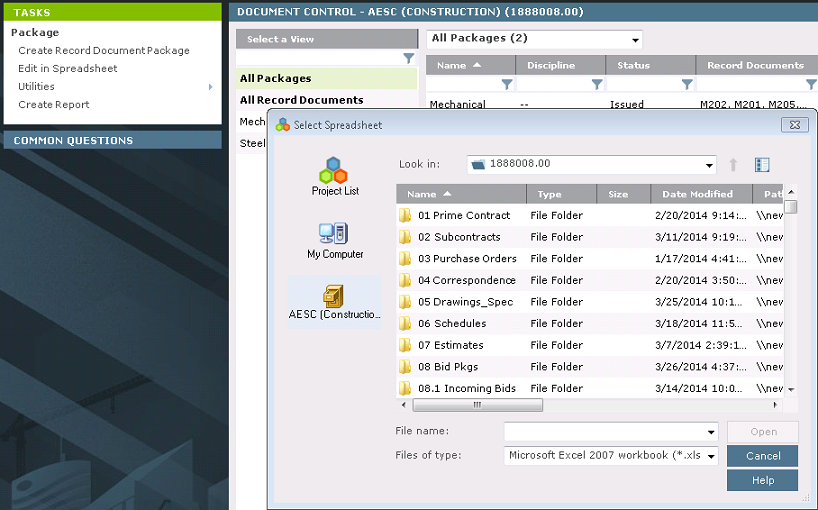
5. After you finish editing the Record Document Packages Import Template.xlsx spreadsheet, import it into a Project Center project by opening the Document Control activity center, selecting All Packages in the Select a View panel and clicking Utilities > Import Spreadsheet from the Tasks panel to open the Select Spreadsheet dialog box, as shown here. Locate the spreadsheet, then click Open.
6. After it is imported, the Import Log dialog box opens showing any import errors. Fix any errors that appear in the spreadsheet, then re-import it.
The import will not succeed until all errors are addressed.
After the spreadsheet is imported, each row in the spreadsheet becomes a record document, and the record documents appear in the appropriate categories.
Table of Contents
Index
Search (English only)
Back