


Import Supplemental Instructions from a Spreadsheet
This topic offers guidelines on creating a spreadsheet template in Microsoft Excel for importing existing supplemental instructions into Project Center.
You can access the sample supplemental instructions spreadsheet template supplied with Project Center in the following location: C:\Program Files\Newforma\Twelfth Edition\Project Center\Templates\Import_SupplementalInstructions_Template.xlsx
You must be a Project Center administrator to perform this procedure.
Requirements overview
In general, each import row will have its columns laid out in a consistent general order with the fields that are common to most objects coming first, the receive action coming second, the closing action data coming third, followed by any specific fields and some supporting fields. The following fields are common to all workflow-based contract management (CM) items:
Draft Status
If the item being imported does not have any workflow transmittals associated with it (no receive and no closing action), it must either be a draft or expected item. In these cases the following fields are required:
-
Draft Status - Must match a keyword in the workflow status list assigned to this item type in the Edit Project Settings dialog box. Only Workflow Expected or Workflow Draft keyword types are allowed for this field.
-
Expected Date - The date that this item is expected. This field must have a value if the Draft Status field was set to a keyword of type Workflow Expected.
Received Items
If the item being imported is to have a receive action created for it, the following fields are required:
-
Received Date - The date the item was received.
-
Received From - Who the item was received from.
-
Received By - Who received the item into the system.
-
Receive Action - The action for the received transmittal. This must match one of the actions defined in the keyword list that is assigned to this project for this CM item type in project settings.
-
Received Via - This much match one of the physical transfer methods in project settings, or Email or Info Exchange.
-
Receive Remarks - The remarks for the receive action.
Closed Items
If the item being imported is closed, it needs a closing action created for it. The following fields are required unless noted otherwise:
-
Closing Method - This field is required and describes what kind of closing the item had. CM items can be closed directly (Close), closed on a reply (Respond and Close), or on a send (Send and Close). The valid values for this field are closed, responded, or sent. This value will determine the type of closing transmittal action created.
-
Closed By - Who closed the item.
-
Closing Date - The date the item was closed.
-
Closing Action - The action for the closing transmittal. This must match an action defined in the keyword list that is assigned to this project for this CM item type in project settings. Note that there are different keyword list assignments for the various closing methods, so the list that this value is matched against depends on the value in the Closing Method field.
-
Closing Remarks - The remarks for the closing action.
-
Sent To - This field should only be set if the Closing Method field was set to sent. In this case it is required and should be the contact the item was sent to.
Supplemental instruction fields
The import spreadsheet has the following fields:
-
id - The ID of the supplemental instruction. This field is required if the item is not expected and the project settings for supplemental instructions are set to manual numbering.
-
sender id - The sender's ID for the supplemental instruction
-
subject - (Required) The subject of the supplemental instruction.
-
draft status - Explained above.
-
expected date - Explained above.
-
discipline - The disciplines that apply to the supplemental instruction. Separate multiple values with a semicolon. Whether all entries must already be in the discipline keyword list depends on the project settings for supplemental instructions.
-
reasons - The reasons for the supplemental instruction. Separate multiple values with a semicolon. Whether all entries must already be in the reasons keyword list depends on the project settings for supplemental instructions.
-
initiated by - Who initiated the supplemental instruction.
-
contract - The ID of the contract that this supplemental instruction applies to.
-
received date - Explained above.
-
received from - Explained above.
-
received by - Explained above.
-
receive action - Explained above.
-
received via - Explained above.
-
receive remarks - Explained above.
-
closing method - Explained above.
-
closed by - Explained above.
-
closing date - Explained above.
-
closing action - Explained above.
-
closing remarks - Explained above.
-
sent to - Explained above.
-
description - The description of the supplemental instruction.
-
internal notes - The internal notes for the supplemental instruction.
-
keywords - The keywords that apply to the supplemental instruction. Separate multiple values with a semicolon. Whether all entries must already be in the project keywords keyword list depends on the project settings for supplemental instructions.
-
email log - Existing email messages that should be included in the email log for this supplemental instruction. This field should contain full UNC paths to email files in the project folders. Separate multiple entries by a single asterisk (*).
-
supporting docs - Existing files that should be included in the supporting documents for this supplemental instruction. This field should contain full UNC paths to files in the project folders. Separate multiple entries by a single asterisk (*).
-
source descriptor - If items are being imported from another data source and will receive periodic one-way updates from that data source, then this field is a descriptor for that data source.
-
source primary key - If items are being imported from another data source this is the unique identifier for this item in the external data source. This is used to ensure any updates received from the external data source are applied to the correct item in the Project Center database.
To create an import file for supplemental instructions and import it
1. Make a backup copy of your existing spreadsheet with the data.
2. Edit the spreadsheet and fill in the required data:
-
Remove any extra rows.
-
Determine how your fields map to Project Center fields (you can rearrange columns to match Project Center columns).
3. Copy your data columns to the Import_SupplementalInstructions_Template.xlsx file, replacing the sample columns with your own information.
4. The Draft Status - Delete, Discipline - Delete, Reasons - Delete, Receive Action - Delete, Received Via - Delete and Closing Method - Delete tabs include the keyword list values for the Draft Status, Discipline, Reasons, Receive Action, Received Via and Closing Method fields. Change any of the existing values by simply typing a new value in the same cell.
For information on extending the list with additional values, please refer to Add Keyword Values to a Spreadsheet Template.
5. Edit the field values based on the information given in the Supplemental instruction fields section above. Add values to fields where required.
6. After you finish editing the Import_SupplementalInstructions_Template.xlsx spreadsheet, import it into a Project Center project by opening the Supplemental Instructions activity center and clicking Import Spreadsheet from the Tasks panel to open the Select Spreadsheet dialog box, as shown here. Locate the spreadsheet, then click Open.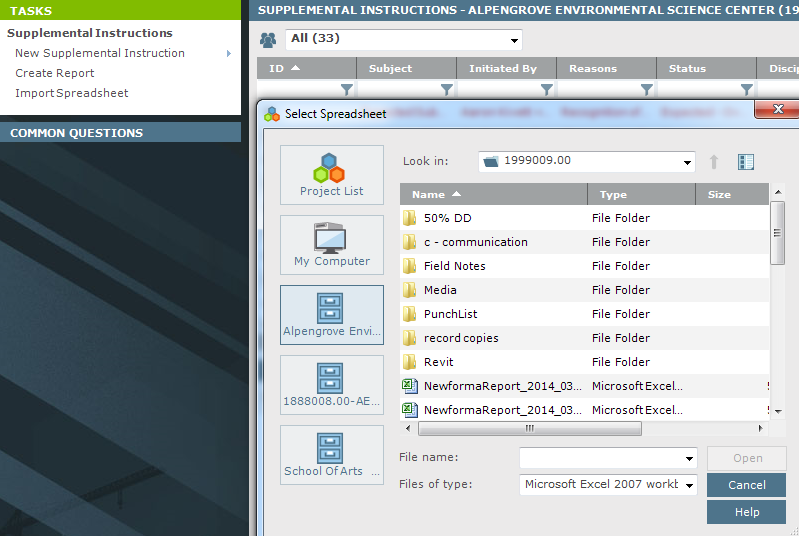
7. After it is imported, the Import Log dialog box opens showing any import errors. Fix any errors that appear in the spreadsheet, then re-import it.
The import will not succeed until all errors are addressed.
Table of Contents
Index
Search (English only)
Back