Project Center uses Microsoft Word as the editor for creating and modifying templates used as the basis for forms generated in Project Center. You can customize any Project Center form template using Microsoft Word. Project Center takes advantage of the “Mail Merge” engine within Microsoft Word to produce a customized look and feel for Project Center forms. If you have used Mail Merge, much of this information will be familiar.
This topic provides guidelines on modifying the supplied Microsoft Word templates to customize them to fit your company's needs. It contains the following sections:
● Edit the template layout in Microsoft Word
● Modify the field data that is output to the form
● View available form merge fields
● Create a new Word template from scratch
Newforma provides several Microsoft Word templates. To access them, go to \Newforma\Templates\Twelfth Edition on the Project Center Server machine. Do not modify these default templates. Before getting started, locate the folder and make copies of the templates and move them to a new folder location.
Open the template you want to modify and customize. For this procedure, we will use the TransmittalFormView.docx template as the example.
You can use Word 2007 or later to modify templates. You must save the modified templates in the same folder under their original names for Project Center to be able to use them.
The first thing to do is customize the appearance of the template's text and its layout. You should edit these properties first. To do so, simply use Word's font and paragraph editors as you would for any document to edit the text and layout as desired. You can move the sections of the template around and rearrange them as necessary.
If you want to update the headers footers, double-click in the corresponding sections.
This section explains how to change the data that is output to the form.
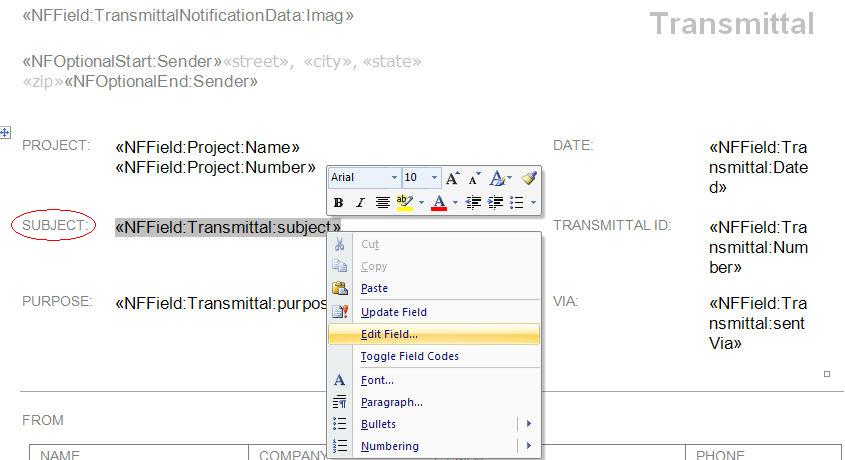
1. Right-click on any of the merge fields and select Edit Field, as shown below. In this example, we will change the SUBJECT field to the transmittal's Number by right-clicking on the <<NFField:Transmittal:subject>> merge field and selecting Edit Field to open the Field dialog box, as shown in step 2 below:
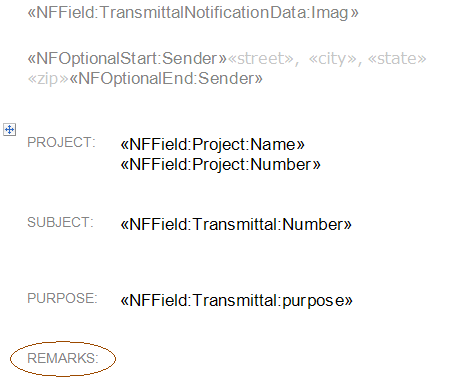
2. Click MergeField from the Field Names list, as shown below, then go to the Field Name field and change subject to Number, and then click OK. The SUBJECT field will automatically change to <<NFField:Transmittal:Number>>, as shown here:
3. Modify any other merge fields as necessary and save the template as the original name in the original location.
To view a list of available merge fields that can be used when creating a template for a particular form, click your mouse on the form viewer and press Ctrl-Shift-f. A Word document containing all of the available merge fields for the form template opens. You can copy and paste these merge fields into your template. See
https://customercommunity.newforma.com/s/article/Advanced-Word-Form-Template-References for more information.
This section explains how to add new fields to the template.
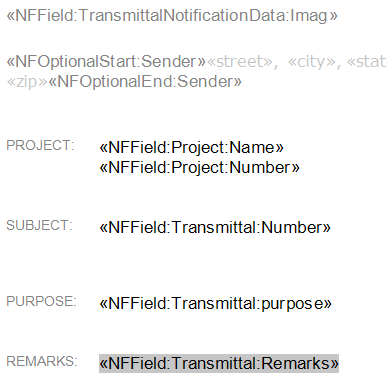
1. For this example, we will add a new field called REMARKS to the template. To do so, place the cursor in the location you want to insert the new field and enter the text ( REMARKS), as shown here:
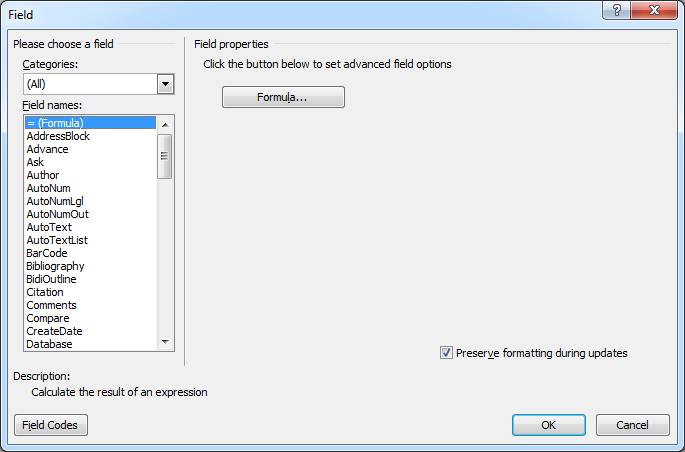
2. Click the Insert menu and select Quick Parts > Field to open the Field dialog box. Select MergeField from the Field Names list. For this example, we will enter NFField:Transmittal:Remarks in the Field Name field, as shown here, and then click OK.
The REMARKS field will now appear as follows:
3. Add/modify any other merge fields as necessary and save the template as the original name in the original location.
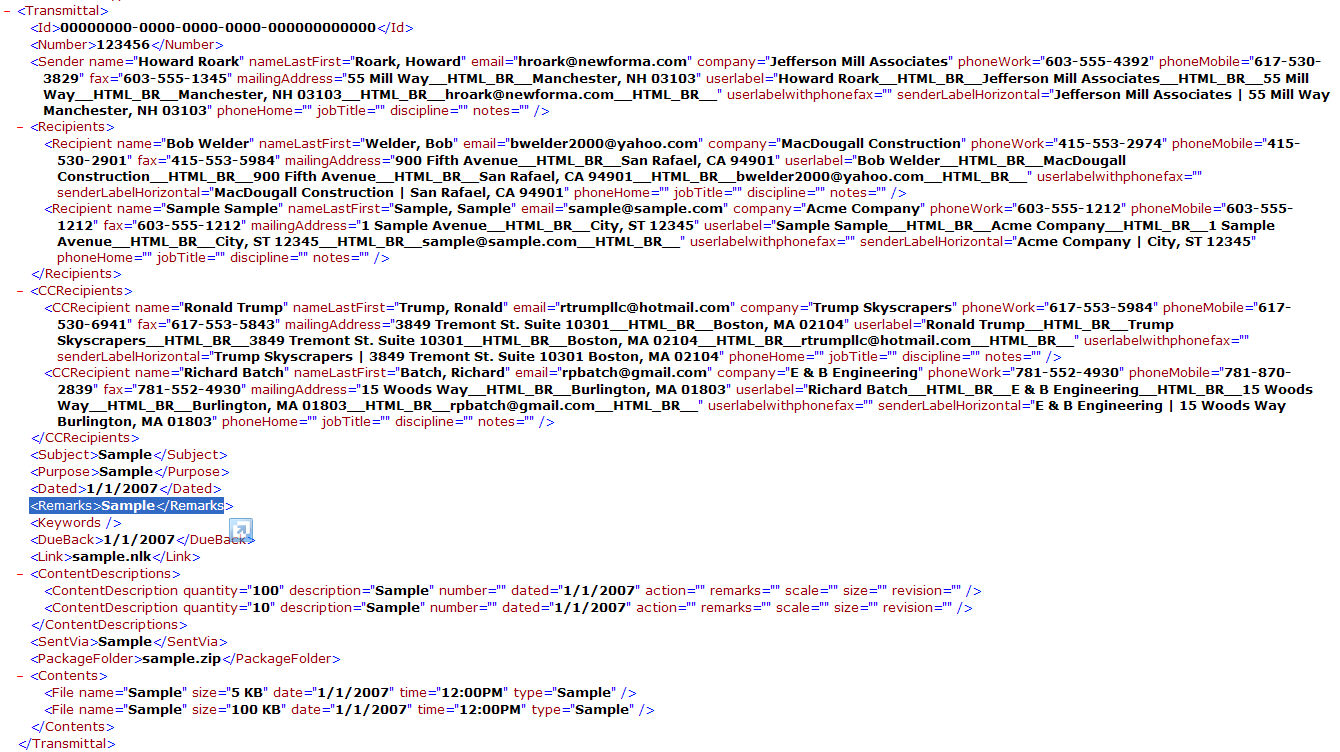
The following example shows where the data comes from. The NFField:Transmittal:Remarks merge field added in the example above will pull the data from the Remarks element (highlighted below) of the Transmittal node in the XML. Project Center generates XML output similar to the example below every time a form is generated.
A section defines a set of data that repeats for multiple records (i.e. list of recipients, RFI list, etc.) or data that may not always be displayed. Sections can be data loops and/or program logic driven. A section is defined by a merge field tagging the start and a merge field tagging the end of the section using one of the two sets of fields:
|
NFSectionStart:{SectionName} |
Loops over data for a specific section. The layout elements within the section are always shown, even if there is no data to parse out. |
|
NFOptionalStart:{SectionName OR FieldName} |
Shows data only if section or field data is present. Layout elements that should only be shown when there is data should be placed within these tags. |
When there are multiple records to show, the formatting and static elements between the two tags will be repeated until there are no more records. When placed inside of a Word table, a table row will be added for each record.

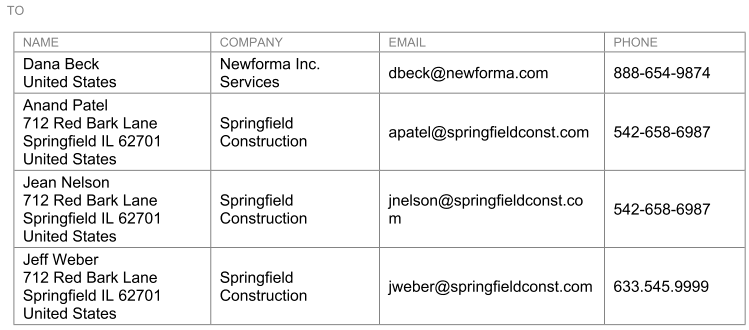
In this example, a list of recipients is generated with the Name, Company, Email Address and Work Phone Number for each recipient. A new table row is automatically generated for each recipient.
The NFSectionStart and NFSectionEnd must reside inside the first and last cell within the respective table row to correctly add rows to the Word table for subsequent records.
The above layout will result in a form that looks like this when executed:
You must close any NFSectionStart or NFOptionalStart with the respective NFSectionEnd or NFOptionalEnd field for the form template to work properly.
To avoid a blank line and/or extra space being inserted before each record, be sure the first field of a section is on the same line immediately following the NFSectionStart field and do not place a space in between.
When specifying an NFField inside an NFSection, it is not necessary to call out the entire data path already specified by the NFSection statement for each field. The path contained within the NFSection is assumed for all fields within the NFSection. In the following example, the data for the name, company, email, and phoneWork merge fields are all pulled from their respective elements in the Recipient node. There is no need to enter NFField:Recipient:Name as name is sufficient because it is enclosed in NFSectionStart and NFSectionEnd merge fields.
For a complete list and description of the available Newforma tags, refer to Understanding Newforma Field Tags.
When you have completed your edits, copy or save the form template to the Project Center Server. You can test the form template by going to the appropriate activity center (in this case the Project Transmittals activity center) and select an outgoing transmittal. Click View Form from the Tasks panel to open the Transmittal form.
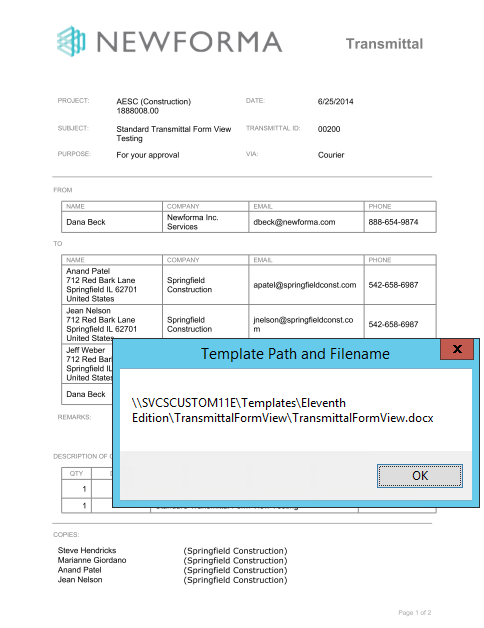
To see which template the form you opened is generated from, press CTRL-SHIFT-T, as shown here:
If you want to create a Word template from scratch instead of modifying the ones that are supplied with Project Center, perform the following steps.
1. Open Microsoft Word and create a new document.
2. Design the template using the fonts, paragraph styles, layout, and tables you want to use as the basis for your company's reports and forms.
3. When the layout of the template is finished, save it and continue with the sections above starting with Add a new merge field.