


Move a Project Folder to a New Location on the Network and Repair Broken Links
Perform the following procedures to move a Project Center project folder to a new location on the network and repair the resulting broken links.
This procedure should only be performed by a network administrator.
Important: The folder you are moving must be shared and users must have read and write permissions to it. The files accessed and used by the Project Center project must be located on your network file server so that both the Project Center Server and Project Center users have access to them and can search them. If you choose a path to a folder stored on your local machine, other users may not have access to it, and the Project Center Server will not work, because the Project Center Server needs to have access to the files.
If you do not want the files to be a part of the search process, restrict access through Windows permissions so that users do not have Read access.
For advanced users: If your system administrator has your local machine mapped on the Project Center Server, you can select a folder containing files stored on your local machine and have full search functionality.
If you want to move a large number of projects, see Move or Rename a File Server.
You can use the following procedure to locate the project folder:
To locate the project folder's current location
1. To locate the current location of the project folder, open the Project Files activity center by clicking Project Files from the Project Home activity center or the Activities list.
2. Select the project folder you are moving.
3. Click Explorer Tasks > Select in Explorer from the Tasks panel to open Windows Explorer to the exact location of the folder.
4. Close Project Center.
5. Continue with the next procedure.
To move the project folder to the new location
1. Right-click on the project folder and select Copy.
2. Navigate to the new location where you want to move the folder and right-click and select Paste to paste it in the new location.
3. Go back and delete the original folder.
4. Continue with the next procedure.
To repair the broken links in Project Center caused as a result of moving the project folder
1. If you are not already there, open the Project Center Administration activity center (shown below) by clicking Project Center Administration from the Tasks panel of the My Project Center activity center, or from the Activities list.
2. From the Projects tab, select the project containing the folder that was moved.
3. Click Edit Settings from the Tasks panel to open the Edit Project Settings dialog box.
4. Click the Project Folders tab. Select the folder that was moved. It is indicated with a broken link icon  , as shown here:
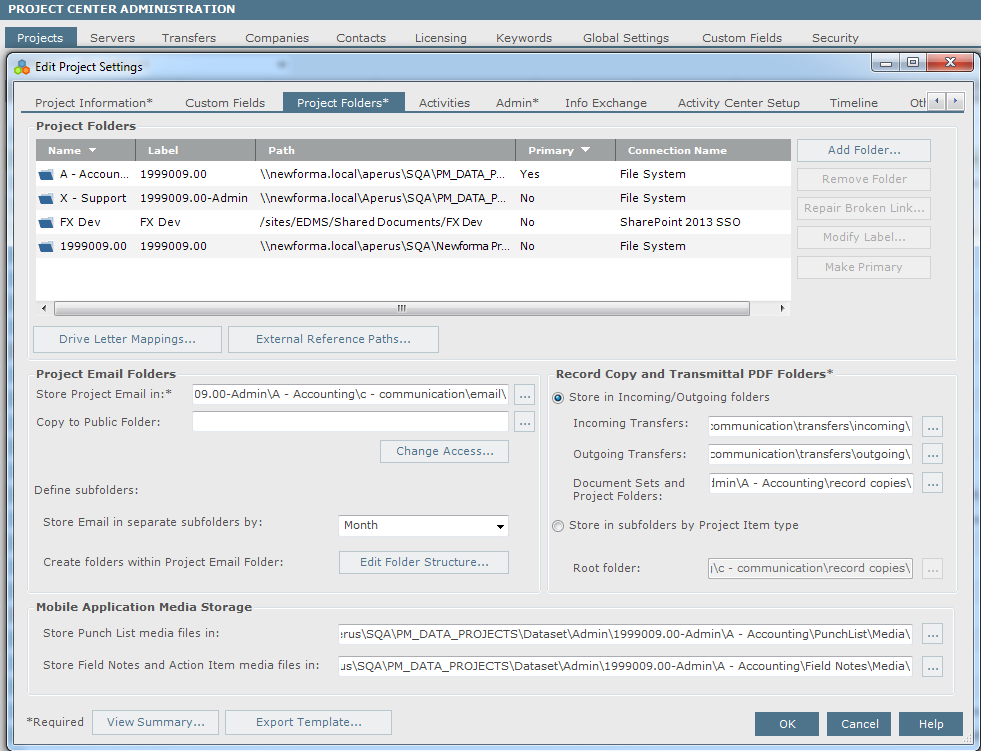
5. Click Repair Broken Link.
6. In the Choose a Folder dialog box, locate the folder in its new location and click OK.
7. When the re-path progress dialog box appears, click OK. The links are now fixed.
8. Close the Edit Project Settings dialog box and open the project to use it.
Important: If you repin this project to a different Project Center Server after performing this procedure, make sure the new Project Center server is a replication peer of the original server, otherwise the existing project team members will not have Info Exchange accounts on the new server. To give the project team members accounts to access Info Exchange after you repin a project to a server that is not a replication peer, select them from the Project Team activity center and click Modify from the Tasks panel to open the Modify Project Team Member dialog box. Mark the Allow Web Access to This Project on Your Info Exchange Server checkbox for each user.
Table of Contents
Index
Search (English only)
Back