


Set up the BIM 360 Connector for Workflow
For information on the connector workflow, please see BIM 360 to Project Center Workflow for Submittals and RFIs.
Have questions? View the BIM 360 Connector for Workflow FAQs in the Customer Community.
The BIM 360 Connector for Workflow to Project Center allows BIM 360 users to send submittals and RFIs directly to Project Center for review by the design team. When the design team completes their review, the submittal or RFI is returned directly to BIM 360, allowing construction and design teams to work where they are most efficient without requiring anyone to double-enter data and to ensure all information is captured as part of the project record.
This topic outlines the requirements and steps for setting up the BIM 360 Connector for Workflow in your Project Center environment:
● Create the Access and Secret key
● Configure the BIM 360 connector
Requirements
● Project Center 12.4.5 or higher with Newforma Link installed, including:
● Azure Active Directory
● Application Proxy
● A new Newforma Project Center Server license with BIM 360 enabled. Without this updated license, the BIM 360 connector options will be disabled in Project Center. Contact your Newforma Account Manager for an updated license.
● The Newforma API must be installed. The API version must match the Project Center version.
● Connector portal credentials. These will be provided by Newforma.
Setup in BIM 360
1. In BIM 360, select the project you want to connect to Project Center.
2. Make sure the design team member who will receive the submittals and RFIs in Project Center is on the BIM 360 project team. This user will be selected as the Ball in Court assignee when sending a submittal or RFI to Project Center. Note that the user can be set up as an email group - for example, a distribution list for the Contract Management team. You can also request that the contractor add everyone on your team that needs to be notified about an incoming submittal or RFI to the BIM 360 project as well.
Setup in Project Center
1. Update Project Center to 12.4.5 or higher.
2. Install and configure Newforma Link with Azure Active Directory and Application Proxy.
3. Install the Newforma API and set up the API Service account.
4. Once the API Service account is created, send an email to support@newforma.com and include the email address of the service account. The subject of the email should be "BIM 360 Connector Service Account".
5. Obtain the new Project Center Server license and Connector portal credentials from Newforma.
6. Apply the updated license file to the Project Center Server.
7. Make sure the design team member who will receive the submittals and RFIs in Project Center is on the Project Center project team. This user will be selected as the Ball in Court assignee when sending a submittal or RFI from BIM 360 to Project Center. Note that the user can be set up as an email group - for example, a distribution list for the Contract Management team.
Note that if you are setting up the Ball in Court assignee as a generic account, you may want to set up a rule for that account's mailbox to auto-forward all mail to a specific group so that multiple users can receive the email notification.
8. Optional: Add users who will be sending submittals and RFIs from BIM 360 to the Project Center project team. While not required, if the sender is not on the project team, the recipient's name appears in both the To: and From: fields.
Create the Access and Secret key
Support will let you know when you can create the Access and Secret key. This information is used by external services to make authenticated calls to the API on your Project Center servers.
1. Log onto https://newforma.cloud with the API Service account that was created for the connector. When prompted, choose the closest geographic region.
2. Click
the dropdown arrow next to the account name in the upper-right corner
of the page and select Generate Service
Access Key:
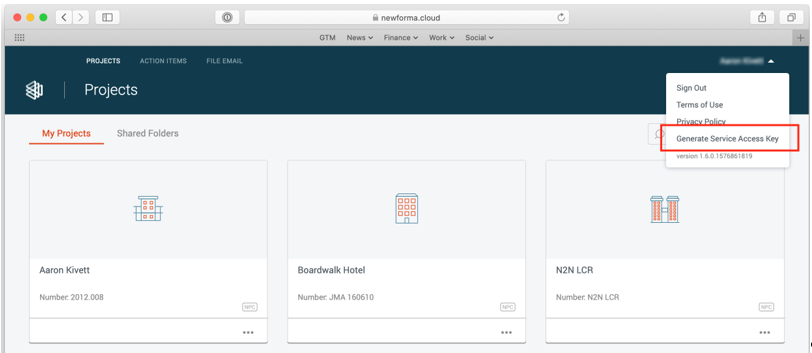
If you do not see the option to generate the access key, please contact support@newforma.com.
3. Copy and paste the Access key and Secret and save them in a safe place. The key cannot be recovered, only replaced, after leaving this screen.
Configure the BIM 360 connector
1. In Project Center, select the project you want to connect to BIM 360.
2. Edit Project Settings and select the Admin tab.
3. Click
Configure:
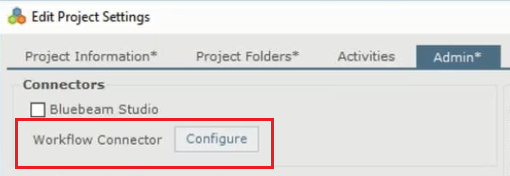
If the button is not enabled an updated License key with BIM 360 enabled is not installed on the server.
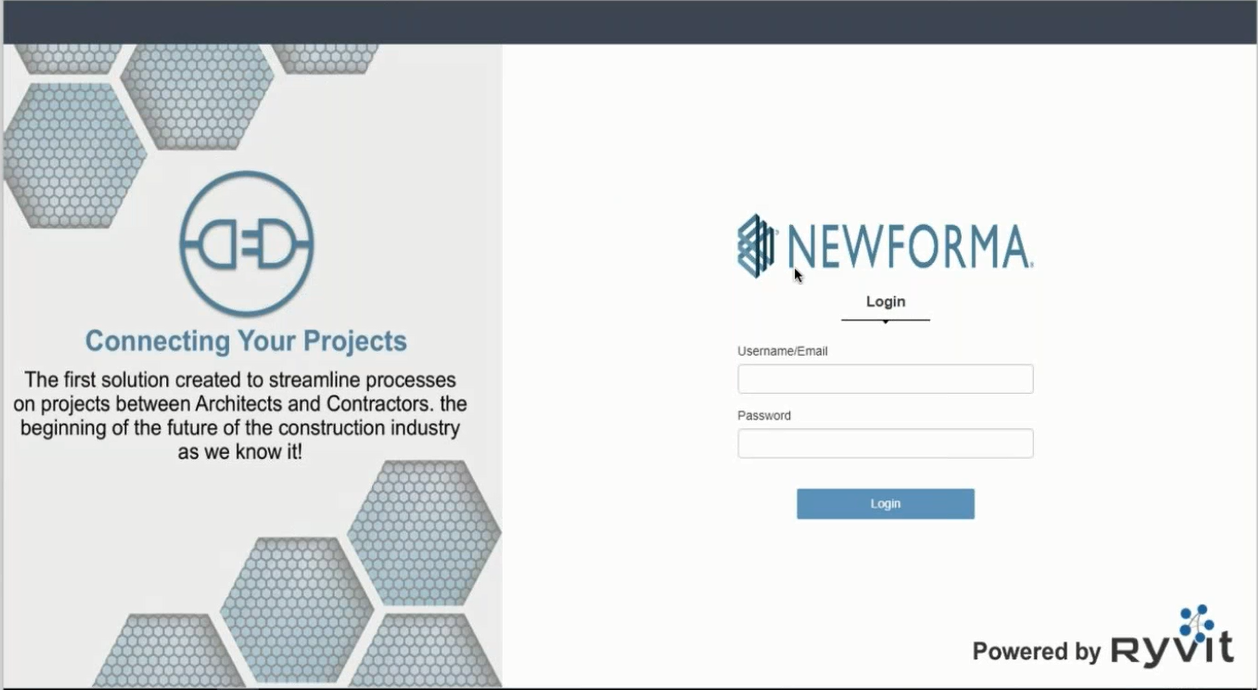
4. The connector
portal opens. Enter the Connector portal credentials provided by Newforma:
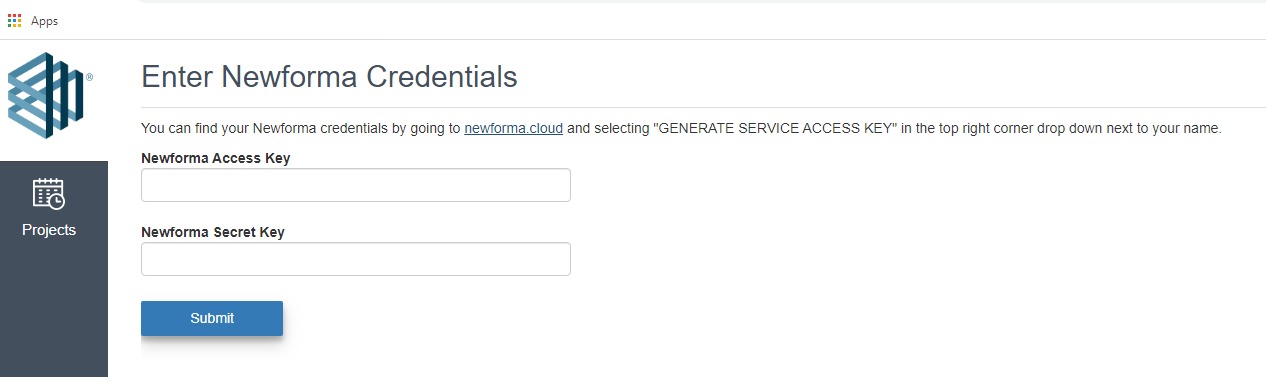
5. On the
Enter Newforma Credentials screen,
enter the Newforma Access Key
and the Newforma Secret Key. These
are the keys you generated during the Create
the Access and Secret Key process above:
6. The BIM 360 login page appears. Log in with the credentials of the user you added to the BIM 360 project above during BIM 360 setup. This is the user who will receive submittals and RFIs in Project Center.
7. A list of BIM 360 projects the user has access to appears.
8. Select the project you want to link to your Project Center project.
9. On the Configure Project Connection page, map the submittal response values between Project Center and BIM 360. you can modify the mapping later if needed.
10. Save to connect the projects.
Table of Contents
Index
Search (English only)
Back