


Stamp Files
Perform the following steps to stamp a file in the Newforma Viewer. Scroll to the bottom for information on word wrapping.
To stamp a file
1. If you are not already there, open a file in the Newforma Viewer.
2. Click Markup Drawing from the Viewer Tasks panel to access the Markup Tools panel.
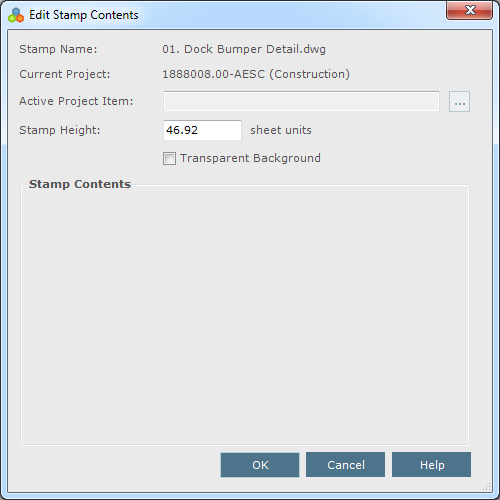
3. Click the  icon to open the Select DWG Stamp dialog box. Locate the .DWG file to use as the stamp and click Open. The Edit Stamp Contents dialog box opens, as shown here:
-
The name of the file appears in the Stamp Name field.
-
The name of the project appears in the Current Project field.
-
If the stamp is linked to a related item (such as an action item, submittal, transmittal, or RFI), it is automatically listed in the Active Project Item field. If it is not linked, you can link it to a Project Center item by clicking the
 button to locate and select the item.
4. The Stamp Height value comes from the size of the entities in the .DWG stamp file. You can edit it.
5. Mark the Transparent Background checkbox if you want to make the background of the stamp transparent.
6. Edit the information in the Stamp Contents section as necessary.
7. Click OK to open the stamp. Move the stamp to the desired location in the drawing, then click to place it in position.
8. You can scale the stamp by dragging any of the corners of the stamp. If the stamp gets fuzzy due to zooming and scaling, select the stamp, click the Edit Stamp Contents task to re-open the Edit Stamp Contents dialog box, mark the Touch Up Stamp checkbox, then click OK.
You can find stamp examples in C:\Program Files\Newforma\Twelfth Edition\Project Center\Templates.
Word wrapping
For information on word wrapping in stamps, see Define Text Regions in DWG Stamps to Allow Word Wrapping.
Table of Contents
Index
Search (English only)
Back