


Transfer Files from Windows Explorer to Info Exchange
Perform the following steps to create an Info Exchange file transfer directly from Windows Explorer.
To create a file transfer from Windows Explorer
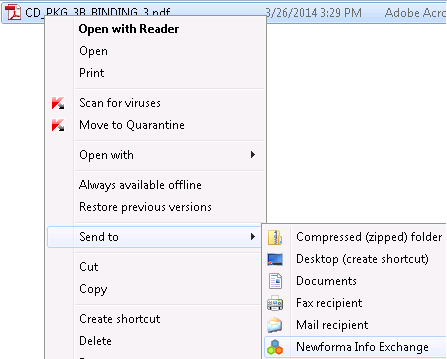
1. Right-click on a file in Windows Explorer, then select Send to > Newforma Info Exchange from the popup menu, as shown below:
2. In the Send File Transfer dialog box, shown below, select the project for which you want to create a transfer.
![]()
3. Click the To: button to open the Choose a Project Team Member dialog box and select recipients for the file transfer. You can also type email addresses directly in this field.
4. Click the CC: button to open the Choose a Project Team Member dialog box and select any additional recipients as needed.
5. Enter a subject for the file transfer.
6. Enter any necessary information about the transfer on the Remarks tab.
7. The file you selected in Windows Explorer appears on the Files to Transfer tab as shown below. You can add additional files by clicking Add Files to select individual files, or Add Folder to select an entire folder.
![]()
8. Click on the Options tab, shown below, and set the transfer options as needed.
![]()
Note that it is not possible to request a notification that all users have downloaded the files when creating a transfer via Windows Explorer. To configure this option, log into Project Center and create the transfer.
9. Click OK to transfer the files. The files are transferred and the recipients receive a notification email similar to the following:
![]()
If the project is configured to require a transmittal for every outgoing Info Exchange transfer, the Create an Outgoing Transmittal dialog box appears after you click OK.
Table of Contents
Index
Search (English only)
Back