


Upload to Extranet Sites Using a Manifest File
The Manifest File option is available beginning with 11.5.
The use of a third party project extranet can often be stipulated by the client or contractor as the mechanism for issuing or sharing project documents. Many of these extranets allow the batch upload of documents and their metadata by making use of a "manifest file" containing relevant information about the documents being issued (title, number, revision, etc.).
Project Center Administrators can configure the Document Control activity center to package the record documents (files) being issued and create a manifest file containing the metadata required by the extranet. Additionally, the specified extranet can be automatically opened in your browser ready for you to upload the files.
Importantly, issuing your record document revisions via Newforma Document Control ensures that you maintain a local record and audit trail of all document issues on the project and are not relying solely on a third party provided extranet to provide you with that record.
This topic covers the following processes:
● Set up manifest file templates (Administrators only)
● Set up the project extranet definition in Project Settings (Administrators only)
● Issue record documents and generate the manifest file
To set up manifest file templates
Manifest files use a template to generate their content. Newforma provides sample manifest files for some of the more familiar extranet sites. However, you can create a template for any extranet site that imports metadata and project files. Manifest files are stored in the following location on the Newforma Project Center Server:
C:\Newforma\Templates\Twelfth Edition\Record Document\Manifest
To customize the templates, you can use the Reporting Field Reference Guides to define which Project Center fields you need data from. Simply copy an existing template or create a new Excel template and place it in the Manifest templates folder mentioned above. Templates in the Manifest directory appear in the Project Settings > Activity Center Setup > Document Control > Manifest File Template drop-down.
Set up the project extranet definition in Project Settings
Create an electronic drag and drop method
Part of the manifest file workflow is automatically displaying the extranet site users will be uploading files to. The extranet location can be defined in Project center as a drag and drop destination. Once defined, the extranet site automatically appears on the desktop when users issue record documents.
Perform the following steps to define an electronic drag and drop method for the extranet site.
1. Select the appropriate project from the Project Center Administration activity center Projects tab, then select Edit Settings from the Tasks panel.
2. Select the Other Projects Lists tab in the Edit Project Settings dialog box.
3. Select the Add button in the Electronic Transfer Methods section at the bottom of the dialog box.
![]()
4. In the Drag Drop Transfer Method dialog box, enter a name for the extranet site drag and drop method.
![]()
The name you enter here is the name that appears in the Send Via drop-down and Tasks lists.
5. Enter the URL address for the extranet site in the Address field.
6. Select OK to close the Drag and Drop Transfer Method dialog box.
Select the manifest file template
Perform the following steps to select the template used to generate manifest files for the project.
1. Select the Activity Center Setup tab in the Edit Project Settings dialog box.
2. Select Document Control in the Select Activity Center list.
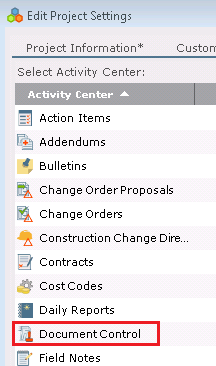
3. In the Manifest File section, select the appropriate template from the Template drop-down list.
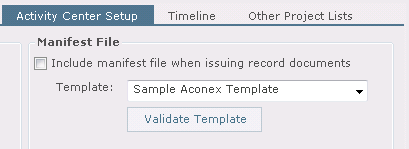
4. Select the Include Manifest File When Issuing Record Documents checkbox.
The checkbox is not active until you select a template.
5. Select Validate Template to ensure all fields in the template are accurate.
6. Select OK to save your changes.
Issue record documents and generate a manifest file
Perform the following steps to issue record documents and generate a manifest file.
1. In the Document Control activity center, select the record documents you want to issue.
2. Select Issue Selected Record Documents in the Tasks panel, then select Latest Revision or Select Revision.
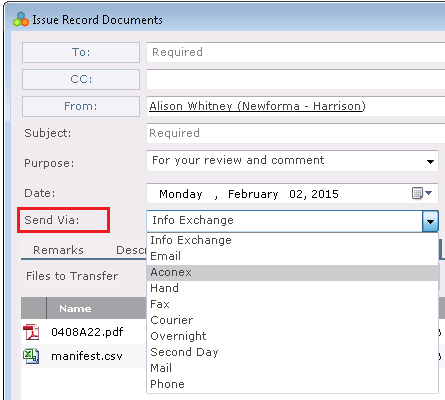
3. Complete information in the Issue Record Documents dialog box as needed. Select the drag and drop location defined for the extranet site from the Send Via drop-down list.
The manifest file is generated when the Issue Selected Record Documents task is selected. If you make any changes to the Associated Files, you will be prompted to regenerate the manifest file.
The manifest file appears on the Associated Files tab in the Issue Record Documents dialog box, in the record copy created for the issuance and in the list of files in the email notification.
The manifest file does not appear on the Description of Contents tab or the Transmittal form used in the email notification.
4. Select Create and Transfer to issue the record documents.
5. The extranet web site automatically launches in your default browser window, and the Drag and Drop to Project File Transfer Site dialog box appears.
![]()
6. Upload the files and manifest file to your extranet site.
All extranet sites have varying instructions on how to upload files and the metadata required for the files being uploaded to the site. Please reference the extranet site for instructions on uploading.
● If the extranet site allows uploading of files and manifest files to the same location and supports drag and drop, you can simply drag the file image from the Drag and Drop to Project File Transfer Site dialog box to the drag and drop target location on the extranet site. Individual files (the files are not zipped) and the manifest file are loaded onto the extranet site.
● If the extranet site requires files be located in separate locations or if you need to edit the manifest file on the web site itself, the best practice is to drag and drop the files to a local folder. The files will be available for you to use when uploading to the extrantet.
There is an API available to link record document issuance with metadata to an extranet site. For more information, contact Newforma Services at services@newforma.com.
Table of Contents
Index
Search (English only)
Back