


Contracts Quick Reference Guide
This topic provides a reference for the Contracts activity center.
Click here to download a PDF of the reference guide.
Purpose
The Contracts activity center is where you create contract records, contract documents, track contract workflow, and see a summarized view of the full Contract financial status for quick analysis.
Audience
Internal project managers or administrators with Financial Manager license permissions in Newforma Project Center.
Key Features
● Create and track contract records and provide cost code-level of detail for contract commitments.
● Create contract documents ready for signature using customizable Word templates.
● Track the complete contract workflow process including forwarding contracts for review or signature, recording reviewer responses, and sending and closing (finalizing) contracts.
● View summarized information of the contract’s financial status, including all change orders and potential change orders,and quickly drill-down into the related documents that compose the financial forecast.
Tasks Covered
● Forward a contract for review or signature
● Link the executed contract file to the contract
● Close (finalize) the contract
To create a contract
1. To create a new contract record go to the Contracts activity center and click New Contract > Create Contract in the Tasks panel to create a new contract originating with your company.

2. In the Create Contract dialog, fill in any required fields such as Subject, ID, To Company, and From Company. Select the correct form template and fill in any other details as desired.
Three default form templates are provided. Each can be customized and/or you can create your own templates.

3. Click the Schedule of Values tab to add commitment items to the contract that you want to track. Click the Add New button to add a new row, fill in the information as needed, and repeat the process for each line you want to add. Cost Code is a required field. Use the Cost Codes activity center to add or import cost codes from an Excel spreadsheet.

If you are creating a contract record simply to track a log of contract values, this is the only tab needed. The remaining steps in this section are only used if you are generating the contract documents for signature.
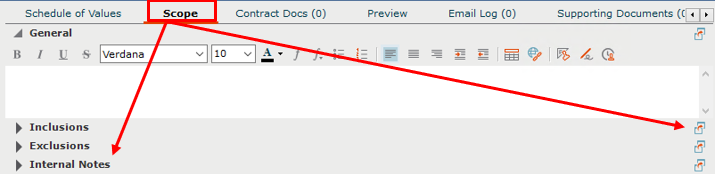
4. Click the Scope tab to describe the work included in the contract, as well as other general information. Click the ![]() button to the far right of each section to enlarge the field. This information merges into the contract document (except for Internal Notes).
button to the far right of each section to enlarge the field. This information merges into the contract document (except for Internal Notes).
5. Click the Contract Docs tab to add specific revisions of record documents from the Document Control activity center. These are the drawings, specifications, and contract exhibits that form the legal basis of the contract.

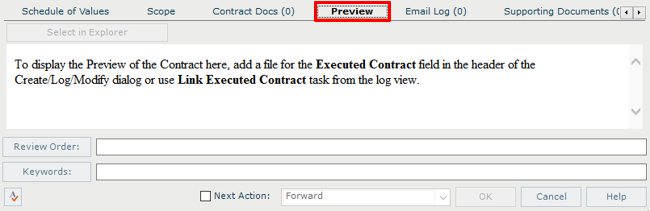
6. Click the Preview tab to see a preview of the final contract document.
7. Click OK to save the contract.
To merge the contract document
Once you have created the contract record, you can optionally create the contract document to be sent for signature using one of the default form templates, or using a form template you have customized or created.
1. Before you can create the contract document, the correct form template must be selected in the Form Template field on the contract record.

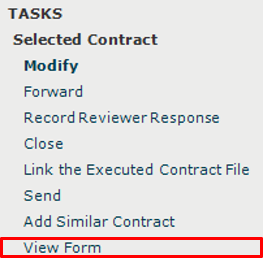
2. Select the contract from the log view and click View Form from the Tasks panel.
3. The resulting merged contract document appears. You can Print or use the Save As button to save the file. If you are ready to take the next step, select the Next Action checkbox and select Forward (for review or signature). This creates a PDF of the contract and attaches it to the Forward Contract workflow step.
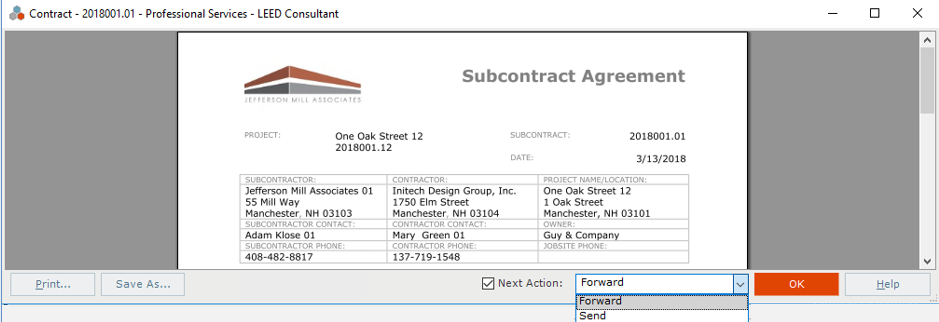
Select Send to choose how to send a .PDF file of the contract and whether to record a transmittal for it.
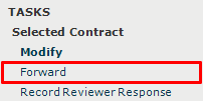
To forward a contract for review or signature
Once the contract document is created, saved in your project files, and linked to the contract record, you can use the Forward task to send for review or send for signature.
1. Select the contract in the log and click on Forward in the Tasks panel.
2. The Forward Contract dialog box opens. Edit any information as needed. Add any files to the Files to Send tab as needed and select the forwarding method from the Send Via drop-down list. Click Forward to forward the contract.
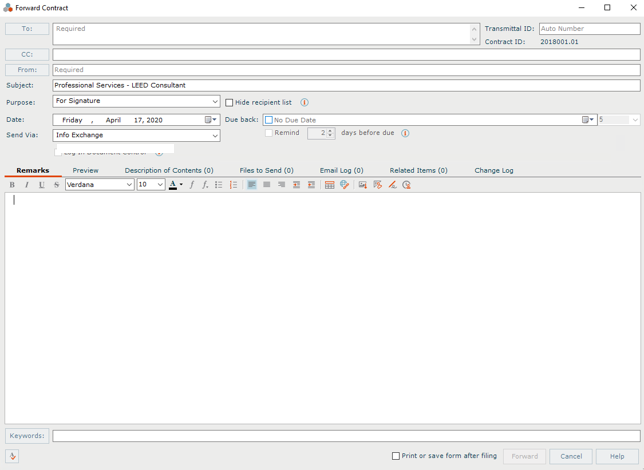
3. If Info Exchange was chosen as the forward method, fill out the Info Exchange options and click OK to complete the transfer.
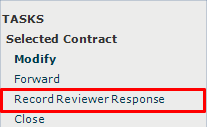
To record a reviewer response
When the reviewer response is received you can record it as a workflow action for the contract. Review responses can originate from Info Exchange, Email, mail, internal staff, etc.
1. If internal staff is recording their review, select the contract, click Record Reviewer Response from the Tasks panel, then go to step 3 below.
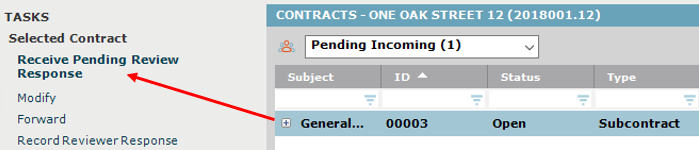
2. If the response is coming from Info Exchange, it will be in the Pending Incoming category. Select the incoming response and click Receive Pending Review Response to receive it.
3. The Record Reviewer Response for Contract dialog box opens. Review the information, then click Record Response.
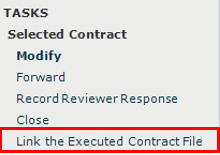
To link the executed contract file to the contract
1. Once the contract is finalized and signed you can link the signed, scanned file to the contract record. Select the contract in the log and click Link the Executed Contract File in the Tasks panel.
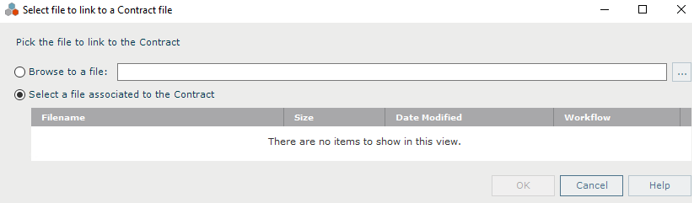
2. In the Select file to link to a Contract file dialog box, browse to find the file or select it from the files in the window, then click OK.
3. The file appears on the contract record in the Executed Contract field and appears on the Preview tab for quick reference.

Optionally, instead of using the task to do this, you can click the button to the right of this field and browse to find the file.
To close (finalize) the contract
After the contract is reviewed and contract documents have been signed and saved, you can take the next workflow action to close (finalize) the contract to indicate that the contracted work can begin.
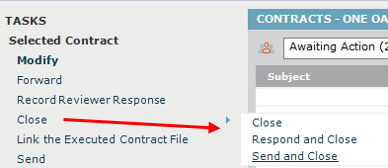
1. Select one of the following three options for closing depending on whether you originated the contact or if you received it and need to send it back to the originator:
● Close – Use this option if you just want to finalize the contract and there is no need to send it to anyone.
● Respond and Close – Use this option if you received the contract from someone else and you want to respond back to who you received it from and mark it finalized.
● Send and Close – Use this option if you want to send the contract to someone other than the originator and mark it finalized.
2. The Select Files to Send dialog box opens. Select the contract document(s) and/or other files to send, select the method (Info Exchange or Email), then click OK.
3. The Send and Close Contract dialog box opens. Fill out the To field. If desired, use the button in the Remarks section below to copy the review remarks into the Remarks field and/or edit as needed. Fill in any other information and click Create and Transfer.

4. If Info Exchange was chosen as the send method, fill out the Info Exchange options and click OK to complete the transfer.
Table of Contents
Index
Search (English only)
Back