


Column Sorting, Filtering, and Grouping
This topic explains how to sort, filter, and group items in activity center logs in Project Center.
● Sorting
● Grouping
Sorting
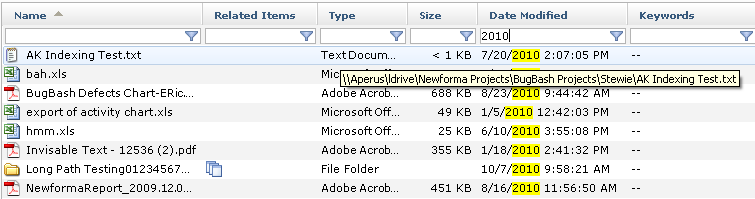
● Click a column header to sort the list of items in a log alphabetically based on the selected column. You can also choose the direction of the sort by clicking the column's arrow (up or down). In the following example, the list will be sorted based on the Name column, in ascending order, since the arrow is in that column, and it is pointing up. (If the arrow was pointing down, the list would be sorted in descending order.)

● Project Center supports three levels of column sorting. In the example above, if you want to sort by the Name, Size, and Related Items columns in that order, click the Related Items column first, Size second, and then Name last.
● You can customize the column placement by dragging and dropping the column headers to new positions in the header row.
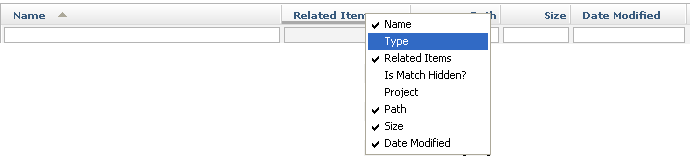
● You can list and de-list columns by right-clicking on any column header and selecting the column names to list them (indicated by a checkmark), or de-list them by clearing the checkmarks. In the following example, the Type column was de-listed by right-clicking on any column header and selecting it to clear the checkmark.
● Reports reflect both which columns appear in the log, and the order in which they appear in the log.
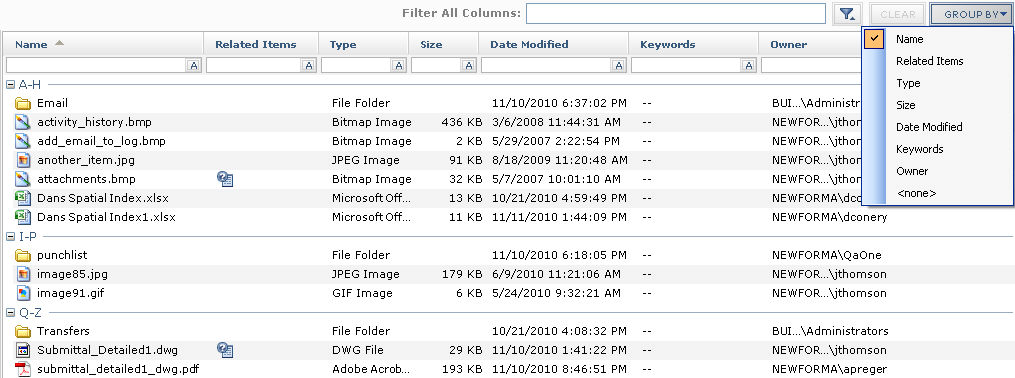
● Some activity centers have a Group By button that enables you to group by any of the columns listed in the activity center. In this example, if you wanted to group the list of files by name, select Name from the drop-down list. The files will be grouped into separate sections alphabetically by name.
Filtering
● Use the Filter All Columns field to filter by any text that appears in any of the columns. For example, if you know the subject (or part of the subject) of the item that you are searching for (or the discipline, priority, assignee, etc.), enter at least part of the text in this field. The list of items updates automatically as you type. For example, if the item you are searching for has the number 30 somewhere in one of the columns, enter 30 in this field. The list will be narrowed down to only items that have the number 30 somewhere in one of the columns.

Filter All Columns does not search email messages or files.
● You can filter columns by entering text in the fields below the column headers. In the following example, the Subject column is being filtered for the letters su. Only items with the letters su in the subject will remain in the list. All text matches will be highlighted.

● You can use negative filters. If you want to remove items that contains a letter or word, enter a minus (-) sign before the text, as shown in the following example. In this example, the submittal with the subject First Submittal (as shown above) is removed when -f is entered in the Subject column filter field.

● You can filter by multiple columns to narrow down the list of results.
● Click Clear to clear all filters and list all items.
● Click the  button to remove and re-insert the filtering row.
● You can use asterisks and question marks as wild cards when filtering. For example:
To find all files named foundation, enter:
foundation.*
To find only a drawing (.DWG) file named foundation, enter:
foundation.dwg
To find files that have D as the first letter of the extension, followed by exactly two letters (such as .DWG, .DGN, .DOC, .DXF, .DWF, etc.), enter:
*.d??
● Matching text is highlighted when you enter text in the Filter All Columns field or the column headers, as shown in the following two examples:

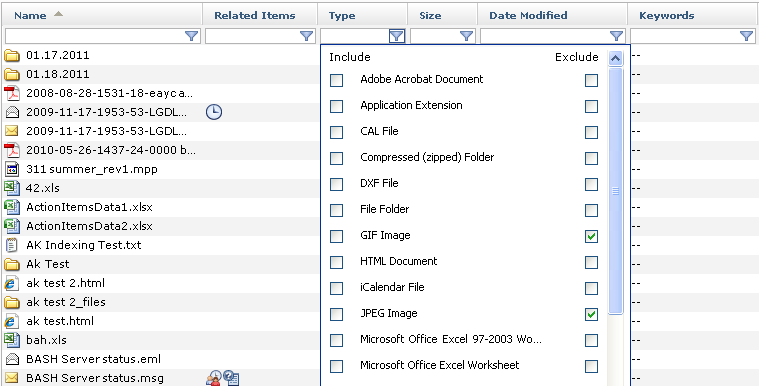
● Similar to negative filtering above, you can click certain  icons (depending on the column) to exclude certain item types from the list. In this example, if you wanted to remove all .GIF and .JPEG files from the list, mark the GIF Image and JPEG Image checkboxes, as shown here:
If you choose to both include some items AND exclude other items, items that fit both parameters will NOT be displayed, as the exclude takes precedence.
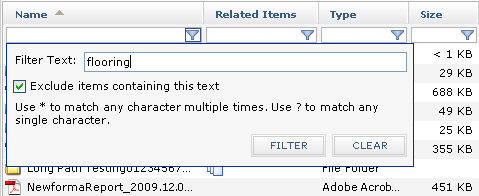
● You can click certain icons (depending on the column) to exclude certain text from the list. In this example, if you wanted to remove all items containing the text flooring in the name, enter flooring and mark the Exclude Items Containing this Text checkbox:
● You can click certain icons (depending on the column) to filter items by dates:
● You can click certain icons (depending on the column) to filter files by size:
● You can double-click in all filter fields under column headers to type in your own filtering text. In this example, the Date Modified drop-down list would normally give options such as Last Week or Next Month, but by double-clicking in the field, you can enter an exact date.
Grouping
Use grouping to group items in an activity center log into various categories by column. When you click the Group By button, all columns from the log are listed, whether they are currently displayed or not. You can group by any of the columns, one at a time.
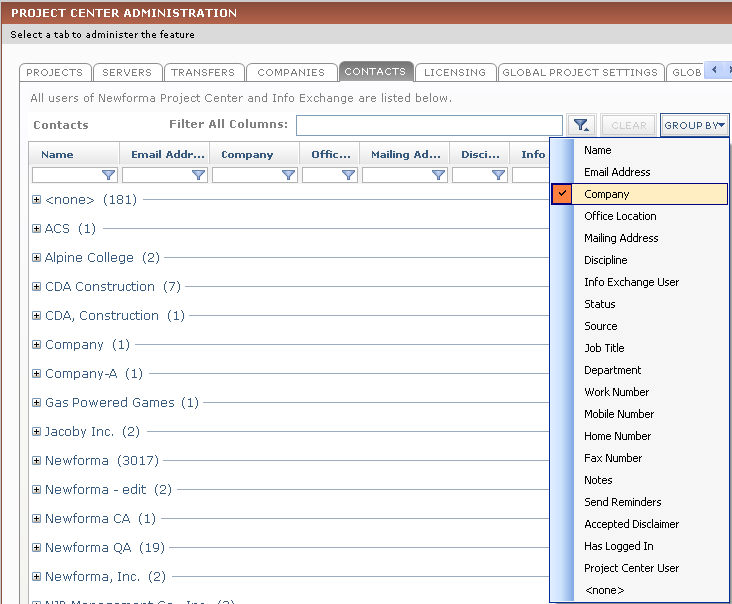
● In this example, the list of Project Center contacts is grouped by the companies they work for. To do this, select Company from the Group By list, as shown in the following image. The list shows the names of all the companies that the contacts work for. The contacts working for each company are listed under each company name. Simply expand the company name by clicking the  icon to view the list of contacts working there.
You can right-click on any group in the list and open a list of menu items, as shown in the next example. In this case you could expand a single group, collapse all groups but the selected one, expand all groups, or collapse all groups.
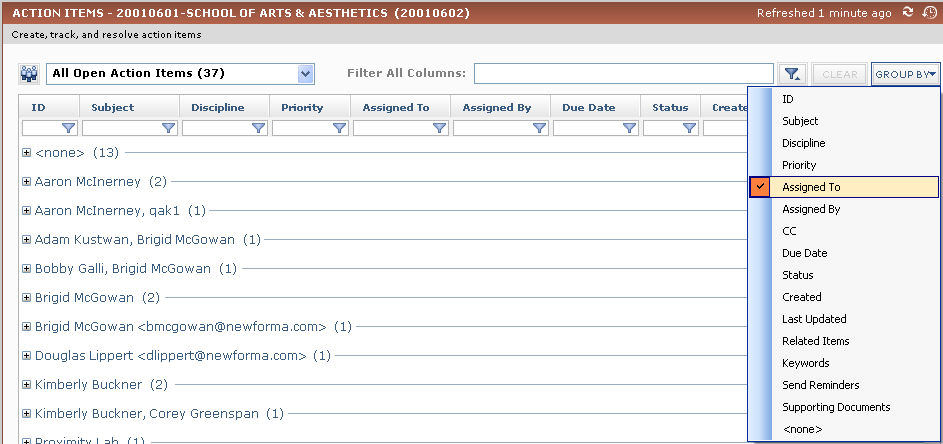
● In this example, action items are grouped by who they are assigned to. The list shows the names of all assignees, and the action items assigned to each assignee are listed under each action item. Simply expand the assignee's name to view the list of action items.
Report templates
You can add filtering, sorting, and grouping fields to report templates. To filter, sort, or group, you must add a tab called Query Definition to your Excel template, and then add the <group>, <sort query table>, and <filter query table> fields. You can group by one field, but can filter and sort by multiple fields. You can apply these features to any activity center that uses custom reports. The following example shows grouping, filtering, and sorting added to the new Query Defintion tab:
Table of Contents
Index
Search (English only)
Back