

Export a Project from Revit to the Newforma Model Viewer
Perform the following steps to export a project from Revit to the Newforma Model Viewer Powered by VEO.
The following steps of the process are covered:
● Create a project in the Newforma Model Viewer
● Export the project from Revit to the Newforma Model Viewer project
● Set up the project in the Newforma Model Viewer
● Create Tags/Styles for the project
● Create standard linked views for the project
To create a project in the Newforma Model Viewer
1. Launch the Newforma Model Viewer and login using your Newforma ID credentials.
If you do not have the Newforma Model Viewer installed, please refer to Newforma Model Viewer Setup and Workflow.
If you do not have a Newforma ID, please refer to the Create a Newforma ID section of Newforma Model Viewer Setup and Workflow.
2. Select
File > New Project to open
the New Project dialog box, shown
here:

3. Enter a name for the project and click OK. The project is created and loads in the viewer.
4. Select File > Save Project to open the Save Changes dialog box. Click Save to save the project. You can now export a project from Revit to the placeholder project in the Newforma Model Viewer.
To export a project from Revit to the Newforma Model Viewer
1. If you
are not already there, launch Revit and select the VEO
tab, shown here, in the menu bar:

2. Click Export Now to open the VEO Exporter, which automatically creates model streams for each Revit file included in the current project.
For the model streams to be created automatically, you must be logged into the Newforma Model Viewer with the project you wish to publish to as the active project.
3. The model
streams appear in the VEO Exporter: Export
Now Confirmation dialog box, shown below:

Each Revit file requires its own model stream in the Newforma Model Viewer. This allows you to easily turn on or off a linked file, as discussed here.
If you are not already logged into VEO, the VEO Login dialog box appears. Enter your Newforma ID user name, account and password and click Login to continue.
4. Click Export Now to export the project to the Newforma Model Viewer.
The first time you export a project, the VEO Exporter publishes all selected project content. Future exports will only publish items that have changed since the last export.
Save the Revit file after the export to save the ID of the VEO project it exported to. This information will be used the next time you export the project.
For information on customizing export settings, please refer to Customize the Project Export from Revit to the Newforma Model Viewer.
To set up the project in the Newforma Model Viewer
f you used Export Now as explained above, steps 1-3 may already be complete.
1. Launch the Newforma Model Viewer and login using your Newforma ID credentials.
2. Select
File > Load Project to open
the Load VEO Project dialog box,
shown here:
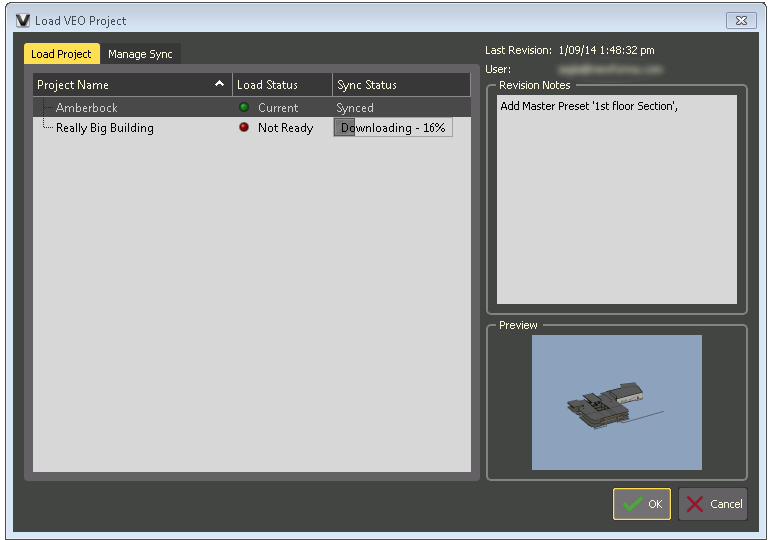
3. Select the project you want to load. Click OK to load the project in the viewer.
4. Click
File > Project Structure to
open the Project Structure dialog
box, shown here:

5. Select
the project in the left panel and click the ![]() icon
to add model streams to the project.
icon
to add model streams to the project.
6. In the
Add Model Stream(s) dialog box,
shown here, select the model streams you want to add to your project and
click OK.

7. The model
streams appear under the project in the left panel of the Project
Structure dialog box, as shown here:

8. Click OK to return to the main viewer window.
To create Tags/Styles for the project
Tags are used to group together common elements that you want to be able to select as a group. For example, exported design projects include many objects that do not need to display (i.e., Analytic Planes). You can create tags to group these objects, then hide them to clean up the project view. You can create and apply styles to tags to apply different looks to objects in the model.
1. From the Newforma Model Viewer View menu, open the following panels and dock them by dragging them to the right side of the viewer:
● Master Presets
● Styling
● Tags and Objects
● Camera Settings
● Model Visibility
● Toggle Fullscreen
2. Click
on the Tags tab in the
Tabs and Objects panel, shown below, and click Add.
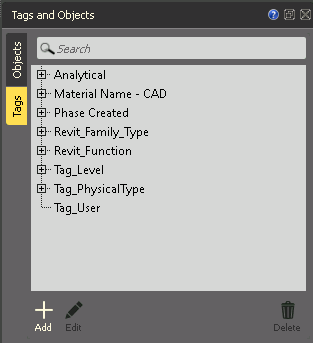
If you created a tag placeholder as part of the project creation process in the Newforma Model Viewer as described above, you can also select the tag and click Edit, then follow the steps below to further define the tag.
3. In the VEO dialog box, shown below, click the Dynamic tab.
4. Enter
the value for the tags you want to hide in the Existing
Tags search field.

5. Expand the tree in the Existing Tags section as needed to locate the tag(s) you want to hide.
6. Select a tag and click the top arrow to include it in the Include Objects that are Members of ANY of the Following Tags field in the Dynamic Tag section of the dialog box. Any objects listed here will be included in the new dynamic tag.
7. Continue adding existing tags to the new dynamic tag as needed.
8. Enter a name (i.e., Hidden) for the new dynamic tag in the Dynamic Tag section of the dialog box.
9. Select a Category for the tag.
10. Select ANY from the drop-down list under the Category field. A list of all the object tag values that will be hidden appears in the Includes Objects that are Members of ANY of the Following Tags field.
11. Click OK to save the new dynamic tag.
12. Select the tag in the list and press F8 to toggle visibility of the objects included in the tag.
13. Click
File > Save Project to open
the Save Changes dialog box, shown
here. Click Save to save the project.

To assign Styles to Tags
Tags can also be used to group like elements together (i.e., all glass in a building) so that you can assign a style to them.
1. On the Tags tab of the Tags and Objects tab, click Add to open the VEO dialog box, shown below.
2. Click the Dynamic tab.
3. Expand the tree in the Existing Tags section of the dialog box to locate the tags you want to include.
4. Select
the tags and click the top arrow to include
them in the Include Objects that are
Members of ANY of the Following Tags field in the Dynamic
Tag section of the dialog box. Any objects listed here will be
included in the new dynamic tag.

You can use standard Windows Shift and Ctrl selection techniques to select multiple tags.
5. Enter a name (i.e., All Glass) for the new dynamic tag in the Dynamic Tag section of the dialog box.
6. Select a Category for the tag.
7. Select ANY from the drop-down list under the Name field.
8. Click OK to save the new dynamic tag.
9. If it is not already selected, select the newly created dynamic tag on the Tags tab.
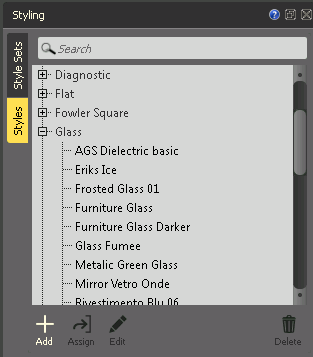
10. Select the Styling panel, shown below, and select the Styles tab.
11. Expand
the desired style to view all available styles of that type, as shown
here:
12. Select
the style you want to assign to the dynamic tag and click Assign.
The New Style Set dialog box,
shown below, appears:

13. Enter a new name for the style set and click OK.
14. All elements included in the dynamic tag have the style applied.
15. Click File > Save Project to open the Save Changes dialog box. Click Save to save the project.
To create standard linked views for the project
You can save views you want to reuse as master presets within the Newforma Model Viewer.
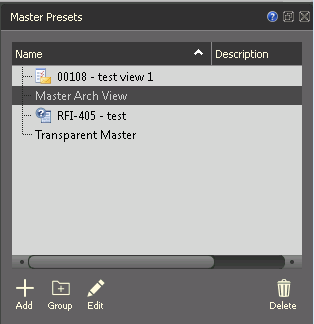
1. Select
the Master Presets panel, shown
here:
2. If you
are creating multiple master presets, you can create a master preset group
to better organize them. Click
Group in the Master Presets panel
to open the New Master Preset Group dialog
box, shown here:

3. Enter a name for the group and click OK.
4. To create a new master preset in the group, select the group in the Master Presets panel.
5. Click
Add in the Master
Presets panel to open the Master
Preset Editor dialog box, shown here:
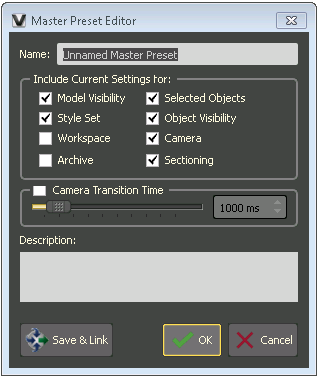
6. Enter a name for the master preset.
7. Select the checkboxes for the settings you wish to include from the current view.
It is recommended that you do NOT include current settings for Workspace.
8. Enter any additional information in the Description field as needed and click OK to save the master preset.
9. Click File > Save Project to open the Save Changes dialog box. Click Save to save the project.