

Newforma Model Viewer
Use the Newforma Model Viewer to view model and linked views associated with project items. In addition to viewing model views, Project Center users can create new model views and link them to project items.
Use the Newforma Model Viewer to do the following:
● View building model views associated with project items
● Use master presets to view the model in different ways
● Create master presets to save your view preferences
● Create new model views and link them to project items
Getting Started
Before you can access model views, you must first install the Newforma Model Viewer. If you have not already installed the viewer, please refer to the Newforma Model Viewer Setup and Workflow topic for installation instructions.
Once you have the model viewer installed, access it by clicking on the
![]() icon associated with your project item.
icon associated with your project item.
Menus
The menus at the top of the Newforma Model Viewer (File, Edit, View, Object, Archive, Help) contain a number of tasks. While there are many tasks available,there are several tasks which are especially relevant to the process of working with model views associated with project items. For example:
● File
-
Load Project. The Load Project option opens the Load VEO Project dialog box, where you can check on which projects are available to you for viewing, as well as the current status of the project load. You can also manage which projects sync and in what order. A project must be loaded before you can view it.
-
Save Project. If you have made changes to the project - for example, created a new master preset - you can save the changes using the Save Project command.
-
Project History. The Project History option lets you jump to a specific date to view a project revision. This is useful if you need to see a revision that is not the original or the latest revision. The border color changes and displays the information for which historical version is being viewed.
-
Project Updates. If you are not viewing the current version of the project, the Project Updates icon in the notification tray turns white. Select File > Project Updates to view the update details and update to the latest revision.
● Edit. Includes the Undo and Redo commands.
● View. Allows you to toggle on/off the visibility of Newforma Model Viewer panels. Panels that are relevant to working with project items include: Master Presets, Tags and Objects, Styling, Measurement and Camera Settings.
● Object. Provides a number of commands to help you select objects in the model view. The Show/Hide options help you to control which elements are visible in the model view.
● Settings
drop-down menu. Clicking the ![]() icon in the
upper-right corner of the Newforma Model Viewer window provides access
to several user-specific options. Most important is the Settings
option, which lets you select measurement display units (meters or feet
and inches) for the viewer as well as customize
the mouse and keyboard settings used for navigation.
icon in the
upper-right corner of the Newforma Model Viewer window provides access
to several user-specific options. Most important is the Settings
option, which lets you select measurement display units (meters or feet
and inches) for the viewer as well as customize
the mouse and keyboard settings used for navigation.
Notification Tray
The notification tray in the lower-left corner of the Newforma Model Viewer window provides quick access to a number of project item statuses. Icons turn white when active or when an update is available. You can right click on any icon for additional options. Notification tray icons include:
● ![]() Online status.
Indicates whether you are working online or offline.
Online status.
Indicates whether you are working online or offline.
●  Upload/Download
arrows. Indicate if you have unsaved changes and if you are viewing
the latest model.
Upload/Download
arrows. Indicate if you have unsaved changes and if you are viewing
the latest model.
-
If you are viewing the latest version of the project, the arrows are black.
-
If changes are downloading, the left arrow (pointing down) turns white and an item count appears below the arrow.
-
If changes are uploading, the right arrow (pointing up) turns white and an item count appears below the arrow.
-
If no changes are uploading or downloading, the arrows are black.
● ![]() Project
Updates. Indicates when an update such as a new master preset is
available and provides access to the Project
Updates panel. If you are not viewing the latest version of the
project, the icon is green.
Project
Updates. Indicates when an update such as a new master preset is
available and provides access to the Project
Updates panel. If you are not viewing the latest version of the
project, the icon is green.
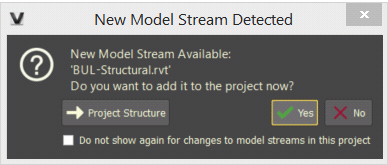
● ![]() Model
Streams. Indicates when model stream updates are available and
provides access to the Project Structure
dialog box. In addition, a message box indicating that a new model stream
has been detected appears and allows you to immediately add it to the
project if desired, as shown below:
Model
Streams. Indicates when model stream updates are available and
provides access to the Project Structure
dialog box. In addition, a message box indicating that a new model stream
has been detected appears and allows you to immediately add it to the
project if desired, as shown below:
● ![]() Sectioning.
Indicates whether or not sectioning mode is active. Click to toggle sectioning
mode on and off.
Sectioning.
Indicates whether or not sectioning mode is active. Click to toggle sectioning
mode on and off.
● ![]() Measuring.
Indicates whether or not measuring mode is active. Click to toggle measuring
mode on and off.
Measuring.
Indicates whether or not measuring mode is active. Click to toggle measuring
mode on and off.
● ![]() First
Person mode. Indicates whether or not first person mode is active.
Click to toggle first person mode on and off.
First
Person mode. Indicates whether or not first person mode is active.
Click to toggle first person mode on and off.
● ![]() Isolation
mode. Indicates whether or not isolation mode is active. Click
to toggle isolation mode on and off.
Isolation
mode. Indicates whether or not isolation mode is active. Click
to toggle isolation mode on and off.
● ![]() Camera
Focal Length. The current camera focal length is displayed below
the icon.
Camera
Focal Length. The current camera focal length is displayed below
the icon.
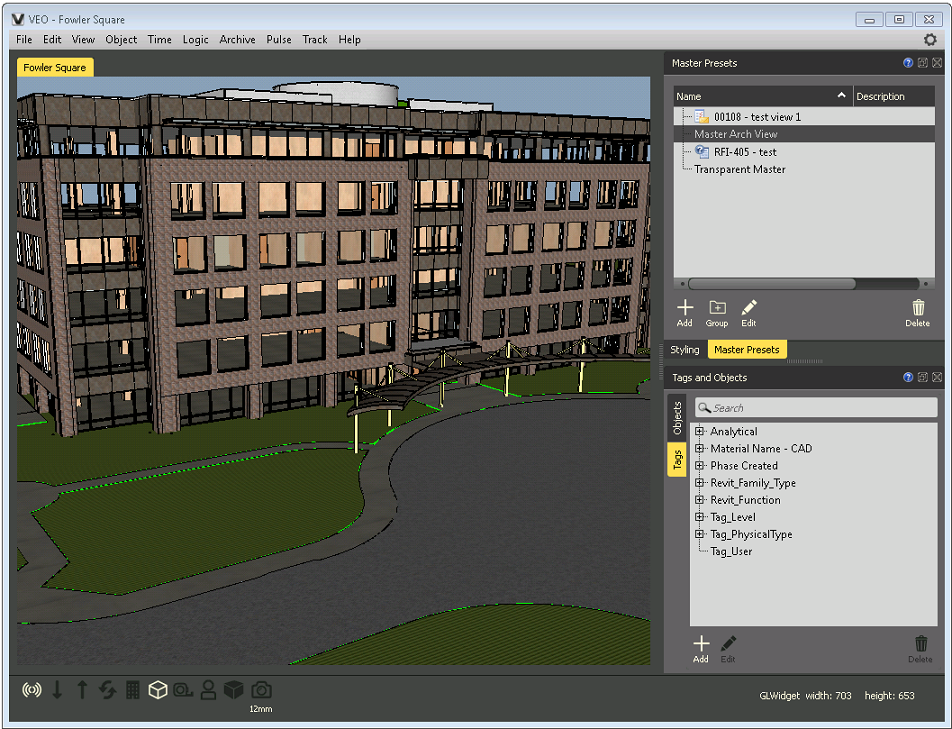
Main panel
The model view appears in the main panel. An example is shown below. Use your navigation commands to manipulate the view.
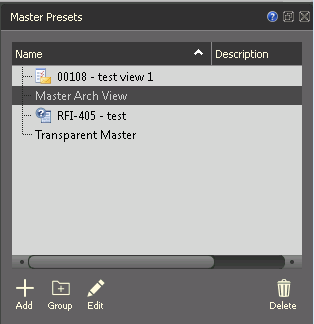
Master Presets
The Master Presets panel (as shown below) lists the master presets currently available for the project. Master presets represent specific model views for the project. The master preset for the model view you selected is highlighted in the list.
● You can select another master preset to view by selecting it in the master preset list.
● You can create
your own master presets by clicking Add
to access the Master Preset Editor dialog
box.
Tags and Objects
The Tags and Objects panel (as shown below) lists the tags and objects that are included in the model view. You can create dynamic tags to group objects together for easier viewing and image manipulation.
The available tags are selected when the project is exported from Revit.
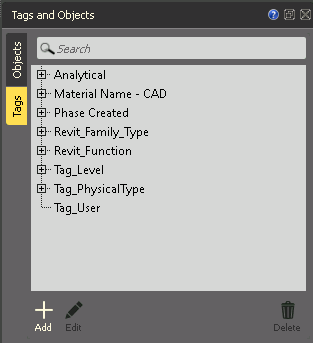
Tags tab
● Lists all available tags and dynamic tags for the model view. Click on any tag to select its associated objects in the model view.
Objects tab
● List all objects included in the model view. Click on any object to select it in the model view.
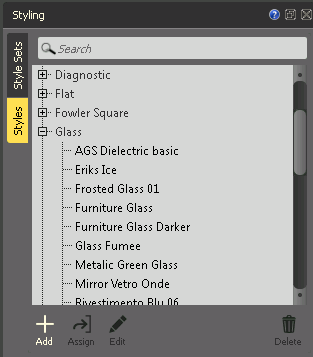
Styling
The Styling panel (as shown below) includes tabs for Styles and Style Sets that are relevant for working with project items. Styles are materials that can be assigned to tags and objects to better reflect the materials used in a project. For example, all glass objects can be assigned a transparent glass style. Style Sets group various style assignments together.
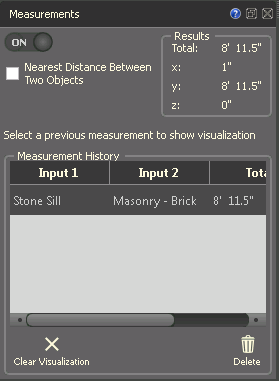
Measurements
The Measurements panel (as shown below) allows you to measure the distance of objects in the model view. Clicking two points on the model view measures the distance between them. The distance appears in the Measurements panel for the duration of your viewer session. You can click on any measurement to jump to it in the viewer.
To access the Newforma Model Viewer
Click on the ![]() icon from any of the following locations:
icon from any of the following locations:
● The Model Views log
● The Related Items popup window
● The Related Items tab
Alternately you can click the  button from any page on which it appears to view a model or linked view.
Additional Resources
● For additional information on using the Newforma Model Viewer, please see Use the Newforma Model Viewer.
● For information on setting up the Newforma Model Viewer, please see Set Up the Newforma Model Viewer.
● Additional information is also available in Newforma Model Viewer - Your First Day_v1 8.pdf.