


Receive Personal Email Messages Outside of a Project (Workflow)
Perform the following steps to receive personal email messages with attachments via Info Exchange that are not related to any Project Center project. This is beneficial when you want to receive an email message with large attachments using Microsoft Outlook that is not related to any particular project.
To send email personal email messages with attachments via Info Exchange that are not related to any Project Center project, see Send Personal Email Messages Outside of a Project (Workflow).
Be aware that Project Center administrators can access and see all "personal" email messages that are received independent of any projects.
Project Center administrator
1. To enable this feature, a Project Center administrator needs to open the Project Center Administration Activity Center Licensing tab.
2. Select the users you want to grant access to this feature and click Modify User from the Tasks panel to open the Modify User dialog box.
3. Mark
the Allow Personal Transfers from Outlook
and the Provide an Upload File Link
checkboxes in the Modify User dialog
box for every user who will use this feature, as shown here:

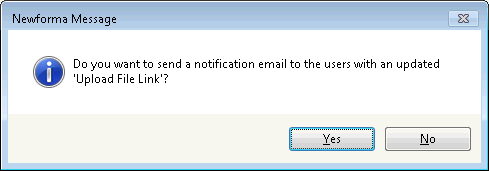
4. Click
Yes when the following message
appears to send a notification containing the upload file link URLs to
the selected users:
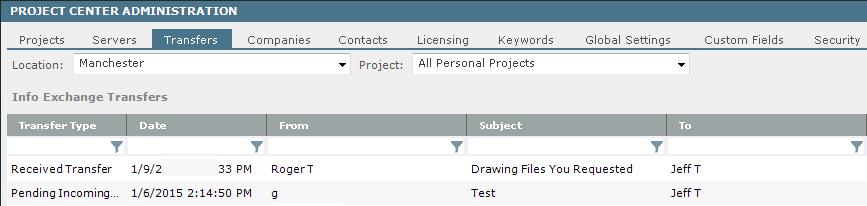
5. Project
Center administrators can view all incoming and outgoing transfers by
opening the Project
Center Administration Activity Center Transfers tab and selecting
All Personal Transfers from the
Project drop-down list:
Sender (this is the URL message recipient and the person who will receive the file transfer)
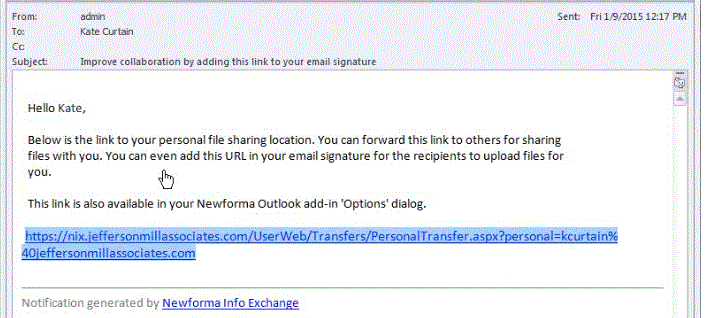
1. When
you receive the email message containing the URL to your personal file
sharing location, you can either highlight the link and copy and paste
it manually to an email message each time you want to use it, or you can
add it to your email signature to use it all the time. To add it
to your email signature, copy it, close the message, and continue with
the following steps.
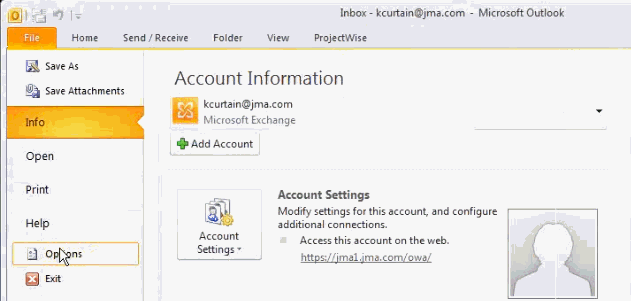
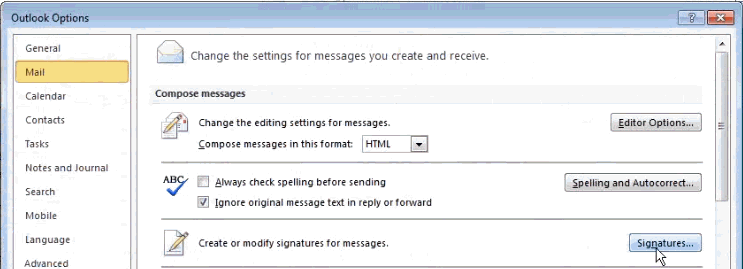
2. In Outlook,
click the File tab, and then click
Options:
3. In the
Outlook Option dialog box, click Mail,
and then Signatures:
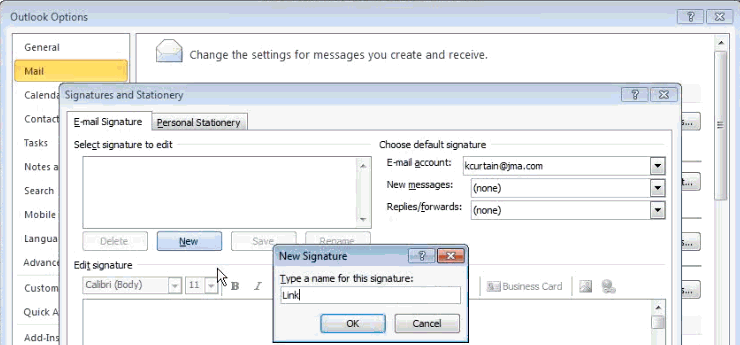
4. In the
Signatures and Stationery dialog box,
click the E-mail Signature tab,
and then click New to open the
New Signature dialog box. Enter
a name for the URL (we're calling it Link
in this example) and click OK:
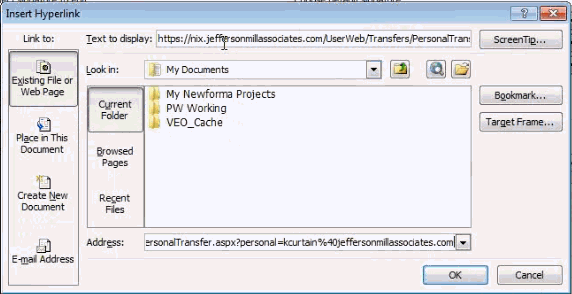
5. Back
in the Stationery dialog box shown
above, select the name of the URL from the Select
Signature to Edit list, click the link icon
to open the Insert Hyperlink dialog box
as shown here, click the Existing File
or Web Page option, and paste the URL in the Address
field:
icon
to open the Insert Hyperlink dialog box
as shown here, click the Existing File
or Web Page option, and paste the URL in the Address
field:
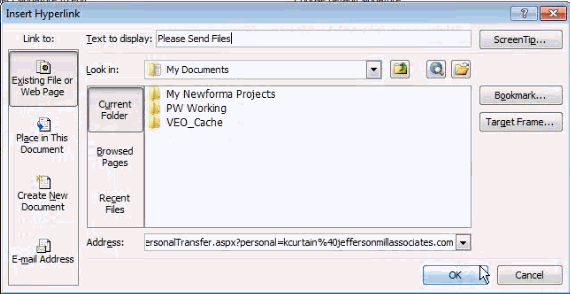
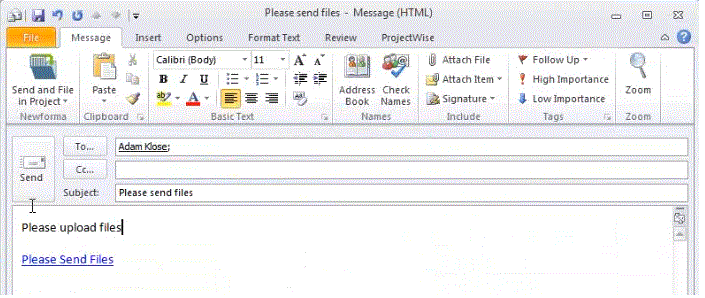
6. In the
Text to Display field, enter the
text as you want it to appear in the signature of your email messages
(in this example it's Please Send Files)
and click OK:
7. Close the remaining dialog boxes.
8. When
you open a new regular email message, the link will appear in your signature,
as shown here.
9. Compose your email message and send it to your recipients. The recipients can click the link to transfer large files back to you.
Recipient (this is the person who receives the file transfer request and the will transfer the files)
1. When the recipient of the email message opens the email message and clicks the link, Info Exchange will open with the following message:
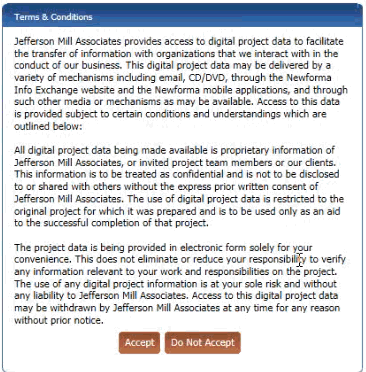
2. Click
Accept to open the Send
a File Transfer page in Info Exchange:
The recipient will not have access to anything else in Info Exchange.
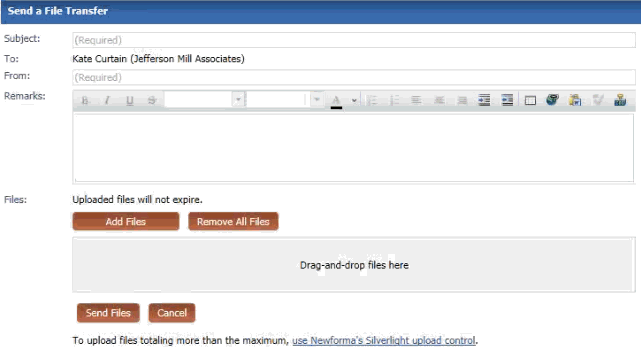
3. The sender's email address will automatically be populated in the To field. Fill in the page as necessary, click Add Files to select the files you want to transfer back to the sender, and then click Send Files to transfer the files back to the sender. You can close the browser.
Sender (recipient of the files)
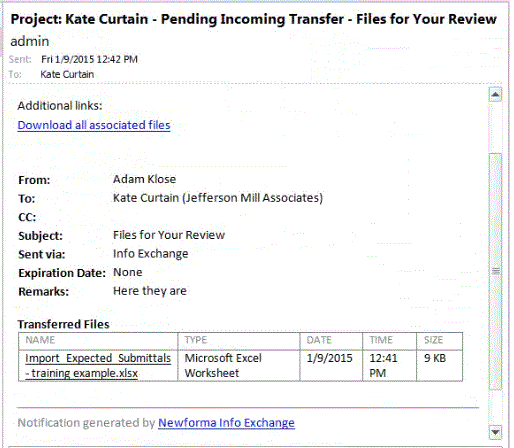
1. In Outlook,
open the email message and click the Download
All Associated Files link, as shown here (the files are listed
at the bottom):
2. Optional:
You can also see a list of all of your personal transfers by clicking
File Transfers > View Personal Transfers
from the legacy Outlook Add-in, which opens the View
Personal Transfers dialog box:
3. Right-click on the pending transfer and select Download Files.
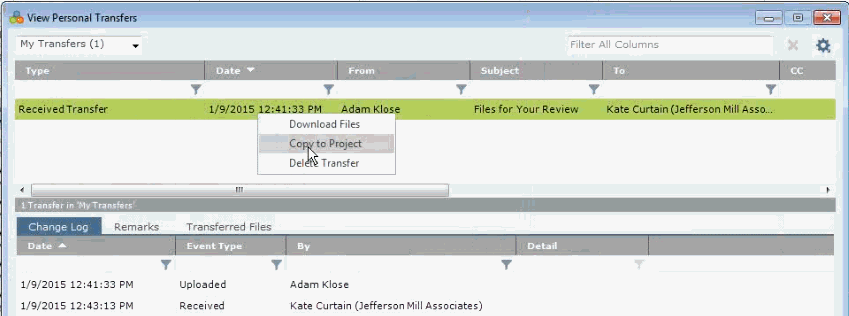
4. You can
also use this dialog box to transfer the downloaded files to a Project
Center project by right-clicking on the received transfer and selecting
Copy to Project:
5. Select
the project from the Select
Project dialog box. The file transfer will then appear in the Info
Exchange Activity Center for the selected project.
Any users
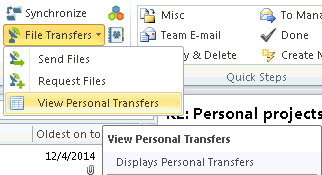
1. To see
a list of all of your personal transfers, go back to Outlook and click
File Transfers > View Personal Transfers
from the Outlook Add-in:
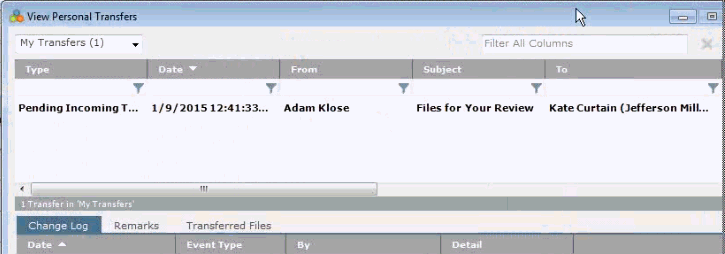
2. The View
Personal Transfers dialog box opens. Use it to view your personal
transfers, as well as to right-click on transfers to perform different
actions, as shown here:
Additional information
● No record copies are created for personal transfers.
● You cannot request a resend of a personal transfer.
● Personal transfers do not appear in any project lists.
Table of Contents
Index
Search (English only)
Back