Perform the following steps to compare a project file accessed from the Project Document Sets activity center to another file.
For information on how Compare handles external references, see How the Compare Feature Handles External References (XREFs).
1. If you are not already there, open the Project Document Sets activity center by clicking Document Sets from the Project Home activity center or the Activities list.
2. From the list of document sets, select the document set containing the file you want to use as the baseline for the comparison.
3. Click the Contents tab, then click the file you want to use as the baseline for the comparison to open the File Tasks panel.
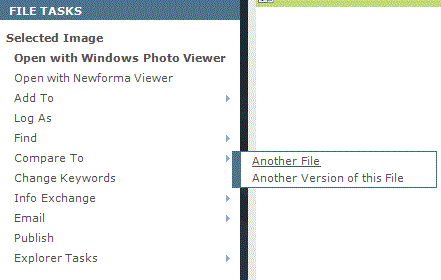
4. From the File Tasks panel, click Compare to > Another File, as shown below, to open the Select a File dialog box.
You can also select Another Version of This File to compare the file to another version of the file.
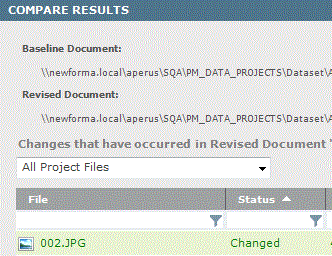
5. Select the file to compare to, then click Open. The Compare Results window opens, which shows any differences in the revised file, such as size and date differences compared to the original file. The name of the baseline and revised files appears at the top, as shown here.
6. Optional:
Click Compare with Newforma Viewer from the Tasks panel to open and compare the files in the Newforma Viewer.
You can also double-click the file to open and compare the files in the Newforma Viewer.
Click Batch Print or Create PDF to open the Batch Print of Compare Results dialog box to batch print or create PDFs of baseline and revised files compared in this activity center.
Click Show XREF Change Details to open the External Reference Details dialog box to display external references in the revised file that have been added, removed, changed, and unchanged compared to the baseline.
Click Swap Baseline and Revised Selections to switch the baseline and revised files.
Click Create a Report to open the Create a Report dialog box to select the type of comparison report to create.