


Transfer Files Between Connected Companies
Using Newforma to Newforma (N2N), you can transfer files between connected companies. N2N automates the file transfer process, completely eliminating the need for recipients to login and download file transfers from the sender’s Info Exchange Server. Instead, incoming file transfers from connected companies are automatically downloaded by the recipient’s Project Center Server directly into the recipient’s incoming Info Exchange Activity Center.
Before you can transfer files between companies, you must Connect Companies and Projects Using Newforma to Newforma.
To initiate a connected file transfer
Sending a connected file transfer is just like sending any other file transfer in Project Center via Info Exchange. Use the steps in the following example as a guideline on transferring files to a connected company's project.
1. If you are not already there, open the Info Exchange activity center by clicking Info Exchange from the Project Home activity center or from the Activities list.
2. Click Create File Transfer from the Tasks panel to open the Transfer Files to Info Exchange dialog box, as shown here
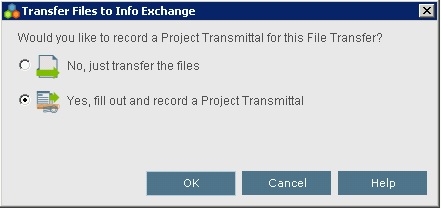
3. Select the second option (Yes...)
4. In the Transfer Files and Create an Outgoing Transmittal dialog box (shown below), click To to open the Choose a Project Team Member dialog box to choose the project team members you want to transfer files to, then click OK.
Make sure you select team members who are members of the connected company, as connected company team members are listed the same as local team members. Look for the name of the connected company under the Company column to find its team members.
If both connected companies are running Project Center 11.5 or higher, the sender does not need to be on the recipient's project team for the recipient to receive a transfer.
5. Fill in the rest of the dialog box as necessary.
6. Select the Associated Files tab.
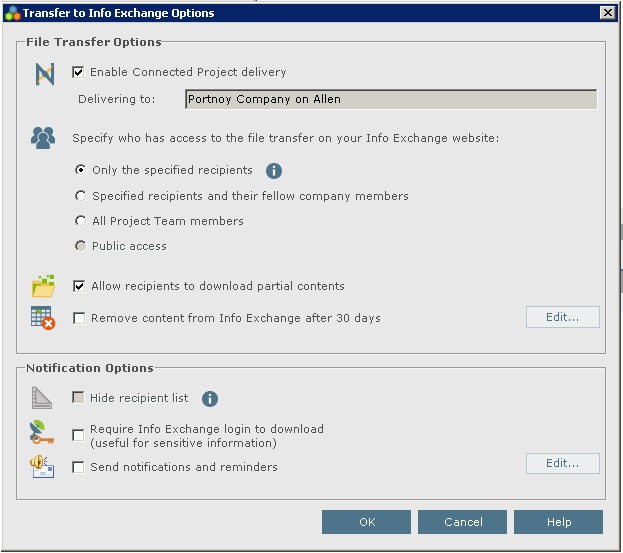
7. Click Create and Transfer to open the Transfer to Info Exchange Options dialog box (as shown below) to set access rights and reminders for the file transfer. If one or more recipients are team members of the connected project, the Enable Connected Project Delivery option will be enabled.
8. Click OK to upload the files to your Info Exchange Server and create a transmittal. The file transfer will appear in the All Outgoing log of the Info Exchange activity center and will be accessible through the Info Exchange website, and the transmittal will appear in the All Sent log of the Project Transmittals activity center.
After the file is uploaded, the recipient's Info Exchange Server automatically downloads the file transfer into the recipient's Info Exchange Activity Center.
9. The recipients at the connected company receive an email notification, just like any other file transfer. They can click the links in the email message, depending on what they want to do:

10. After clicking the link (in this example, the first link is clicked), the file transfer is listed in the recipient's Info Exchange Activity Center. The files have automatically been downloaded, so all the recipient has to do is click Acknowledge Receipt from the Tasks panel to notify the sender that the file transfer was received. The following dialog box opens, giving the recipient other actions that can be performed.
If files are deleted from a Shared Folder that has been connected using Newforma to Newforma, the files will also be deleted from the incoming Shared Folder on the connected company's network the next time the folder in synchronized.
Table of Contents
Index
Search (English only)
Back